
How to Make Ice Cream at Home for Creamy Results Every Time
Making your own ice cream at home is one of those simple pleasures that feels like magic. It really boils down to three key stages: mixing your base, chilling it down completely, and then churning it into a frozen, creamy dessert.
Whether you're using an electric maker for that classic, dense texture or trying a simple no-churn recipe, the secret is always the same: keep everything cold and freeze it right. This is what guarantees that perfectly smooth, scoopable result we're all after.
The Simple Joy of Making Ice Cream at Home
There's a special kind of satisfaction that comes from scooping ice cream you made yourself, a feeling you just can't get from a store-bought pint. This guide is for anyone who loves the idea of choosing their own ingredients and creating flavors from scratch. We'll show you why making ice cream at home is more than just a recipe—it’s about taking control, kicking artificial additives to the curb, and making something truly special.
Thanks to modern tools like a reliable electric ice cream maker, the whole process is surprisingly straightforward. You can turn your kitchen into a personal creamery without any fuss. From rich, classic custards to no-churn recipes that take just minutes to prep, we’ll help you find a method that works for you.
Why Make It Yourself?
The shift toward homemade food is about more than just taste—it's a worldwide trend. The global ice cream market, valued at USD 70.920 billion in 2025, is expected to reach USD 93.126 billion by 2030. A huge part of that growth comes from people just like us, wanting natural, high-quality flavors. Plus, making it yourself can save a family 30-50% compared to what you'd spend on premium pints. You can read more about the booming ice cream market and its trends.
Beyond the cost savings, there are some pretty great perks to churning your own:
- Total Flavor Control: Want an intense vanilla bean flavor? Feel like swirling in chunks of your favorite dark chocolate or fresh strawberries from the garden? You're the boss.
- Ingredient Transparency: Forget trying to decipher long labels full of stabilizers and preservatives. When you make it, you know exactly what’s in every spoonful—just simple, good stuff.
- Unbeatable Freshness: Nothing compares to the taste and texture of freshly churned ice cream. It's softer, the flavors are brighter, and it hasn't been sitting in a deep freeze for weeks.
The real magic of homemade ice cream is turning simple, quality ingredients—cream, sugar, vanilla—into a scoop of pure happiness. It’s a creative process that ends with a delicious reward.
Let's get started. You're about to see just how rewarding it is to craft frozen treats that are all your own.
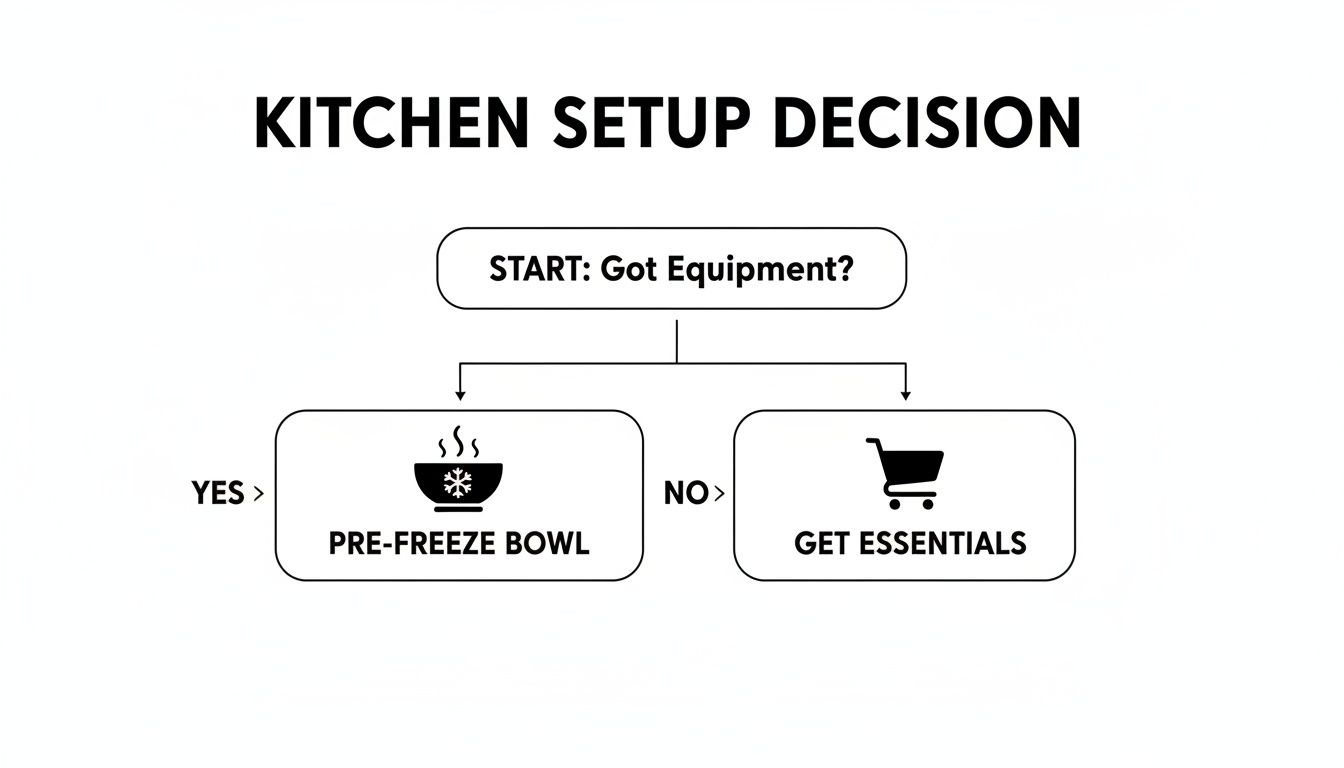
Setting Up Your Kitchen for Ice Cream Success
Before you even think about whisking cream and sugar together, let's talk about setting up your workspace. A little prep goes a long way and is the secret ingredient to avoiding a soupy, disappointing mess. Getting your kitchen in order first is what separates the pros from the novices.
A few key tools can make all the difference. You don't need a professional kitchen, but having the right basics on hand will guarantee much smoother results.
- A good, heavy-bottomed saucepan is your best friend for custard bases, as it heats everything evenly without scorching the bottom.
- Your electric maker's freezer bowl needs to be truly frozen. I always recommend a full 48 hours in the coldest part of your freezer to lock in that chill.
- Never underestimate a good rubber spatula! It’ll help you get every last drop of that precious ice cream base out of the bowl.
- A shallow, airtight container is crucial for storage. It minimizes ice crystals and keeps your creation tasting fresh.
Essential Equipment For Machine-Made Ice Cream
If you're using an electric churner, a properly frozen bowl is non-negotiable. For the science to work, the inside of that bowl needs to be at least -20°C. Anything warmer, and you’ll be fighting a losing battle against ice crystals.
| Tool | Why It Matters |
|---|---|
| Pre-freeze Bowl | The key to preventing ice crystals and achieving a creamy texture. |
| Shallow Airtight Container | Your best defense against dreaded freezer burn. |
| Digital Thermometer | A must-have for custard bases to ensure eggs reach a safe 85°C. |
I've learned the hard way that scraping a thick, cooling custard out of a saucepan with a flimsy spatula is a frustrating experience. A flexible but firm scraper will become your most-used utensil, trust me.
When your tools are chilled and everything is organized, the whole process just flows. You'll find your rhythm and end up with a consistently perfect texture every time.
Setting Up A Simple Workstation
Think like a chef for a minute. They call it mise en place—everything in its place.
First, clear and clean your countertop. You want plenty of room to work without knocking things over, with all your ingredients and utensils within easy reach.
Next, take a few minutes to chill your mixing bowls, spoons, and even measuring cups in the fridge. Every little bit helps keep that base cold from start to finish. It might seem like overkill, but it makes a real difference.
Finally, lay out your equipment in the order you'll need it. This little bit of organization keeps the process moving and prevents you from scrambling to find a whisk while your custard is on the stove. This is a small habit that pays off in big ways when you're learning how to make ice cream at home.
If you're looking for an easy and fun way to get the whole family involved, our 1.2-quart electric ice cream maker for families is a fantastic place to start.
And hey, while you're mastering ice cream, why not enhance your general chef skills? The confidence you gain will spill over into everything you cook.
Pro Tip: Lay out every single ingredient and tool before you start. It’s a simple trick that keeps you focused and prevents costly mistakes once things get moving.
Cleaning And Storage
Once the churning is done, clean your tools right away. Warm, soapy water is all you need for the bowl, paddle, and lid. Dried-on ice cream base is a pain to scrub off later. Most importantly, make sure the freezer bowl is completely dry before it goes back into the freezer.
Proper storage keeps your tools in great shape. I like to keep spare parts like paddles in a labeled bag so they don't get lost. A freezer thermometer is also a cheap and invaluable tool to make sure your freezer is cold enough for the next batch.
When you store your finished ice cream, always label the container with the flavor and the date. This helps you rotate your stock and ensures you're always eating it at its peak. After all your hard work, you want every scoop to be as delicious as the first.
Choosing Your Homemade Ice Cream Method
Deciding on your approach shapes the entire ice cream adventure. It’s all about what tools you own, the hours you can carve out, and the scoopable texture you’re after. From feather-light sorbet to ultra-rich custard, there’s a style calling your name.
Before diving into recipes, let’s compare the three core methods side by side. This snapshot will help you pick the perfect route for your kitchen setup.
Comparing Homemade Ice Cream Methods
Here’s a quick-glance comparison of the three main methods to help you decide which approach is right for you based on time, equipment, and desired texture.
| Method | Equipment Needed | Time Commitment | Typical Texture | Best For |
|---|---|---|---|---|
| Electric Churner (Philadelphia) | Electric ice cream maker, freezer bowl | 4–12 hours (chill + churn) | Light & airy | Simple flavors, weeknight treats |
| French Custard | Stovetop, whisk, electric churner | 6–24 hours (cook + chill + churn) | Dense & velvety | Decadent, custard-rich scoops |
| No-Churn | Bowl, mixer (hand or stand), freezer-safe container | 2–3 hours (freeze) | Creamy but slightly firm | No-equipment households |
Use this table as a roadmap. Your choice will guide how you shop, prep, and plan your freezer space.
The Electric Churner Method Philadelphia Style
When speed meets simplicity, this method shines. Philly-style ice cream skips eggs, leaning on a blend of milk, cream, sugar, and your favorite flavorings.
A quality machine, like the Cooler Kitchen 1.2-quart model, is key. Its paddle scrapes frozen walls constantly, shaving ice crystals and folding in air for the ideal scoopable consistency.
• Base Ingredients: Milk, heavy cream, sugar, extracts or purees
• Chill Time: 4–12 hours (longer is smoother)
• Technique: Pour cold base into the pre-frozen bowl and churn until it thickens
“I turn to this quick method when cravings hit on a Wednesday night. A straight-up vanilla bean version tastes astonishingly bright without over-complication.”
A deep chill before churning makes all the difference. Aim for an overnight rest in the fridge to lock in that creamy mouthfeel.
The Custard Method French Style
If you crave a truly opulent scoop, the French-style custard is your match. Egg yolks, whisked with sugar, create a silky base that’s resistant to icy grit.
Key steps include:
• Whisking 4–6 egg yolks with sugar until pale
• Heating cream and milk to steaming without boiling
• Tempering yolks by slowly adding hot dairy, then cooking gently until the custard coats a spoon
Once it’s done, cool that custard completely—ideally overnight. The flavors deepen, and proteins settle into that signature velvety texture.
“Tempering looks daunting, but patience and a steady hand turn it into second nature. The end result? An indulgence worth every extra minute.”
The No-Churn Method For Ultimate Simplicity
No ice cream maker? No problem. This trick relies on whipped heavy cream and sweetened condensed milk to mimic traditional churning.
• Combine 1 can sweetened condensed milk with 2 cups whipped cream
• Fold gently to preserve air bubbles
• Add mix-ins—chocolate chips, fruit swirls, nuts—and freeze for at least 2–3 hours
A splash of vodka or liqueur (about a tablespoon) keeps the texture soft and prevents solid ice formation. The result is delightfully creamy, even if it lacks the density of churned custard.
“My kids love mixing in cookie crumbles and watching it set. It’s the perfect weekend project when the electric maker is tucked away.”
Ready to explore another frozen favorite? Check out our deep dive into gelato techniques in this article: Learn more about making gelato at home in our detailed article.
Choosing a method boils down to your schedule, gear, and taste. Sample each style—you’ll discover which one feels most at home in your freezer.
Starter Recipes for Your First Batch
Alright, enough theory—the real magic happens when you start churning. It's time to get your hands dirty with three of my go-to recipes. Think of these as your training wheels; they're reliable, delicious, and perfect for building your ice-cream-making confidence.
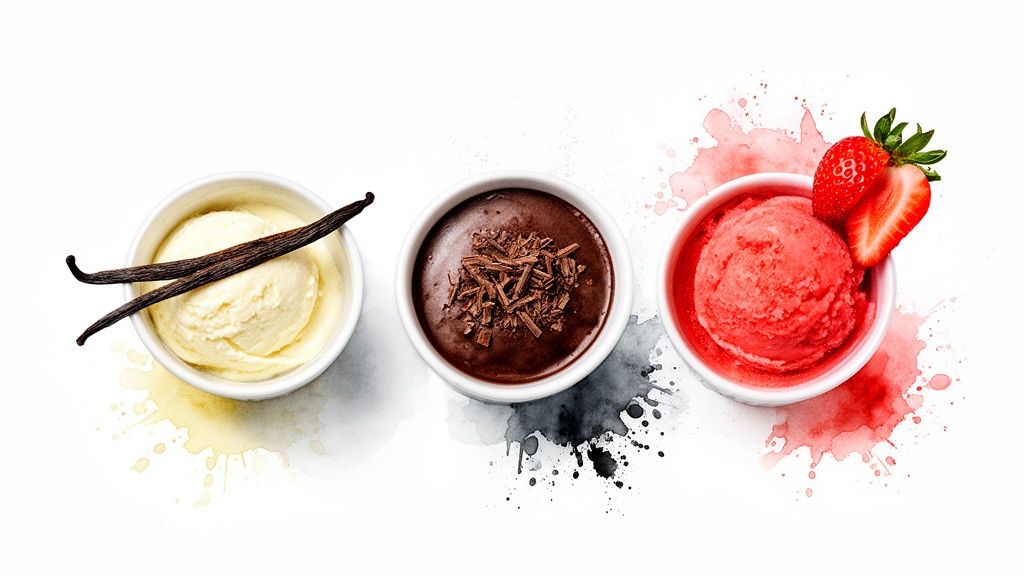
We'll start with a timeless classic: a rich, custard-style vanilla bean that is the absolute gold standard for creamy flavor. Then, we’ll move on to a deep, decadent chocolate that’s a dream to make in an electric churner. And finally, I’ll show you a vibrant strawberry sorbet that comes together in minutes, proving you don’t need dairy for a show-stopping frozen treat.
Classic Custard-Style Vanilla Bean
Mastering a custard base is like learning a fundamental kitchen skill. It opens up a whole universe of flavors, and its velvety, luxurious texture is just unbeatable. The key step is tempering the eggs, which sounds intimidating but is really just a simple technique to gently cook the yolks into the cream without scrambling them.
You'll Need:
- 2 cups heavy cream, chilled
- 1 cup whole milk
- ¾ cup granulated sugar, divided
- 5 large egg yolks
- 1 whole vanilla bean, split with seeds scraped (or 1 tbsp vanilla extract)
- ⅛ tsp fine sea salt
Let's Make It: First, get your dairy base going. In a saucepan, combine the cream, milk, ¼ cup of the sugar, salt, and both the vanilla bean pod and its scraped seeds. Warm this over medium heat until it’s steamy and fragrant, but don't let it boil.
While that’s heating, whisk the egg yolks with the remaining ½ cup of sugar in a separate bowl. Keep whisking until the mixture becomes pale and noticeably thicker.
Now for the tempering. Slowly ladle about a cup of the hot cream mixture into your egg yolks while whisking constantly. This gently raises the eggs' temperature. Pour this warmed-up egg mixture back into the saucepan with the rest of the cream.
Cook over low heat, stirring constantly with a spatula. You're looking for the custard to thicken just enough to coat the back of the spatula—this will happen around 170°F (77°C).
Strain the finished custard through a fine-mesh sieve into a clean bowl. If you're using vanilla extract instead of a bean, stir it in now. Press a piece of plastic wrap directly onto the surface to prevent a skin from forming and get it in the fridge. It needs to chill for at least 4 hours, but overnight is even better.
Once it's thoroughly cold, fish out the vanilla bean pod. Pour the custard into your pre-frozen electric ice cream maker and churn for about 20-25 minutes, or until it looks like thick soft-serve.
Finally, transfer your ice cream to an airtight container and let it harden in the freezer for at least 4 hours before scooping.
My Biggest Tip: Never, ever rush the chilling process. A truly cold base is the secret to a fast churn and an incredibly creamy texture with minimal ice crystals. It's the one step that separates good ice cream from great ice cream.
Decadent Chocolate Ice Cream
For the true chocoholics, this one's for you. It delivers a deep, satisfying flavor that’s rich but not cloying. Using Dutch-process cocoa powder gives it a smoother, less acidic profile that just melts on your tongue. Best of all, it's an eggless, Philadelphia-style recipe, which means it comes together much faster.
You'll Need:
- 2 cups heavy cream
- 1 cup whole milk
- ¾ cup granulated sugar
- ½ cup Dutch-process cocoa powder
- 1 tsp vanilla extract
- A pinch of fine sea salt
Let's Make It: Start by whisking the sugar, cocoa powder, and salt together in a bowl until all the lumps are gone.
Next, pour the cream and milk into a saucepan and add your dry mixture. Warm everything over medium heat, whisking until the sugar and cocoa are completely dissolved and the base is smooth and steamy. Again, no boiling!
Take it off the heat and stir in the vanilla extract. Pour the base into a container, cover it, and let it chill completely in the fridge for at least 4 hours (or overnight).
Pour the cold chocolate base into your ice cream maker’s frozen bowl and let it churn for 20-30 minutes. You're looking for that thick, soft-serve consistency.
Scrape the ice cream into a freezer-safe container, pop on a lid, and freeze for at least 4 hours until it's firm and scoopable.
5-Minute Strawberry Sorbet
This recipe is my secret weapon for when I need a fantastic dessert, fast. It proves that a stunning frozen treat can be incredibly simple. Because we’re starting with frozen fruit, you can whip this up anytime a craving hits. It also happens to be naturally dairy-free and vegan.
You'll Need:
- 1 lb (16 oz) frozen strawberries
- ¼ cup maple syrup or agave (adjust to your sweetness preference)
- 2 tbsp fresh lemon juice
- A pinch of salt
Let's Make It: This one is almost too easy. Just put the frozen strawberries, maple syrup, lemon juice, and salt into a high-powered blender or food processor.
Blend on high until the mixture is completely smooth and creamy. You might need to use the tamper to push the fruit down into the blades. Be patient—it'll get there!
You can serve it right away for a soft-serve style treat. If you prefer a firmer, scoopable sorbet, just transfer it to an airtight container and freeze for 1-2 hours.
The shift toward homemade sorbets and plant-based options isn't just a niche interest. The organic ice cream market was valued at USD 1,239.42 million in 2022 and is expected to reach USD 1,840.98 million by 2030. A big driver is that 65% of millennials are actively looking for plant-based foods. Plus, making your own can cut your costs by 45% per pint and reduce packaging waste by over 90% compared to premium store-bought brands. You can discover more insights about the organic ice cream market on databridgemarketresearch.com.
And hey, if you get the bug for making cultured dairy treats at home, you might love this next project. Check out our guide on making homemade yogurt right in your own kitchen.
What to Do When Your Ice Cream Goes Wrong
Look, even after years of making ice cream at home, I still get the occasional batch that’s less than perfect. Maybe it’s hard as a rock, or worse, full of those dreaded crunchy ice crystals. Before you even think about tossing it, let's talk about what's going on.
Most of these common issues are surprisingly easy to fix. Once you understand the why behind the problem, you can make a few simple tweaks to your technique and turn a kitchen hiccup into your creamiest batch ever.
The Number One Enemy: Icy Texture
The most common complaint I hear is about a gritty or icy texture. This is a classic case of water molecules freezing into big, crunchy crystals instead of the tiny, smooth ones we want. Churning is supposed to break these crystals up as they form, but a couple of things can throw a wrench in the works.
It almost always comes down to temperature and the makeup of your base.
- Your base wasn't cold enough. Pouring a lukewarm base into your machine is a recipe for disaster. It takes way too long to freeze, giving those large ice crystals plenty of time to throw a party. Always, always chill your base for at least 4 hours, though overnight is even better.
- Your freezer bowl wasn't frozen solid. A half-frozen bowl is a fast-thawing bowl. Give it a shake—if you hear any liquid sloshing around, it’s not ready. It needs a full 24 to 48 hours in the coldest spot in your freezer. No shortcuts!
Here's the key takeaway: The faster your ice cream base freezes, the smaller the ice crystals. Speed is your secret weapon for that silky-smooth texture we're all after.
"Why Won't My Ice Cream Freeze?"
Is your churner just spinning and spinning, with the base looking as soupy as when you started? It’s a frustrating feeling, but it almost always points back to temperature. Your freezer bowl has to be rock solid, and your base needs to be thoroughly chilled, ideally right around 40°F (4°C).
Another thing to check is your fat content. Fat molecules are your friends here; they physically get in the way of water molecules, stopping them from forming big ice crystals and giving your ice cream its rich structure. If you swapped out heavy cream for a lower-fat milk, you'll likely find the mixture struggles to firm up properly.
Fixing Other Common Mishaps
Beyond the big two, a few other issues can pop up. Don't worry, the fixes are usually pretty straightforward.
Problem: "My custard curdled!" You're not alone. If your egg-based custard looks a bit like scrambled eggs, it just means it got a little too hot. Don't panic! Get it off the heat immediately and pour it through a fine-mesh sieve to catch the cooked bits. To really save it, you can give the strained, cooled custard a quick blitz in a blender to smooth out any lingering lumps.
Problem: "My mix-ins all sank to the bottom." Ah, a classic timing mistake. If you add heavy chunks of chocolate or brownie bites too early, they’ll sink right through the liquid base. The trick is to wait until the final 2 to 3 minutes of churning. Once the ice cream is thick and looks like soft-serve, it’s strong enough to hold onto your goodies and keep them suspended in every scoop.
By paying attention to temperature and timing, you can solve just about any problem you’ll run into. Think of every batch as a learning experience that gets you one step closer to frozen perfection.
Storing and Serving Your Homemade Creation
You’ve done the hard work, and the churner has just finished its magic. But don't put your feet up just yet—these next few steps are what separate good homemade ice cream from an unforgettable one.
The Art of the Freeze
Proper storage is everything. It's what keeps your masterpiece creamy and delicious instead of turning it into a block of icy disappointment.
The second your ice cream is done churning—when it looks like a thick, glorious soft-serve—you need to move quickly. Scrape it immediately into an airtight container that you’ve pre-chilled in the freezer. I find that shallow, wide containers work best because they help the ice cream freeze faster and more evenly, which is the secret to preventing those dreaded ice crystals.
Here’s a little trick I swear by: before you pop the lid on, press a small piece of parchment paper or plastic wrap directly against the surface of the ice cream. This simple barrier keeps air out and is your best defense against freezer burn.
More Than Just a Scoop
Serving your homemade ice cream should be a celebration! While there's nothing wrong with a classic scoop in a bowl, a little extra effort can turn it into a real event.
- Whip up an Affogato: Pour a shot of hot espresso over a scoop of vanilla or chocolate ice cream. It's an incredibly simple, yet sophisticated, dessert that always impresses.
- Build Your Own Ice Cream Sandwiches: Grab your favorite cookies—homemade or store-bought—and press a generous scoop of ice cream between them. You can't go wrong with classic chocolate chip and vanilla.
- Create a Sundae Bar: This is a huge hit with kids and adults alike. Just set out bowls of toppings like chopped nuts, warm chocolate sauce, sprinkles, whipped cream, and fresh berries. Everyone gets to be their own dessert chef.
Keeping Your Gear in Top Shape
The final, and often neglected, step is cleaning up. Trust me, cleaning your ice cream maker right away will save you a headache later. Dried-on ice cream base is a real pain to scrub off.
Wash the freezer bowl, paddle, and lid in warm, soapy water as soon as you're done. The most important part? Make absolutely sure the freezer bowl is 100% dry before it goes back into the freezer. Even a few water droplets can form a layer of ice that makes it less effective for your next batch.
Once it's clean and bone-dry, pop it right back into the freezer. That way, you’re always ready for when the next ice cream craving strikes.
Got Questions About Homemade Ice Cream? We've Got Answers
Even with a great recipe in hand, a few questions are bound to come up when you're making ice cream. Let's walk through some of the most common ones I hear, so you can churn your next batch with total confidence.
Why Is My Homemade Ice Cream Rock-Hard?
You pull your beautiful creation from the freezer, only to find it's frozen into a solid, unscoopable brick. It's a classic problem, and it almost always comes down to a trio of culprits: fat, sugar, and air.
-
Fat and Sugar Content: Think of these ingredients as your secret weapon against ice. They work by lowering the freezing point of your base, which is crucial for preventing those big, crunchy ice crystals from forming. If you've swapped heavy cream for skim milk or tried to drastically reduce the sugar, you'll likely end up with an icy, hard texture.
-
Not Enough Air: That churning process isn't just for mixing! It's actively whipping air into the base, a process known as "overrun." This air is what gives ice cream its light, scoopable texture. Make sure you let your machine run until the mixture looks like thick, soft-serve ice cream before you transfer it to the freezer.
A little pro tip: adding a tablespoon of a neutral spirit like vodka can also work wonders for scoopability, since alcohol doesn't freeze solid.
The perfect scoop is all about balance. Too little fat and sugar gets you an ice block, but go overboard, and your ice cream might not freeze properly at all.
How Long Does Homemade Ice Cream Last in the Freezer?
When stored correctly, your homemade ice cream will be at its best for about two weeks. Keep it in a shallow, airtight container tucked away at the very back of your freezer where the temperature is most stable.
After that two-week mark, you'll start to notice a decline in texture. It's more prone to picking up pesky freezer odors and developing ice crystals. This is because our homemade versions don't have the commercial stabilizers and preservatives found in store-bought pints. They're meant to be enjoyed fresh!
To give it the best possible shot at a longer life, try pressing a small piece of parchment or wax paper directly onto the surface of the ice cream before putting the lid on. This simple trick is a fantastic way to keep ice crystals at bay.
Once you master the basics, you might get curious about the subtle differences between frozen desserts. It's fascinating to learn about what is gelato and why it is so different from ice cream and appreciate the craft even more.
Ready to turn your kitchen into the neighborhood's favorite ice cream shop? The Cooler Kitchen 1.2-Quart Electric Ice Cream Maker makes it incredibly fun and easy for the whole family. Start making delicious memories today at coolerkitchen.com.