
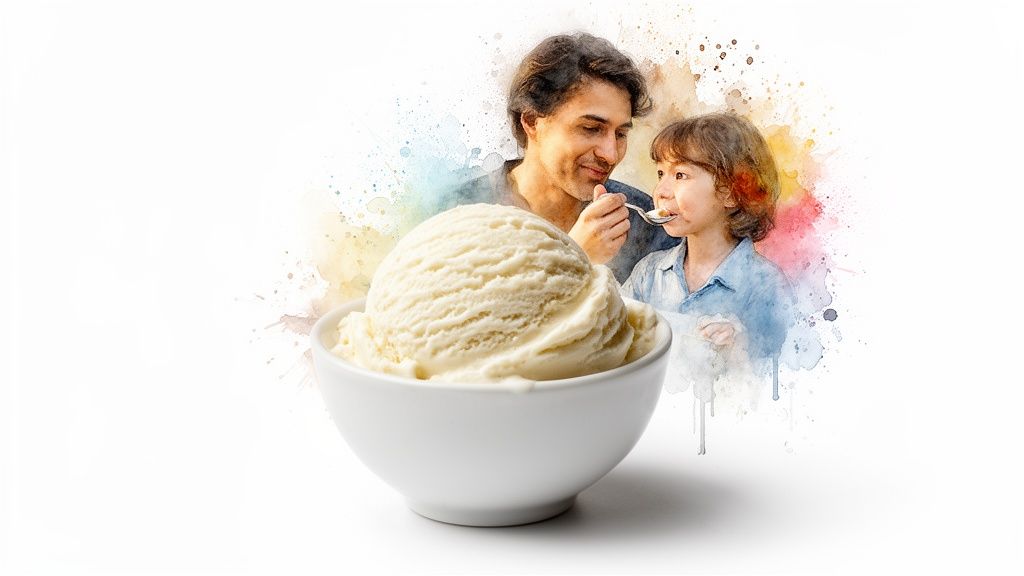
How to Make Gelato at Home for an Authentic Italian Treat
If you think making authentic gelato at home is some complicated culinary feat, I’ve got good news. It’s actually simpler than you might imagine. The magic lies in a slow-churning process that transforms basic ingredients—milk, sugar, and a touch of cream—into a dessert that’s dense, intensely flavorful, and unbelievably smooth.
Unlike its American cousin, ice cream, true gelato uses far less cream and typically no egg yolks at all. This is the secret behind its signature silky, smooth texture and the more intense flavor that makes it a world-famous Italian treat. With the right technique, you can bring the magic of a Florentine gelateria right into your own kitchen.
What Makes Homemade Gelato So Irresistible?
Ever had a scoop of gelato in Italy and wondered why it tasted so profoundly different from the ice cream back home? It's not just one thing, but a beautiful combination of science, tradition, and a little bit of artistry. Learning how to make gelato at home is all about understanding these core principles to create something truly special.
The unique personality of gelato really comes down to three key factors: its fat content, how it's churned, and the temperature it's served at.
- Less Fat, More Flavor: Authentic gelato has significantly less cream and butterfat than ice cream, usually hovering around 4-8%. Now, this might sound backward, but less fat means your taste buds aren't coated in a heavy film. This allows the star flavors—whether it's rich pistachio or bright strawberry—to come through with stunning clarity.
- Slow Churning for Density: Gelato is churned at a much slower speed. This deliberate process incorporates very little air (what the pros call "overrun"), which is why it's so much denser and silkier than fluffy ice cream. A pint of gelato actually weighs more than a pint of ice cream because of this.
- Warmer Temperature for Texture: It's served a bit warmer than ice cream, right around 10-15°F. This isn’t just a random preference; it’s crucial for achieving that soft, elastic texture that makes it easy to scoop and helps the flavors melt perfectly on your tongue.
The Rise of a Culinary Passion
The love for authentic gelato has exploded far beyond Italy’s borders, becoming a genuine global culinary movement. This isn't just another food trend; it reflects a bigger shift toward appreciating artisanal, high-quality foods made with care.
The numbers don't lie. The global gelato market has seen incredible growth, jumping from about $2.85 billion in 2021 to a projected $23 billion by 2025. You can read more about this massive expansion in Straits Research's detailed report. This explosive growth shows that making gelato has evolved from a niche hobby into a mainstream passion for home cooks who value natural ingredients and handcrafted quality.
Thankfully, this worldwide appreciation has made it easier than ever to find great ingredients and reliable equipment, like the Cooler Kitchen ice cream maker, designed specifically for home kitchens.
At its heart, making gelato is about connection. It's an opportunity to slow down, engage your senses, and create a shared experience with family. The process itself becomes a memorable activity, filled with laughter, tasting, and anticipation.
This guide is here to show you that an authentic Italian gelateria experience is completely within your reach. With a few key techniques, a solid machine, and a dash of patience, you'll be crafting scoops of irresistible, creamy gelato that transport you straight to a sun-drenched piazza.
Gelato vs Ice Cream: A Quick Comparison
While they might look similar, gelato and ice cream are fundamentally different. This table breaks down exactly what sets them apart.
| Characteristic | Authentic Gelato | Traditional Ice Cream |
|---|---|---|
| Fat Content | Lower, typically 4-8% from whole milk and less cream. | Higher, must be at least 10% butterfat, often much more. |
| Air (Overrun) | Lower, around 25-30%. Churned slowly for a dense, compact texture. | Higher, often 50-100%. Churned faster, resulting in a lighter, airier feel. |
| Serving Temp | Warmer, around 10-15°F, which keeps it soft and highlights the flavors. | Colder, typically served at 0-5°F, which can numb the palate slightly. |
| Ingredients | Primarily milk, sugar, and natural flavorings. Rarely uses egg yolks. | Cream, milk, sugar, and often contains egg yolks, which act as a stabilizer. |
| Flavor & Texture | Intense, clear flavors with a silky, elastic, and dense mouthfeel. | Rich and creamy due to higher fat, with a fluffier, more crystalline texture. |
As you can see, the differences are what give gelato its distinct character—it’s all about prioritizing pure flavor and a luxuriously smooth texture over richness and airiness.
Your Gelato Making Toolkit
Before we even think about ingredients, let's talk about gear. Getting your kitchen set up correctly is the first step to incredible gelato, and honestly, it’s what separates a good attempt from a great one. We’re not talking about a pro-level setup, just a few key items that make all the difference in getting that signature silky texture.
The star of the show, without a doubt, is the ice cream maker. I know, you might see "no-churn" recipes out there, but for true gelato, a machine is a must. It’s the constant, slow churning that keeps ice crystals tiny and prevents too much air from getting whipped in. That’s how you get gelato’s dense, rich consistency instead of fluffy ice cream.
The Heart of the Operation
For making gelato at home, especially if you're getting the kids involved, you want a machine that’s reliable and doesn't overcomplicate things. You don't need a giant, noisy unit that takes up half your counter space.
Something like the Cooler Kitchen 1.2-quart electric ice cream maker is a perfect example of what I mean. It uses a pre-freeze bowl—you just pop the inner bowl in your freezer for about 24 hours, and it's good to go. It’s compact, simple, and turns your chilled gelato base into creamy magic in about 20 to 30 minutes.
The Supporting Cast
Beyond the machine itself, a few other kitchen basics will make your life a whole lot easier and your gelato a whole lot better. Each tool has a very specific job to do.
- Heavy-Bottomed Saucepan: This is your best friend for gently heating the base. A thick bottom means even heat, which is crucial for preventing the milk and sugar from scorching on the bottom. Nobody wants a burnt-tasting gelato.
- Fine-Mesh Sieve: Straining the base after you've heated it is a non-negotiable step for me. It’s the secret to getting that impossibly smooth texture by catching any bits that shouldn't be there, like tiny pieces of cooked egg or undissolved sugar.
- Digital Thermometer: Gelato making is part art, part science. A digital thermometer takes the guesswork out of pasteurizing your base. You can hit the perfect temperature to dissolve everything and ensure it's safe without accidentally scrambling your eggs.
- Silicone Spatula: Ditch the wooden spoon for this one. A flexible silicone spatula lets you scrape every single drop of that precious base out of the pot and, later, out of the churning bowl. We can't let any of that goodness go to waste!
My Pro Tip: Right out of the machine, your gelato will be the consistency of soft serve. It's incredibly tempting to dig in right then, but trust me—pop it in the freezer for a few hours to "ripen." This final chill is what develops that classic dense, scoopable texture.
Finally, give some thought to storage and serving. Use an airtight, freezer-safe container to keep your gelato from picking up weird freezer smells or getting icy. I find that a shallow, wide container works best because it helps the gelato freeze faster and more evenly.
And when it’s finally time to serve, presentation matters! Serving your homemade creation in proper Ice Cream Cups can make it feel like you just stepped out of a gelateria in Rome. With this toolkit, you’re ready to go.
Crafting the Perfect Italian Gelato Base
This is where the real magic happens. Making the gelato base isn't just about mixing ingredients; it's a careful process that lays the groundwork for that incredibly smooth, intensely flavorful gelato you're dreaming of. A flawless base is the secret behind every truly great scoop.
The goal here is to create a seamless, custard-like mixture. We need to make sure the sugar is completely dissolved and the fats are evenly distributed, creating a perfectly homogenized liquid. How well you handle this stage directly impacts the final texture, so it deserves your full attention. We'll start with a true classic: Fior di Latte, which translates to "flower of milk." It's a pure, sweet cream flavor that forms the foundation for so many others.
The simple act of heating, straining, and chilling is what elevates basic ingredients into a sublime gelato base.
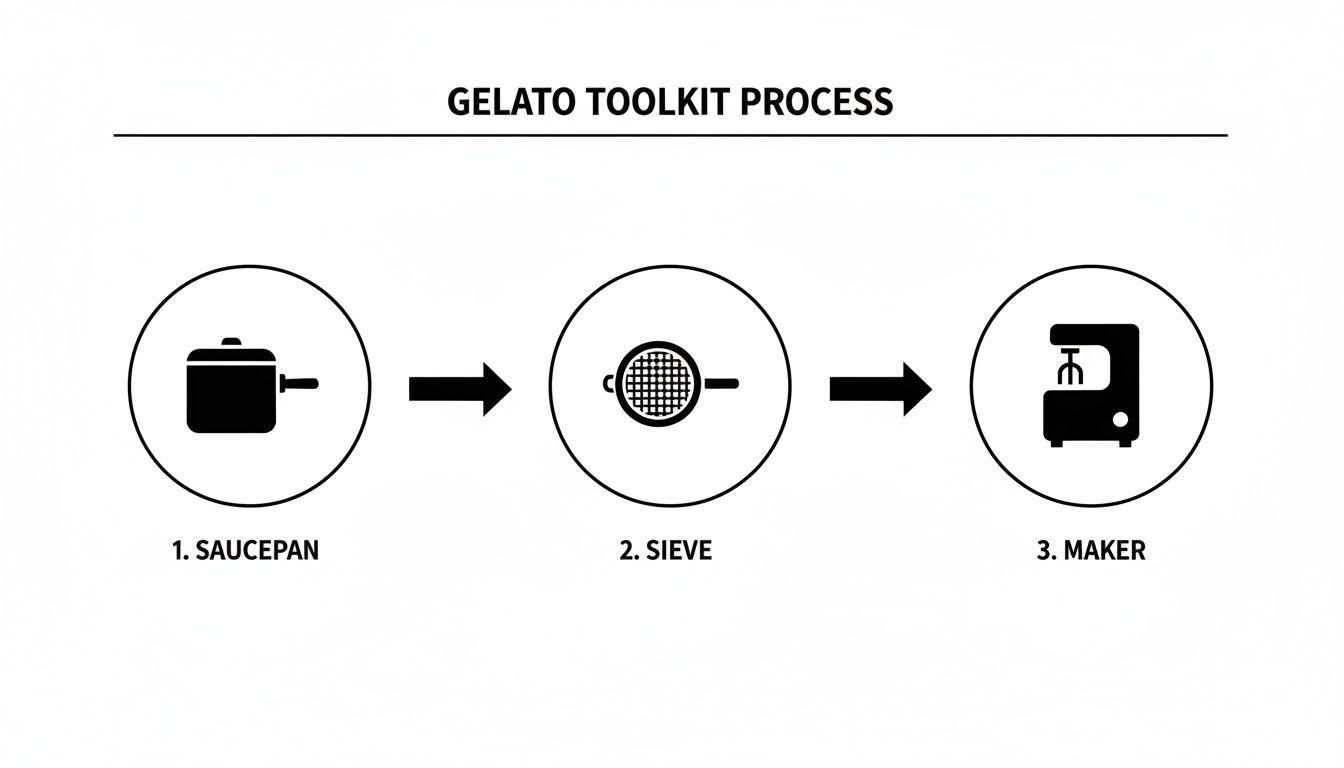
This little diagram breaks it down perfectly: heat in a saucepan, strain through a sieve for absolute smoothness, and then churn in your ice cream maker. Master these three steps, and you're on your way to gelato heaven.
Your Foundational Fior di Latte Recipe
Think of this recipe as your blank canvas. It’s simple, elegant, and lets the quality of your dairy truly shine. Once you’ve nailed this, you can riff on it endlessly to create countless other flavors.
What You'll Need:
- Whole Milk: 2 ¼ cups (540 ml). This is the heart of your gelato, giving it that signature light body.
- Heavy Cream: 1 cup (240 ml). This brings the fat content up just enough for a creamy, not icy, texture.
- Granulated Sugar: ¾ cup (150 g). For sweetness, of course, but it also lowers the freezing point, which is crucial for a soft scoop.
- Dextrose or Corn Syrup: ¼ cup (50 g). This is fantastic at preventing ice crystals from forming, ensuring a silky finish.
- Skim Milk Powder: ¼ cup (30 g). Here's a little secret weapon! It boosts the milk solids, which absorbs excess water for a denser, richer result.
- A Pinch of Salt: Just a tiny bit really makes all the other flavors pop.
Creating and Pasteurizing the Base
First things first, combine all your dry ingredients—the sugar, skim milk powder, and salt—in a small bowl and give them a good whisk. This simple step prevents the milk powder from clumping up later. Set that aside for a moment.
Now, pour the whole milk and heavy cream into a heavy-bottomed saucepan. Warm them gently over medium-low heat, stirring every so often. You’re not looking for a boil here, just warm to the touch.
Once the milk is warm, start slowly whisking in your dry ingredient mixture. Keep stirring constantly with a silicone spatula, making sure to scrape the bottom and corners of the pot so nothing scorches. You'll want to heat the base until it reaches 170°F (77°C) on a digital thermometer. This is the pasteurization step; it makes the base safe, fully dissolves the sugars, and helps create a stable, smooth emulsion.
Pro Tip for a Silky Smooth Finish: Whatever you do, don't let the base boil. Boiling can mess with the milk proteins and leave your gelato with a slightly cooked taste. Gentle, consistent heat is your best friend here.
As soon as it hits temperature, take the saucepan off the heat immediately. The next move is critical for texture: strain the base through a fine-mesh sieve into a clean bowl or container. This catches any tiny bits that didn't dissolve, guaranteeing an impeccably smooth mouthfeel. It's a small step that elevates your gelato from good to great.
The Crucial Aging Phase
You’re almost there! Now comes the easiest, yet perhaps most important, part of the process: aging. Once strained, cover the base with plastic wrap, pressing it right onto the surface to stop a skin from forming. Pop it in the refrigerator for at least four hours, but honestly, overnight is even better.
This isn't just about getting the base cold. During this rest period, some amazing things are happening:
- Fats Solidify: The fat molecules in the cream crystallize, which gives you a richer texture and more stable structure when you churn.
- Proteins Hydrate: The milk proteins get a chance to fully absorb the water in the base, leading to a much smoother, less icy final product.
- Flavors Meld: All the flavors deepen and mingle, resulting in a gelato that’s more complex and delicious.
Skipping the aging phase is a common mistake and almost always leads to an icy texture. A little patience here is the secret that separates amateur attempts from gelateria-quality results. If you enjoy making frozen desserts, you might want to check out our guide on how to make homemade ice cream, which shares some similar principles.
After a nice long rest, your base is finally ready for the ice cream maker. It should be beautifully thick, cold, and fragrant—the perfect starting point for churning into dense, creamy gelato in your Cooler Kitchen machine.
The Art of Churning and Ripening Gelato
After patiently letting your gelato base age, we're finally at the most exciting part. This is where the magic happens, transforming that chilled, fragrant liquid into the dense, creamy dessert you’ve been dreaming of. The churning process is where all your careful prep work pays off, creating that signature texture that makes gelato so special.
For this critical step, an electric ice cream maker like the Cooler Kitchen model is your best friend. Its slow, steady motion is exactly what you need to minimize the amount of air whipped into the base—a concept known as overrun. Less air is the secret to gelato's dense texture and intense flavor.
Kicking Off the Churn
First thing's first: make sure the freezer bowl of your machine is frozen solid. I can't stress this enough. A common mistake is pulling it out too early. It needs a good 24 hours in the coldest part of your freezer to be effective. An under-chilled bowl just won't work, leaving you with a soupy mess that never thickens up.
Just before you start, give your aged gelato base one last vigorous whisk to make sure it's perfectly smooth. Now, assemble your ice cream maker, switch it on, and then pour the base into the frozen bowl while the paddle is moving. This little trick prevents the liquid from instantly freezing to the sides, ensuring a smooth, even churn right from the start.
From here, let the machine do its thing for about 20 to 30 minutes.
Insider Tip: I know it's tempting, but try not to peek! Every time you lift the lid, you let warm air in and disrupt the process. Trust your machine and just listen. You'll hear the motor start to work a little harder as the gelato thickens, which is a great sign you're on the right track.
Recognizing the Perfect Consistency
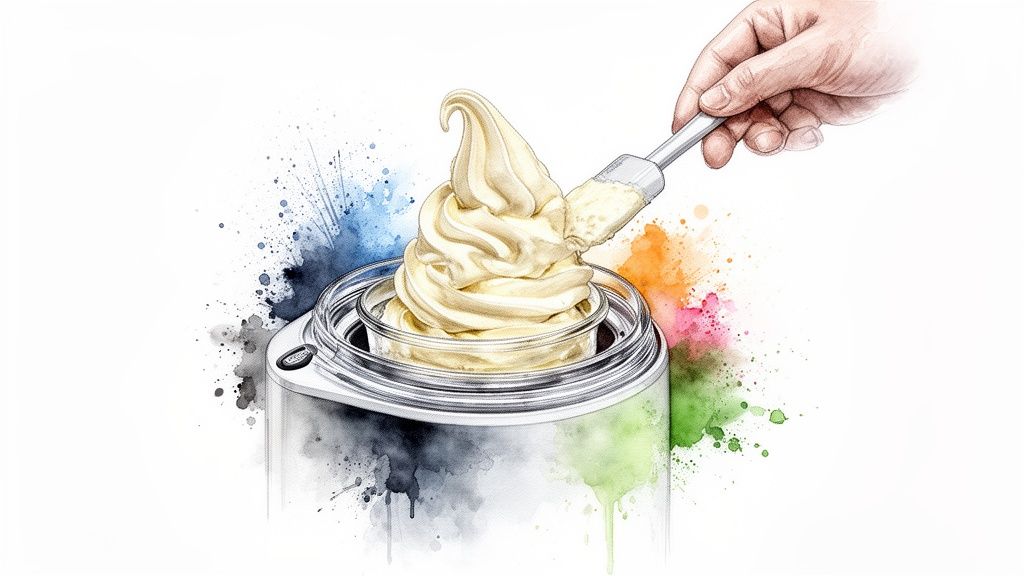
As the minutes pass, you’ll see the liquid base slowly become thicker, creamier, and more opaque. What you’re looking for is a very specific visual cue: the gelato should look like a thick, luxurious soft-serve.
It will start to pull away from the sides of the bowl, clinging to the paddle as it turns. That’s your signal—it's done churning. It won't be hard and scoopable yet (that comes next), but it will have that perfect pre-frozen texture. Be careful not to over-churn, as that can ruin the texture and make it grainy or even buttery.
If you're planning to add mix-ins—like chocolate shavings for a classic Stracciatella or some toasted nuts—now's the time. Toss them in during the final 2-3 minutes of churning. This gets them perfectly distributed without being pulverized by the paddle.
The Final, Crucial Ripening Stage
Once the gelato reaches that beautiful soft-serve state, you're ready for the final, non-negotiable step: ripening. This is the hardening phase in the freezer where the texture is perfected and the flavors have a chance to meld and deepen even further.
Working quickly, transfer the gelato from the churner into a pre-chilled, airtight container. A good silicone spatula will be your best tool for scraping every last bit out. Speed is key here to prevent any melting.
Here’s a simple trick to stop those dreaded ice crystals from forming on top: press a piece of parchment paper or plastic wrap directly against the surface of the gelato before sealing the lid. This creates a barrier against moisture.
Now, place the container in the coldest part of your freezer (usually way in the back) and let it ripen for at least four hours, though overnight is even better. This final rest is what truly transforms your creation into dense, perfectly scoopable, gelateria-quality gelato.
Exploring Creative Flavors and Variations
Once you've nailed the foundational Fior di Latte, you've essentially created a blank canvas for endless flavor experiments. This is where the real fun begins, turning the science of gelato making into an art form.
The trick is learning how to add new ingredients without wrecking that perfect, silky texture you worked so hard to get. It really comes down to two key techniques: infusions and mix-ins. Knowing when to use each is the secret to moving from good gelato to truly unforgettable gelato.
Simply put, infusions happen before you churn, while mix-ins are added right at the very end. This distinction is everything. For instance, if you just tossed fresh mint leaves into the churner, you’d end up with chewy, unpleasant bits. But by gently steeping the leaves in your warm milk base beforehand, you capture their pure, clean essence for a beautifully flavored gelato.
Mastering Infusions and Mix-Ins
Think of infusions as capturing the very soul of an ingredient. This method is perfect for things with powerful aromatics, like whole coffee beans, citrus zest, fresh herbs (like basil or mint), and spices such as cinnamon sticks or cardamom pods.
The process is straightforward. Just add your flavoring agent to the milk and cream as you’re heating it up. Once it's warm, take it off the heat and let it steep for 20-30 minutes. This gives the base plenty of time to soak up all those gorgeous flavors before you strain the solids out. The result is a smooth, deeply flavored gelato with no textural interference.
Mix-ins, on the other hand, are all about adding distinct textures and pops of flavor. These are the bits and pieces you actually want to bite into.
- Timing is Key: Fold your mix-ins in during the last 2-3 minutes of churning. Any earlier, and the paddle will crush them into oblivion. Any later, and they won't be evenly distributed.
- Good Candidates: Think small, firm, or frozen. Mini chocolate chips, toasted nuts, crumbled cookies, or a thick fudge swirl are all fantastic choices.
- Pro Tip: Always chill your mix-ins! Adding room-temperature sauces or ingredients will slightly melt the gelato, causing it to refreeze with an icy, grainy texture. Don't sabotage your hard work.
A classic beginner mistake is adding things like fruit purées or alcohol as a mix-in. Because of their high sugar and water content, they dramatically alter the freezing point. These need to be incorporated into the base before churning to ensure a smooth final product.
Delicious Gelato Recipes to Try
With those techniques in mind, let's put them to work. Here are three classic Italian recipes, adapted for the home kitchen, that show these principles in action. For each one, you'll start with your prepared and aged Fior di Latte base.
- Classic Stracciatella: Gently melt 4 ounces (115g) of a good-quality dark chocolate. During the final minute of churning, slowly drizzle the melted (but not hot!) chocolate into the machine. It will hit the cold gelato, harden instantly, and shatter into delicate, crunchy flakes. It's that simple.
- Vibrant Strawberry (Fragola): Hull and slice 1 pound (450g) of fresh, ripe strawberries. Blend them with a tablespoon of lemon juice and a couple of tablespoons of sugar until perfectly smooth. Just before you pour your base into the churner, whisk this fresh purée in.
- Decadent Pistachio (Pistacchio): This one is all about the quality of your ingredients. You’ll need a pure pistachio paste, not just chopped nuts. Whisk ½ cup (120g) of the paste directly into your base before you age it overnight. This gives that rich, nutty flavor time to fully meld with the dairy for a completely seamless taste.
Creating Plant-Based and Kid-Friendly Gelato
One of the best things about making gelato at home is the freedom to tweak it for anyone. You can make it fun for kids or adapt it for friends and family with dietary needs.
For a guaranteed kid-pleaser, try a "Cookies and Cream" version. Just toss in a cup of crushed chocolate sandwich cookies during the last minute or two of churning. Colorful sprinkles are another no-brainer—they add a fun look and a satisfying crunch.
The world of dairy-free gelato is also exploding. While traditional dairy-based gelato still commands an 84.65% global market share, the plant-based category is growing at an impressive 7.18% CAGR, according to market analysis from MordorIntelligence.com. This shift is great news for home cooks, as it means more options for everyone.
To make a plant-based gelato, simply swap the dairy with a creamy, full-fat plant milk.
- Oat Milk: Its neutral flavor and creamy consistency make it a fantastic all-purpose base.
- Cashew Milk: With its high-fat content, this is my go-to for creating an exceptionally rich and smooth texture that comes very close to the real thing.
The technique doesn't change. You'll still create the base, age it, and churn it just like you would with dairy. You might be surprised to find that a rich, plant-based chocolate or pistachio gelato becomes your new favorite.
And if you’re looking for more ways to cool down, check out our guide on beating the heat with shaved ice and bubble tea.
Troubleshooting Common Homemade Gelato Issues
Even when you follow a recipe to the letter, homemade gelato can be a bit finicky. Don't get discouraged if a batch doesn't turn out perfectly—every gelato maker, myself included, has faced these same little hurdles. Think of it as part of the craft; learning to diagnose and fix these common issues is what separates good gelato from great gelato.
The most common complaint I hear is about icy or grainy gelato. You're dreaming of that silky-smooth texture, but instead, you get a mouthful of crunchy ice crystals. This is almost always a sign that water has run amok in your base.
Solving the Icy Gelato Problem
When gelato turns icy, it means free water molecules have had too much time and space to band together and form large, noticeable crystals. The goal is to keep those crystals microscopic. Usually, the problem lies either in how you balanced your base or how you froze it.
Here's what I always check first:
- Did you age the base long enough? Letting the base rest in the fridge for at least four hours (but preferably overnight) is non-negotiable. This "aging" period gives the fats and proteins time to fully hydrate and bind with the water, which is your best defense against ice.
- How are your sugar and fat levels? Sugar and fat are your best friends when it comes to texture. They physically get in the way, preventing water from forming large ice crystals. If a batch comes out icy, your recipe might be a bit too lean on one or both of these.
- How was the churn? A slow churn or a freezer that isn't cold enough gives ice crystals too much time to grow. The magic is in freezing it fast. This keeps the crystals tiny, resulting in that signature creamy feel.
If you're really struggling with ice crystals or a gritty texture, it's worth diving into professional ice cream refrigeration techniques. Understanding the science behind temperature control can be a game-changer for your final product.
Here's a simple pro tip: Before you seal your container, press a small piece of parchment paper or plastic wrap directly onto the surface of the gelato. This creates a physical barrier that stops moisture in the air from forming that dreaded layer of ice on top.
Addressing Other Common Concerns
Beyond iciness, a few other things can go sideways. From a watery base to a flavor that just seems "off," let's get them sorted out.
Why Is My Gelato Base So Thin?
A base that looks more like milk than cream probably wasn't heated correctly. You really need a digital thermometer for this part. Most recipes require you to hit a specific temperature, usually around 170°F (77°C), to activate stabilizers like cornstarch and fully dissolve the sugars. This step creates the emulsion that gives your gelato its body.
Why Does My Gelato Taste a Little Eggy?
If you're making a classic Italian custard base with egg yolks and you get an eggy aftertaste, you've slightly overcooked them. It happens! The yolks were likely heated too fast or held at a high temp for too long, causing them to curdle just a tiny bit. The key is gentle, consistent heat and non-stop stirring. And always, always strain your finished base through a fine-mesh sieve. It will catch any rogue bits and guarantee a cleaner, purer flavor.
Once you know what to look for, you can tweak your process and get that perfect, delicious result every time.
Ready to start making delicious, family-friendly frozen treats at home? The Cooler Kitchen 1.2-Quart Electric Ice Cream Maker makes it easy to create perfect gelato, sorbet, and ice cream every time. Explore the possibilities and get your own today!