
Unforgettable Electric Ice Cream Maker Recipes
Welcome to the world of incredible homemade ice cream, made effortlessly right in your own kitchen. This guide is your starting point for creating everything from a classic, creamy vanilla to vibrant, fruity sorbets. The best part? You control every single ingredient and can finally skip all those weird preservatives.
We'll show you just how simple it is to whip up amazing frozen treats, making some sweet memories with every single churn.
Your Guide to Perfect Homemade Ice cream
There's a special kind of joy that comes from making ice cream at home. It's more than just dessert; it's a fun, hands-on experience that brings everyone together. You get to call all the shots, from the quality of the cream to the exact amount of chocolate chunks.
Whether you're a parent looking for a fun weekend project with the kids or a foodie who's serious about quality, an electric ice cream maker is your key to a world of delicious creativity.
More and more people are discovering the satisfaction of making fresh, delicious desserts in under 30 minutes. It's no surprise the global market for ice cream machines is booming, with the North American market alone projected to hit USD 3.483 billion by 2025. It’s clear this isn't just a trend; it's a full-blown hobby for people who love good food.
Why Bother Making Ice Cream at Home?
Beyond the incredible taste, homemade ice cream has some real advantages you just can't get from a store-bought pint. From start to finish, the whole process is genuinely rewarding.
- You're in Charge of Ingredients: You pick the quality and amount of sugar, cream, and mix-ins. This is a game-changer for anyone managing dietary needs or just aiming for a richer, more natural flavor.
- The Flavor Sky's the Limit: Forget being stuck with the usual store-bought options. You can experiment with fresh-picked strawberries, herbs like mint or lavender, or even a swirl of salted caramel. If you can dream it up, you can probably churn it.
- Less Plastic, More Planet-Friendly: Using a machine like the Cooler Kitchen 1.2-quart model means you're cutting down on all that single-use packaging. It’s a small but satisfying step toward a more sustainable kitchen.
This hands-on approach to creating delicious food from scratch fits perfectly with the philosophy of the Homestead Kitchen, which celebrates self-sufficiency and timeless cooking methods.
Getting Started with the Right Mindset
Before you dive in, there are a couple of fundamentals to get right. Honestly, this is where most people go wrong. The vast majority of electric ice cream makers, including the popular Cooler Kitchen model, use a freezer bowl that must be frozen solid before you begin.
This step is absolutely non-negotiable if you want that smooth, creamy texture we all crave. A partially frozen bowl just leads to soupy, disappointing results.
Think of this guide as your go-to resource for everything from the foundational base recipes to troubleshooting those inevitable little hiccups. For an even deeper dive into the basics, you might want to check out our dedicated article on how to make homemade ice cream.
Alright, let’s get churning
Mastering the Classic Ice Cream Bases
Before you start dreaming up wild flavor combinations, you have to get the basics right. Every fantastic scoop, whether it's a simple vanilla bean or a loaded rocky road, begins with a solid foundation. The real secret to unlocking your ice cream maker's potential is understanding the two classic styles: Philadelphia-style and French-style.
Think of these not just as recipes, but as core techniques. One gives you a light, clean, and refreshing ice cream, while the other creates something impossibly rich and creamy. Let's break down both so you can churn like a pro.
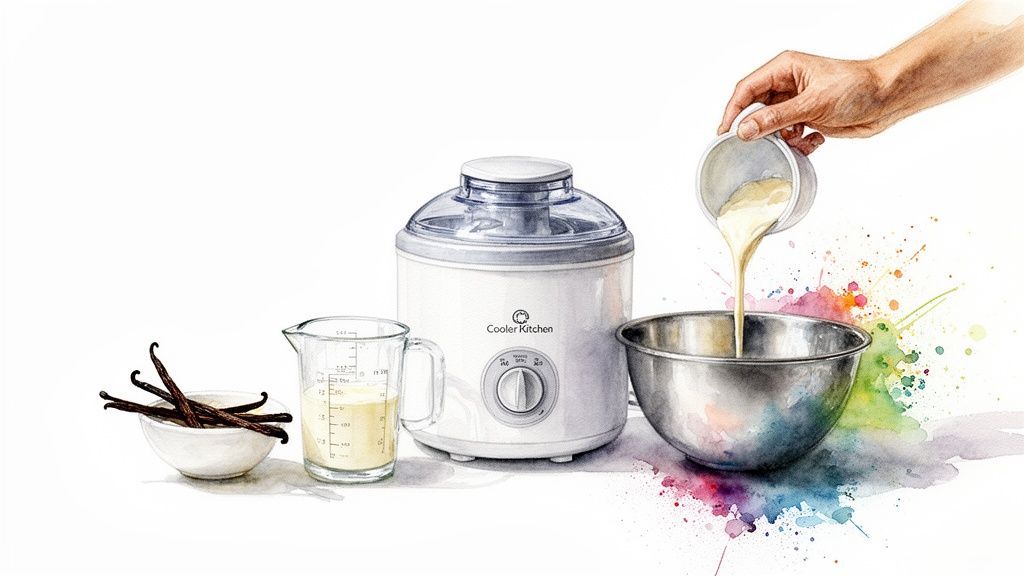
The Foolproof Philadelphia-Style Vanilla Bean
This is American ice cream at its purest. It’s an eggless, no-cook recipe that’s all about letting high-quality dairy and vanilla do the talking. Since you don't have to mess with cooking a custard, it comes together incredibly fast, making it the perfect starting point for anyone new to making ice cream at home.
The real beauty here is its simplicity. The clean, bright flavor makes it the perfect canvas for just about any mix-in you can think of, from chunks of cookie dough to swirls of fresh strawberry puree.
What You'll Need
- 2 cups heavy cream, very cold
- 1 cup whole milk, very cold
- ¾ cup granulated sugar
- 1 whole vanilla bean, split with seeds scraped (or 1 ½ teaspoons of pure vanilla extract)
- ⅛ teaspoon fine sea salt
Don't skip the salt! It might seem like an odd ingredient for a sweet treat, but it’s a flavor powerhouse. It actually makes the ice cream taste sweeter and more complex by tamping down any bitterness from the dairy fat.
Putting Together the No-Cook Base Grab a medium bowl and whisk together the sugar and salt. Pour in just a bit of the milk—about half a cup—and keep whisking until you can’t feel any gritty sugar on the bottom of the bowl. This is a simple but crucial step to avoid a grainy texture later on.
Now, whisk in the rest of your milk and all of the heavy cream. If you're using a vanilla bean, stir the seeds in now. If you're using extract, wait until just before you churn. Cover the bowl and let it chill in the fridge for at least 4 hours, though I find that leaving it overnight yields the best results.
For an electric maker with a freezer bowl, like the Cooler Kitchen 1.2-quart model, this chilling step is non-negotiable. A warm base will immediately start to melt the frozen bowl, and your ice cream will never thicken. You want that base to be below 40°F (4°C) before it hits the machine.
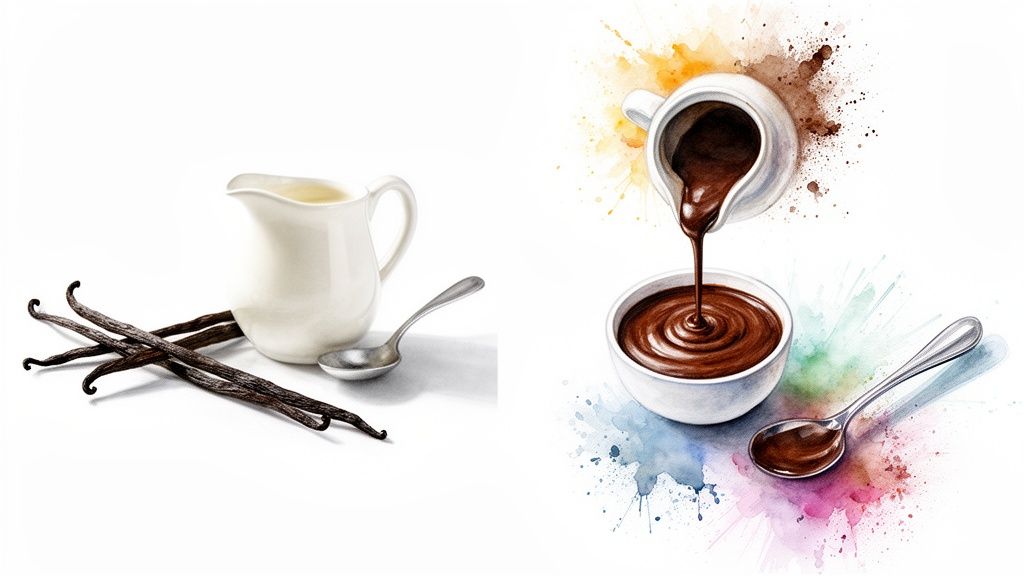
The Decadent French-Style Chocolate Custard
Ready to level up? French-style ice cream is where things get truly luxurious. The process involves creating a rich custard base by tempering egg yolks, which results in a dense, ultra-smooth texture that’s pure decadence.
Those little egg yolks are miracle workers. They act as a natural emulsifier, preventing large, crunchy ice crystals from forming. It’s what gives premium, high-end ice cream that signature creamy mouthfeel.
Ingredients for a Rich Custard
- 1 ½ cups heavy cream
- 1 ½ cups whole milk
- ¾ cup granulated sugar, divided
- 5 large egg yolks
- ½ cup unsweetened cocoa powder, sifted
- 4 ounces bittersweet chocolate (60-70% cacao), chopped finely
- 1 teaspoon pure vanilla extract
Making the Custard Base Before you start, get an ice bath ready. Just fill a large bowl with ice and a little water and set a smaller, clean bowl inside it. You'll use this to cool your custard down fast.
In a saucepan, combine the milk, cream, half of the sugar (that's about 6 tablespoons), and the sifted cocoa powder. Whisk it all together and warm it over medium heat until it's steamy and hot. Whatever you do, do not let it boil.
While that’s heating, whisk the egg yolks with the remaining sugar in a separate bowl. Keep whisking until the mixture turns pale yellow and gets a little thicker. This helps protect the yolks from scrambling in the next step.
Now for the most important part: tempering. With your whisk going constantly, slowly ladle about a cup of the hot milk mixture into the yolks. This gently brings their temperature up so they don't curdle. Pour this warmed-up egg mixture back into the saucepan with the rest of the hot milk.
Switch to a wooden spoon or a spatula and cook over low heat, stirring constantly and scraping the bottom of the pan. You'll know it's ready when the custard has thickened enough to coat the back of the spoon, which usually takes 5 to 10 minutes.
Quickly pour the custard through a fine-mesh strainer into the chilled bowl you set over the ice bath. Add your chopped chocolate and vanilla, let it sit for a minute to melt, then stir until it's perfectly smooth. This guarantees a silky, lump-free base every time. Let it cool completely over the ice, then cover and chill it in the fridge overnight.
Once you’ve got these two techniques down, you're ready to create almost any flavor you can imagine. For more ideas to get you started, check out our collection of the best ice cream maker recipes.
Going Beyond Ice Cream: Sorbets, Gelato, and Soft Serve
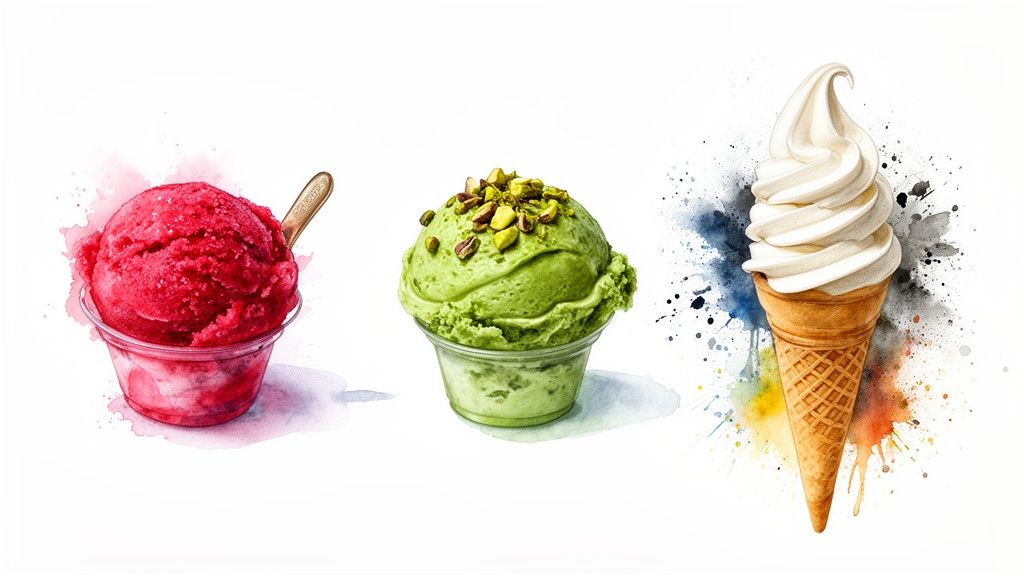
Once you've nailed the classic cream-and-egg bases, you're ready to unlock your ice cream maker's full potential. The world of frozen desserts is vast, and with a few simple adjustments, you can be whipping up vibrant sorbets, rich Italian gelato, and nostalgic soft serve right in your own kitchen.
What really separates these treats? It all boils down to three things: fat, air, and temperature. Classic ice cream is high in fat and churned to whip in a good amount of air, giving it that familiar light, scoopable body. Gelato, on the other hand, flips the script. It uses more milk than cream, lowering the fat content, and is churned slowly. This process introduces less air, creating a dense, silky dessert that packs an incredibly intense flavor punch.
Sorbet is the purest of the bunch—often just fruit, sugar, and water. This makes it naturally dairy-free and wonderfully refreshing. And that classic soft serve? It’s all about achieving that iconic, airy swirl by churning at a slightly warmer temperature and serving it fresh from the machine.
Crafting a Tangy Raspberry Sorbet
There’s something incredibly satisfying about making a bright, tangy sorbet. Since there's no fat to create a creamy mouthfeel, the real secret is nailing the sugar-to-fruit ratio. Sugar isn't just for sweetness; it’s the magic ingredient that lowers the water's freezing point, preventing your sorbet from turning into a solid, un-scoopable block of ice.
Sorbet Ingredients:
- 4 cups fresh or frozen raspberries (about 20 ounces)
- 1 cup granulated sugar
- ¾ cup water
- 2 tablespoons fresh lemon juice
First, make a simple syrup. Just combine the sugar and water in a small saucepan over medium heat, stirring until the sugar dissolves completely. Set it aside to cool down. While that’s happening, blitz your raspberries in a blender until they're totally smooth.
Now for a crucial step: pour the raspberry puree through a fine-mesh strainer into a bowl. Use a spatula to press all the liquid out, leaving the seeds behind. This is what guarantees a silky-smooth final product. Stir the cooled simple syrup and lemon juice into your strained puree. Cover the bowl and let the base chill in the fridge for at least 4 hours, or even better, overnight.
Once it's thoroughly chilled, churn the raspberry base in your pre-frozen ice cream maker bowl for about 20-25 minutes. It will look soft and a bit slushy. Transfer it to an airtight container and pop it in the freezer for at least 2 more hours to firm up before you dig in.
Achieving Authentic Pistachio Gelato
Making real gelato at home is a game-changer. You really get to appreciate its unique, dense texture. Interestingly, the slower churn speed of most home electric makers is actually a benefit here, as it naturally incorporates less air—just what you want for authentic gelato. This recipe leans on whole milk more than heavy cream to keep the fat content down, true to Italian tradition.
If you want to go even deeper into the art of this Italian classic, we’ve put together a comprehensive guide on how to make gelato at home.
Gelato Ingredients:
- 2 ½ cups whole milk
- ½ cup heavy cream
- ¾ cup granulated sugar
- 4 large egg yolks
- 1 cup unsalted, shelled pistachios, finely ground
- ¼ teaspoon almond extract
You'll start by making a light custard. In a bowl, whisk the egg yolks and sugar together until they're pale and creamy. Gently heat the milk and cream in a saucepan over medium heat until it’s steamy, but don't let it boil.
Next, you need to temper the eggs. Slowly pour about a cup of the hot milk mixture into the yolks while whisking constantly. This prevents them from scrambling. Pour everything back into the saucepan and cook over low heat, stirring all the while, until it thickens just enough to coat the back of a spoon. Strain the custard into a clean bowl, then stir in the ground pistachios and almond extract. Let this base chill completely overnight.
Churn your cold pistachio base for 25-30 minutes. Gelato is meant to be served a bit warmer than ice cream, so it will be softer right out of the churn. For the most authentic experience, serve it immediately. If you prefer it firmer, freeze it for 1-2 hours.
Making Classic Soft Serve at Home
There’s a reason soft serve is a worldwide obsession. The boom in home ice cream makers is partly driven by families wanting to create fresh, fun recipes and get kids involved in the kitchen. While soft serve might dominate the commercial market with over 58% of the share, there's a huge surge in home cooks making fruit-based and vegan treats, with a 29% jump in demand for versatile machines. You can see more data from this htfmarketinsights.com market analysis.
A Note on Texture: The secret to perfect soft serve is all in the timing. You have to serve it immediately after churning. The machine whips in air while chilling the base just enough to get that signature soft, swirly texture without freezing it solid.
This dead-simple recipe is a guaranteed hit with everyone.
- 2 cups whole milk
- 1 cup heavy cream
- ¾ cup granulated sugar
- 1 tablespoon pure vanilla extract
- Pinch of salt
Just whisk everything together in a bowl until the sugar dissolves. Chill this mixture for at least 4 hours. Then, churn it in your pre-frozen bowl for 15-20 minutes, or until it's thick but still perfectly soft. Serve it right away for that true soft-serve experience.
Making Unbelievably Good Dairy-Free Frozen Desserts
Let's be honest: crafting a dairy-free frozen dessert that's actually creamy can feel like you're chasing a myth. The biggest culprits are always a thin, watery base and that dreaded icy crunch that screams "failed experiment." But I promise, with a few key ingredients and the right approach, your electric ice cream maker can whip up vegan treats that are every bit as rich and satisfying as their dairy-filled cousins.
The whole secret is picking a base with enough fat and body to do the job heavy cream normally does. This is where plant-based ingredients really get to show off, each one bringing something special to the table. Once you get the hang of how they work, those classic dairy-free dessert problems will be a thing of the past.
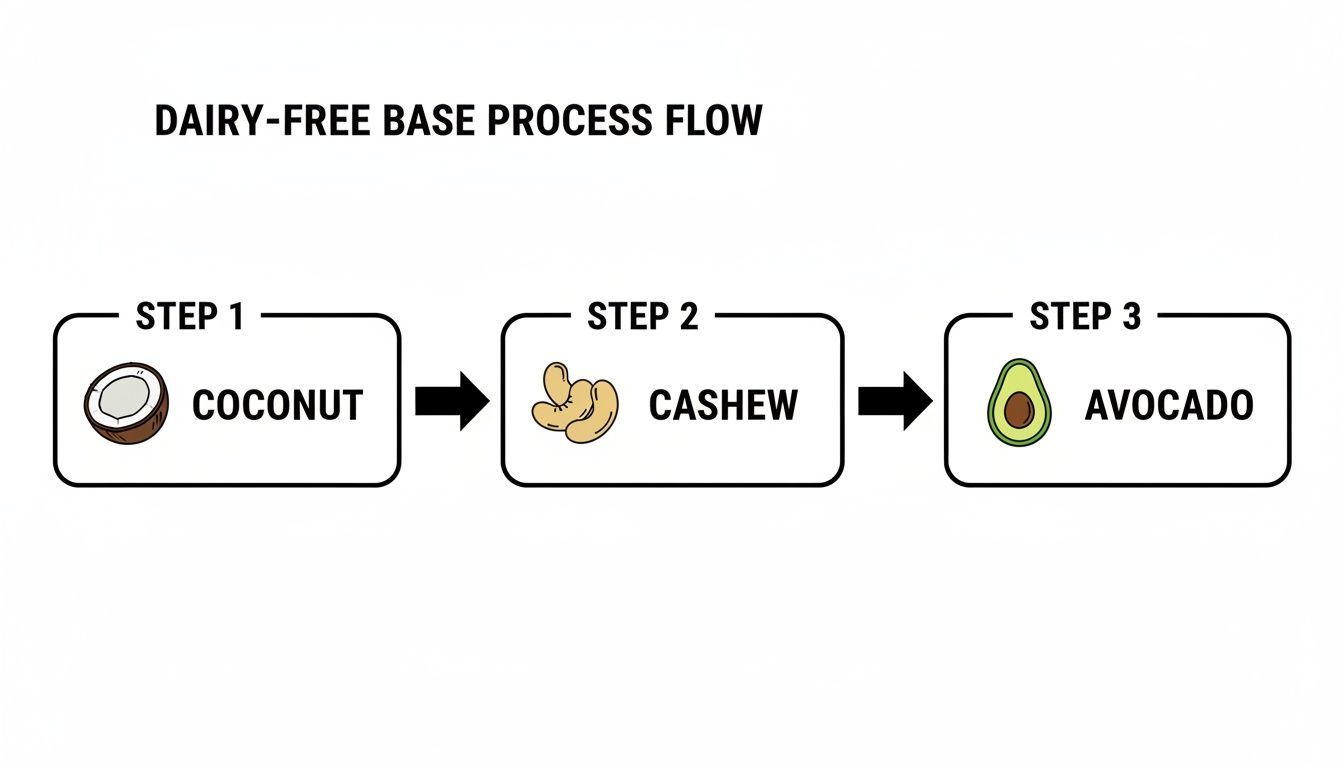
Choosing Your Creamy Vegan Base
Forget about icy, disappointing results. The foundation of a truly luxurious vegan ice cream is a solid, fatty base. Each of these options brings its own unique flavor and texture to the party.
-
Full-Fat Coconut Milk: This is, without a doubt, the king of creamy vegan ice cream. You have to use the kind from a can—full-fat, not the thin stuff in a carton. Its high fat content is what churns into a stunningly smooth and rich final product. The subtle coconut flavor is a natural fit for tropical fruits like mango or pineapple.
-
Soaked Raw Cashews: When you soak raw cashews and blend them with a bit of water, they transform into an incredibly thick, neutral-tasting cream. This makes it the perfect blank canvas for flavors like vanilla bean, rich coffee, or deep chocolate where you don't want any other flavors getting in the way.
-
Avocado: I know it sounds a little strange, but hear me out. Avocado brings a wonderful dose of healthy fats and a buttery texture that’s hard to beat. It’s an amazing secret weapon for intensely-flavored desserts like chocolate or matcha, where the stronger flavors completely hide any hint of avocado.
It all comes down to simple food science: fat gets in the way of ice crystals forming. The more fat you have in your base—whether from coconut, nuts, or avocado—the smaller the ice crystals will be, which means a smoother, creamier, and less icy dessert.
Creamy Coconut Mango 'Nice' Cream Recipe
This recipe is pure tropical escape in a bowl, and it proves you don't need a drop of dairy for a rich, satisfying treat. The coconut milk creates a super-smooth texture that’s just perfect with the sweet, bright mango.
What You'll Need:
- 1 (13.5-ounce) can full-fat coconut milk, chilled in the fridge overnight
- 3 cups frozen mango chunks
- ¼ cup maple syrup or agave (add more or less to your liking)
- 1 tablespoon fresh lime juice
- A small pinch of sea salt
First things first, combine the chilled coconut milk, frozen mango, maple syrup, lime juice, and salt in a high-speed blender. You’ll want to blend it until it’s completely smooth, scraping down the sides a few times to make sure you get any stubborn little chunks.
Pour that beautiful, vibrant mixture right into the pre-frozen bowl of your Cooler Kitchen ice cream maker. Let it churn for about 15 to 20 minutes, or until it thickens up to a lovely soft-serve consistency. You can dig in right away or, for a firmer, more traditional scoop, transfer it to an airtight container and pop it in the freezer for at least 2 hours.
And if you’re looking to build out your dairy-free dessert menu, you can find some fantastic inspiration in these gluten-free vegan snack recipes.
Rich Dark Chocolate Avocado Mousse Recipe
This is the one. This is the recipe that will make a believer out of any dairy-free skeptic in your life. The avocado creates a mind-blowingly thick and velvety base, while dark cocoa and chocolate bring an intense, decadent flavor. No one will ever guess your secret ingredient.
Base Ingredients:
- 2 ripe medium avocados, peeled and pitted
- ½ cup unsweetened cocoa powder, sifted
- ½ cup maple syrup
- ¼ cup unsweetened almond milk (or your favorite plant-based milk)
- 1 teaspoon pure vanilla extract
- ¼ teaspoon sea salt
Toss all the base ingredients into a food processor or a powerful blender. Blend until the mixture is completely silky-smooth. It might take a minute or two, but you want to be absolutely sure there are no little green specks of avocado left. What you’ll have is a thick, luscious, pudding-like mousse.
Scrape the chocolate avocado base into your frozen ice cream maker bowl. It only needs to churn for about 10-15 minutes. Because the base is already so thick and rich, it comes together much faster. The machine will simply chill it down and make it even denser, like a thick, frozen mousse. Serve this one immediately for the absolute best texture.
Insider Tips for Flawless Frozen Treats
Even with a fantastic recipe, a few small details can be the difference between a decent batch of homemade ice cream and an unforgettable one. I've learned over the years that mastering these little tricks helps you sidestep common frustrations and get that perfect, creamy scoop every single time. Honestly, the real work starts long before you even plug in the machine.
The journey to perfect ice cream boils down to one golden rule: everything must be as cold as possible. This isn't just a suggestion; it's the most critical factor for success, especially if you're using a freezer-bowl model like the Cooler Kitchen 1.2-quart maker.
Nail the Pre-Churning Chill
Your freezer bowl is the foundation of the whole operation, and it needs to be frozen completely solid. Don't just pop it in the freezer for a few hours and hope for the best. For truly great results, give it a full 24 hours in a freezer set to 0°F (-18°C) or colder. A quick test I always do is to give it a shake—if you hear even the faintest sloshing sound, it's not ready.
The same goes for your ice cream base. It has to be thoroughly chilled, ideally below 40°F (4°C). I always make my base the day before and let it chill overnight. This not only gets it cold enough but also allows the flavors to deepen and the fats to properly emulsify, which is key for a creamy texture. Pouring a lukewarm base into your frozen bowl is a recipe for disaster; it will instantly start melting the bowl's coolant, and you'll end up with a soupy mess that never thickens.
Pro Tip: I can't stress this enough—use a thermometer! Don't just guess or rely on time. Checking your base's temperature before you pour it into the machine removes all the guesswork and guarantees it’s ready to freeze correctly.
Troubleshooting Common Texture Problems
We've all been there: you follow the recipe, but the ice cream just won't thicken, or it comes out icy and hard. Nine times out of ten, the culprit is temperature or an imbalance in your ingredients. An insufficiently frozen bowl or a base that wasn't chilled enough are the usual suspects for a runny final product.
That dreaded icy texture? It’s all about preventing large ice crystals from forming. Here’s how I avoid it:
- Don't Skimp on Fat and Sugar: Both fat and sugar are your best friends here. They act like natural antifreeze, getting in the way of water molecules that want to form big ice crystals. If you try to cut back on either, you're likely to end up with a rock-solid, icy block.
- A Little Booze Goes a Long Way: A tablespoon or two of a neutral spirit like vodka or kirsch can be a game-changer. Alcohol doesn’t freeze, which helps keep the finished ice cream much softer and more scoopable right out of the freezer.
- Move Fast: As soon as the ice cream is done churning, get it into its storage container immediately. The longer it sits out and melts, the more opportunity those pesky ice crystals have to form when it refreezes.
For dairy-free recipes, getting that creamy texture can be even trickier, but choosing the right base ingredients makes all the difference.
As you can see, high-fat plant-based ingredients like full-fat coconut milk, soaked cashews, and even avocado are fantastic for creating a smooth, rich texture that rivals traditional dairy ice cream.
Perfecting Mix-Ins and Storage
Timing is everything when it comes to adding things like chocolate chips, chopped nuts, or cookie dough. You'll want to toss them in during the last 1-2 minutes of churning. If you add them too early, the dasher might pulverize them or, even worse, they can weigh down the base and stop it from thickening properly.
How you store your ice cream is just as important as how you make it. I always use a shallow, flat, airtight container because the larger surface area helps the ice cream freeze much faster and more evenly. And here’s a final trick: before you put the lid on, press a piece of plastic wrap or wax paper directly onto the surface of the ice cream. This simple step creates a barrier that stops ice crystals from forming on top, keeping your creation perfectly creamy for days.
The passion for homemade treats is booming. The market for soft-serve machines alone is projected to grow from USD 822.083 million in 2021 to over USD 949 million by 2025. With home cooks demanding fresher ingredients and faster results—some 2024 models have slashed churn times by 41%—it's clear this trend is here to stay. You can learn more about the growing ice cream machine market trends and see just how popular at-home churning has become.
Got Questions? We’ve Got Answers.
Even with the best recipes, a few questions always pop up when you're getting the hang of a new ice cream maker. Think of this as your go-to guide for those little head-scratchers that can make the difference between a good batch and a truly great one. Let's tackle the most common ones we hear from home cooks.
"Why Won't My Ice Cream Thicken Up?"
This is, without a doubt, the number one hurdle people face. Nine times out of ten, the problem comes down to temperature. There are two main culprits: either the freezer bowl wasn't cold enough to start, or the ice cream base was too warm.
Your machine's freezer bowl needs to be frozen absolutely solid. We recommend a full 24 hours in a freezer set to 0°F (-18°C) or colder. A quick test? Give it a shake. If you hear even the slightest slosh of liquid inside, it needs more time in the deep freeze.
The same goes for your liquid base. It has to be thoroughly chilled before it hits that frozen bowl. It should hang out in the fridge for at least four hours, but honestly, letting it chill overnight is the real secret to success. Pouring a warm base into the bowl is a recipe for failure—it just melts the bowl's coolant on contact and you'll never get that thick, creamy consistency.
"How Do I Keep My Ice Cream From Turning Into a Brick in the Freezer?"
It’s true—homemade ice cream freezes harder than the store-bought stuff because it doesn't have all those commercial stabilizers and emulsifiers. But don't worry, you can absolutely get that perfectly scoopable texture at home with a few simple tricks.
- Don't Skimp on the Good Stuff: Fat and sugar are your allies in the fight against iciness. They actively get in the way of large ice crystals forming. If you cut back too much on either, you're pretty much guaranteed an icy, rock-hard result.
- A Little Booze Goes a Long Way: Just a tablespoon of a neutral spirit like vodka can make a huge difference. Alcohol has a lower freezing point than water, which helps keep the entire mixture softer and easier to scoop.
- Store It Right: Use a shallow, flat, airtight container. This shape helps the ice cream freeze more quickly and evenly. When you’re ready for a bowl, just let it sit on the counter for 5-10 minutes to soften up.
Here's a pro tip that's easy to overlook: don't overfill the machine. If you pour in a base that goes more than two-thirds of the way up the bowl, the paddle won't have enough space to churn air into the mix. This leads to a dense, icy texture. Always respect the fill line on your model.
"What’s the Real Difference Between Gelato and Ice Cream?"
They might look similar, but the experience of eating them is worlds apart. It all comes down to three things: fat, air, and the temperature you serve it at.
American-style ice cream is rich, made with a higher percentage of heavy cream and often includes egg yolks. This gives it a butterfat content of 10% or more. It's also churned pretty fast, which whips a good amount of air into it (a process called "overrun"), making it lighter and fluffier.
Gelato, its Italian cousin, leans on whole milk more than cream and uses fewer, if any, egg yolks. This means it has a lower fat content. The game-changer, though, is that it's churned very slowly. This incorporates way less air, creating a dense, silky-smooth dessert that packs an incredibly intense flavor punch.
"When Is the Right Time to Add My Mix-Ins?"
Timing is everything here. Whether you're adding chocolate chunks, toasted nuts, crumbled cookies, or a caramel swirl, the rule is simple: wait until the last 1-2 minutes of churning.
If you toss them in too early, a few things can go wrong. The paddle might grind your mix-ins into a fine powder, they could all sink to the bottom, or they might even get in the way of the ice cream thickening properly. Waiting until the very end ensures every chunk and swirl is perfectly suspended throughout the finished ice cream, giving you that amazing texture in every single spoonful.
Ready to put this newfound knowledge to the test? The Cooler Kitchen 1.2-quart electric ice cream maker is the perfect sidekick for your frozen dessert adventures. Explore our collection and find the perfect kitchen companions at Cooler Kitchen today!