
Best Ice Cream Maker Recipes: Creamy Classics and Fresh Flavors
The secret to the best ice cream maker recipes isn't some complicated culinary technique. It’s all about starting with a top-notch, perfectly chilled base and using fresh, simple ingredients. Honestly, your success really boils down to three things: freezing the bowl solid, keeping your base ice-cold, and knowing exactly when to toss in your mix-ins for that perfect crunch.
Your Journey to Perfect Homemade Ice Cream
Think of this as your playbook for making incredible frozen treats right in your own kitchen. We’re going way beyond just a list of instructions to help you truly master your electric ice cream maker and unlock a whole new world of flavor. It's time to forget those store-bought pints with their mile-long ingredient lists. When you're in charge, you control everything.
More and more people are discovering the joy of homemade desserts. You can see it in the numbers—the global ice cream maker market has grown like crazy as people get more into DIY culture and healthier eating. It’s all about using fresh ingredients and making things exactly how you like them.
Setting Yourself Up for Success
I've learned this the hard way: the secret to creamy, dreamy ice cream is all in the prep work. The most common mistake I see people make is rushing the process. Before you even dream of hitting that "on" switch, a few key steps will make all the difference.
Getting these first few steps right is absolutely critical. They lay the foundation for a smooth, creamy texture and prevent the dreaded icy crunch. Here's a quick rundown of what to do before you even start mixing.
Essential Prep for Perfect Ice Cream
| Preparation Step | Why It's Important | My Pro-Tip |
|---|---|---|
| Freeze the Bowl Solid | An under-frozen bowl won't get cold enough, leading to slow churning and large ice crystals. The result? Icy, grainy ice cream. | Give it a shake. If you hear any liquid sloshing around, it needs more time. I always leave mine in the back of the freezer for a full 24 hours. |
| Chill the Base Thoroughly | A cold base freezes faster. Quick freezing means smaller ice crystals, which is the key to that silky-smooth texture we all love. | I never churn a base that hasn't chilled for at least 4 hours, but overnight is even better. It lets the flavors meld and ensures it's truly ice-cold. |
| Set Your Freezer to 0°F | Your home freezer needs to be cold enough to both freeze the bowl solid and "ripen" the finished ice cream to a firm, scoopable consistency. | Use a freezer thermometer to check the temp. Setting it to 0°F (-18°C) is the sweet spot for both preparing your machine and storing your final creation. |
Once you make this prep a non-negotiable part of your routine, you'll see a massive improvement in the quality of your homemade ice cream.
Why Homemade Beats Store-Bought Every Time
Beyond the pure fun of it, making your own ice cream just gives you so much more. You get to use real vanilla beans, strawberries you just picked, or that fancy dark chocolate you've been saving. That means no artificial flavors, weird preservatives, or stabilizers. It also just blows the doors wide open for creativity.
The real magic of a home ice cream maker is its adaptability. You can easily adjust sugar levels, create unique flavor combinations, or craft delicious dairy-free versions that cater to any dietary need, turning a simple dessert into a personalized culinary creation.
Whether you're making a classic vanilla bean gelato, a vibrant fruit sorbet, or a wild, kid-friendly flavor loaded with cookies, your machine is the key. Nail these fundamentals, and it’ll go from just another kitchen gadget to your family's favorite appliance. And if you get the bug for making things from scratch, you might want to explore other diverse recipes for all sorts of culinary adventures.
Mastering Classic Vanilla and Chocolate Ice Cream
Every great ice cream adventure starts with the classics: vanilla and chocolate. But the homemade versions? They're on another planet entirely. Forget the bland, airy tubs from the store—we're about to make something with pure, intense flavor and an incredibly dense, creamy texture.
The secret to both of these foundational recipes is their simplicity. We’re making what’s known as Philadelphia-style ice cream, which means no eggs. It’s faster, lets the core flavors shine, and is a fantastic way to get your feet wet if you're new to this. Consider these your confidence-building recipes.
The Perfect Philadelphia-Style Vanilla Bean Ice cream
A truly great vanilla ice cream is elegant and complex, never "plain." The trick is to use top-shelf ingredients, especially a real vanilla bean or a pure vanilla bean paste. Those little black specks aren't just for show; they deliver a floral, nuanced aroma you simply can't get from extract alone.
This recipe is perfectly scaled for a standard 1.2-quart machine, so you’ll get maximum volume without a messy overflow during churning.
Here's What You'll Need:
- Heavy Cream: 1 ½ cups, very cold
- Whole Milk: ¾ cup, very cold
- Granulated Sugar: ⅔ cup
- Vanilla Bean: 1 bean, split lengthwise with seeds scraped (or 1 tbsp pure vanilla bean paste)
- Salt: A tiny pinch (about ⅛ teaspoon)
First, combine the milk, sugar, and salt in a small saucepan. Scrape the vanilla bean seeds into the milk and toss the empty pod in, too. Gently warm this mix over medium-low heat, stirring until the sugar completely dissolves. You’re not trying to boil it—the goal is simply to melt the sugar and infuse the milk with that incredible vanilla flavor.
Once the sugar is dissolved, pull the pan off the heat and fish out the vanilla pod. Now, slowly whisk in the cold heavy cream. This gently cools the base while creating a silky-smooth emulsion. The final mixture should be just thick enough to coat the back of a spoon.
The chilling step is where the magic really starts to happen. Transfer your base to an airtight container and stick it in the fridge for at least four hours. Honestly, though, overnight is best. A properly chilled base churns faster and produces smaller ice crystals, which is the key to an ultra-creamy final product.
Crafting a Rich and Decadent Chocolate Ice Cream
For the chocolate fanatics, this recipe delivers a deep, satisfying flavor that’s more like a frozen truffle than just a dessert. The game-changer here is using high-quality unsweetened cocoa powder—I prefer Dutch-processed for its smooth, less acidic taste. We're also going to "bloom" the cocoa, a critical step that unlocks its full flavor potential.
Ingredients for Chocolate Bliss:
- Heavy Cream: 1 ½ cups, very cold
- Whole Milk: ¾ cup, very cold
- Granulated Sugar: ¾ cup
- Unsweetened Cocoa Powder: ½ cup (Dutch-processed recommended)
- Pure Vanilla Extract: 1 teaspoon
- Salt: ⅛ teaspoon
Start by whisking the sugar, cocoa powder, and salt together in a saucepan while they're still dry. This little trick prevents clumps later. Then, gradually whisk in the whole milk until you have a smooth, lump-free slurry.
Place the saucepan over medium heat and bring the mixture to a gentle simmer, whisking the whole time. Let it bubble gently for about 30 seconds. This is the blooming process I mentioned—it activates the cocoa and releases its deep, rich flavors. Remove it from the heat and stir in the vanilla extract.
Pour this chocolate base into a separate bowl and slowly whisk in the cold heavy cream until it's all one cohesive mixture. Cover and chill this base just like the vanilla: at least four hours, but overnight is always better for the final texture.
The Art of Churning and Ripening
Once your base is thoroughly chilled, it's go-time. Pour the cold mixture into your pre-frozen ice cream maker bowl and let it churn for 20-30 minutes. The exact time will vary depending on your machine and how cold your freezer is.
You're looking for a visual cue: the ice cream should look like thick, soft-serve. It will have grown in volume and started pulling away from the sides of the bowl. Be careful not to over-churn, as this can start to melt the base you just worked so hard to freeze.
While it's delicious right out of the machine, you need to "ripen" the ice cream for that classic, scoopable texture. Quickly transfer the churned ice cream to a pre-chilled, airtight container. I like to press a piece of parchment paper directly onto the surface to prevent ice crystals from forming. Seal it up and stash it in the coldest part of your freezer for at least four hours. This final freeze allows the ice cream to firm up completely, developing the perfect structure and deepening its flavor.
How to Make Vibrant Sorbets and Rich Gelato
Ready to level up your frozen dessert game? Let's move beyond classic ice cream and talk about two of my absolute favorites: intensely fruity sorbet and ridiculously silky gelato. They might both live in the freezer, but they couldn't be more different. Getting them right is all about understanding a few key details that turn everyday ingredients into something truly special.
Perfecting Your Sorbet Base
Sorbet is basically the pure essence of fruit, frozen into a scoopable, dairy-free delight. But its success all comes down to one thing: the sugar-to-water ratio. If you skimp on the sugar, you’ll end up with a solid block of fruit-flavored ice. Go overboard, and you'll get a syrupy slush that never quite freezes.
The trick is a simple syrup. This isn't just for sweetness—sugar molecules get in the way of large ice crystals forming, which is exactly what gives you that smooth, spoonable texture instead of a crunchy one. If you're looking for inspiration, a recipe like this Wild Berry Sorbet is a fantastic place to start.
For a foolproof strawberry sorbet, I stick to a simple 1:1 syrup ratio—that’s one part sugar to one part water.
Stunning Strawberry Sorbet Recipe:
- Fresh or Frozen Strawberries: 1 pound (about 3 cups), hulled
- Granulated Sugar: 1 cup
- Water: 1 cup
- Fresh Lemon Juice: 2 tablespoons
- Vodka or Light Corn Syrup: 1 tablespoon (This is optional, but I highly recommend it for the smoothest possible texture.)
First, get your simple syrup going. Just heat the sugar and water in a small pot until the sugar is completely dissolved, then set it aside to cool down. While that’s happening, blitz your strawberries and lemon juice in a blender until they’re completely smooth.
Here’s a step I never skip: strain the purée through a fine-mesh sieve. It’s the only way to get rid of all those tiny seeds and guarantee a perfectly silky sorbet.
Once the syrup is cool, mix it into the strained strawberry purée. Now, stir in that optional tablespoon of vodka or corn syrup. A tiny bit of alcohol or invert sugar lowers the freezing point just enough to act as an insurance policy against iciness. Chill this mixture in the fridge for at least four hours before you even think about churning.
The single most important factor for creamy sorbet is a deeply chilled base. The colder it is going into the machine, the faster it will freeze. Fast freezing means small ice crystals, and small ice crystals mean a smooth, non-gritty final product.
The Magic of Authentic Gelato
People often call gelato "Italian ice cream," but it really is in a league of its own. So what’s the difference? It all comes down to milk, fat, and air.
Unlike American-style ice cream, which often has a lot of heavy cream, traditional gelato uses a higher ratio of whole milk. This means less fat, which allows the gelato to be served a little warmer without freezing rock-solid. That slightly warmer temperature is what lets the intense, pure flavors really pop.
The churning is different, too. Gelato is churned much more slowly, which incorporates a lot less air—a factor known as overrun. Some commercial ice creams can be 50% air or more. A good gelato, on the other hand, usually has an overrun of only 20-30%.
The payoff is a dessert that’s denser, smoother, and packed with more flavor in every spoonful. To dig deeper into the process, check out our complete guide on how to make gelato at home.
Classic Pistachio Gelato Recipe
Getting that deep, nutty pistachio flavor without any weird artificial aftertaste is an art form. My secret? Make your own pistachio paste. I know it’s an extra step, but trust me, the flavor payoff is huge.
For the Pistachio Paste:
- Raw, Unsalted Pistachios: 1 cup, shelled
- Powdered Sugar: ¼ cup
- Neutral Oil (like grapeseed): 1-2 tablespoons
- Almond Extract: ⅛ teaspoon (optional, but it really makes the nuttiness sing)
Start by toasting the pistachios in a dry pan or on a sheet in a 350°F oven for about 5-7 minutes, just until you can smell them. Let them cool completely. Then, put them in a food processor with the powdered sugar and blitz until you have a fine, sandy powder. Keep the machine running and slowly drizzle in the oil until a thick, smooth paste forms.
For the Gelato Base:
- Whole Milk: 2 cups
- Heavy Cream: 1 cup
- Granulated Sugar: ⅔ cup
- Pistachio Paste: ½ cup
- Salt: ⅛ teaspoon
Gently warm the milk, cream, and sugar in a saucepan over medium heat, stirring until the sugar dissolves. Don't let it boil! Take it off the heat and whisk in your homemade pistachio paste and the salt until everything is perfectly smooth.
Now for the patient part: chill the base for at least four hours, or even better, overnight. When you're ready, churn it in your ice cream maker for 20-25 minutes, or whatever your machine’s instructions suggest. It will come out looking like a dense soft-serve. Scrape it into a pre-chilled container and let it "ripen" in the freezer for at least four more hours. This final step is crucial for developing that signature rich, dense texture that makes gelato so incredible.
Making Ice Cream for Kids and Dairy-Free Diets
Some of the best recipes you'll ever make in your ice cream machine are the ones you create for the people you love. Getting the kids involved is a perfect weekend activity, and being able to whip up a batch of creamy, dairy-free dessert means nobody gets left out.
This is where having a home machine really pays off. You can dream up wild, colorful flavors for the kids or perfect a rich, satisfying pint for someone with a dairy allergy, all while skipping the weird additives you find in many store-bought options.
Crafting the Ultimate "Cookie Monster" Ice Cream
There’s a special kind of magic in watching a kid's face light up at the sight of bright blue, cookie-packed ice cream. This "Cookie Monster" recipe is always a winner, and it's super easy to pull off using the classic Philadelphia-style vanilla base we talked about earlier.
The secret to getting it just right comes down to two things: getting that iconic blue color and knowing exactly when to throw in the cookies.
- The Perfect Blue: You only need a few drops of blue food coloring. The trick is to mix it into your vanilla base before you chill it. This makes sure the color is perfectly even, with no weird streaks.
- Choosing Your Cookies: You'll want about 1 cup of roughly crushed cookies. I love using classic chocolate chip, but those cream-filled chocolate sandwich cookies add a whole other level of texture and flavor.
The most important part? Timing. You absolutely must wait until the last minute or two of churning to add the cookies. I mean it—wait until the ice cream is practically done, usually the last 1-2 minutes. If you add them too soon, they'll turn into a sad, soggy mush and could even jam the machine's paddle. Adding them at the very end keeps them in big, satisfying chunks that get swirled perfectly through the finished ice cream.
Looking for more ways to get your little ones excited about cooking? Check out our other fun recipes to make with kids.
This little flowchart can be a great starting point for deciding on your next frozen creation.
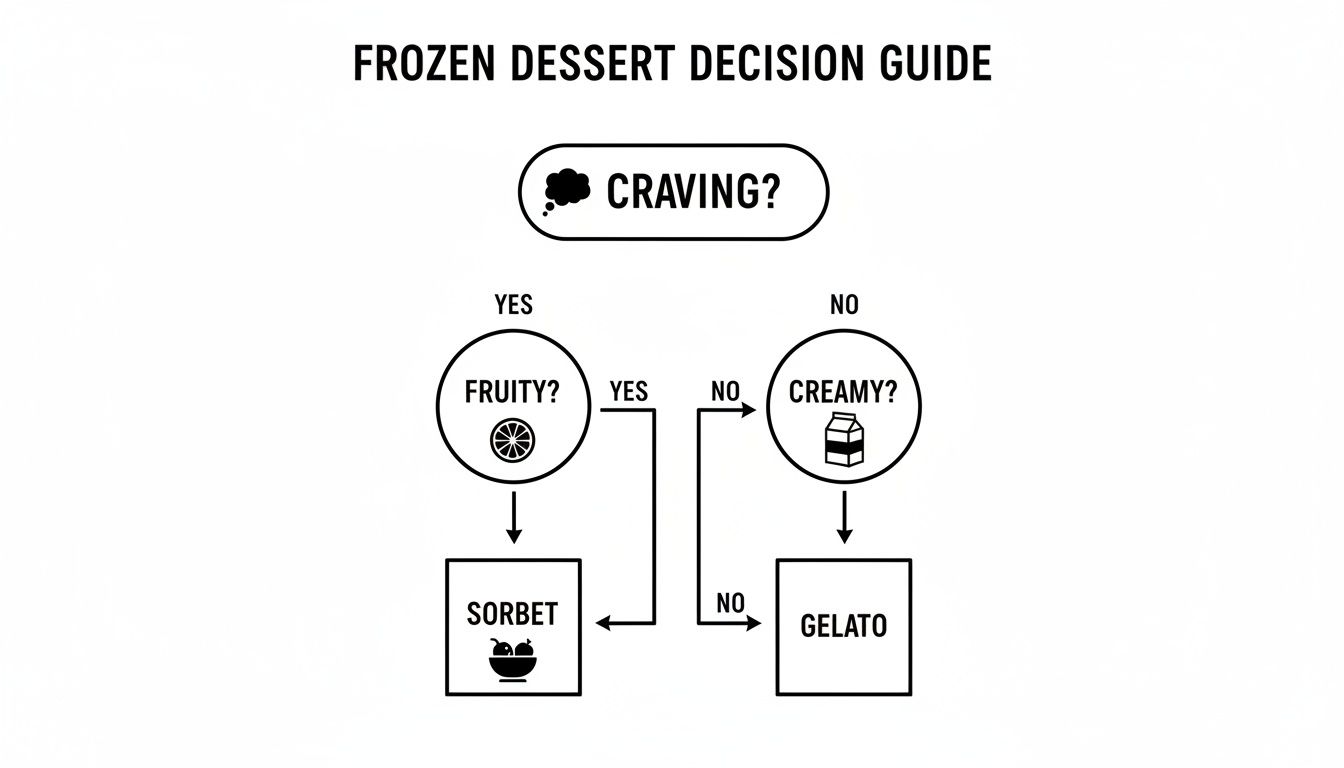
As you can see, sometimes the choice is as simple as deciding whether you're in the mood for something fruity or something intensely creamy.
Deliciously Creamy Dairy-Free Vanilla Ice Cream
Thankfully, making fantastic dairy-free ice cream at home is no longer a mystery. The real secret is picking the right plant-based milk and understanding what it brings to the table. For me, full-fat canned coconut milk is the gold standard; its high fat content does an amazing job of mimicking the rich texture of heavy cream.
The biggest hurdle with dairy-free ice cream is preventing that dreaded icy texture. Because most plant milks have a high water content, they're prone to forming large ice crystals. Using a milk with a higher fat percentage is your best line of defense.
To get a truly great dairy-free vanilla, you need a base built for creaminess.
My Go-To Creamy Coconut Vanilla Base:
- Full-Fat Canned Coconut Milk: Two 13.5-ounce cans, chilled overnight
- Maple Syrup or Agave: ½ to ⅔ cup, depending on your sweet tooth
- Pure Vanilla Extract: 1 tablespoon
- Salt: Just ⅛ teaspoon to make the flavors pop
The first step is crucial: chill your cans of coconut milk in the fridge overnight. This makes the thick, rich cream separate and rise to the top. When you're ready to start, open the cans and carefully scoop out only that solidified cream, leaving the watery liquid behind (you can save that for a smoothie).
Whisk the coconut cream with your sweetener, vanilla, and salt until it's completely smooth. You want to make sure you break down any little lumps of coconut cream. From there, pour the base into an airtight container and chill it for at least four hours.
Once it's thoroughly chilled, churn it in your ice cream maker for 20-25 minutes. You're looking for a thick, soft-serve consistency. Then, scrape it into a freezer-safe container and let it "ripen" in the freezer for at least four more hours to firm up into a perfectly scoopable treat.
Dairy-Free Milk Comparison for Ice Cream
Choosing a non-dairy milk can feel overwhelming, but they aren't all created equal when it comes to frozen desserts. The fat, protein, and water content in each will give you dramatically different results.
Here’s a quick rundown of my favorites and what to expect from each.
| Milk Type | Pros for Ice Cream Making | Cons and Things to Consider | Best For |
|---|---|---|---|
| Full-Fat Coconut Milk | High fat content creates an incredibly rich and creamy texture, very similar to traditional ice cream. | Can have a noticeable coconut flavor that might not work for every recipe. | Rich, decadent flavors like chocolate, vanilla, or coffee where the coconut complements the taste. |
| Oat Milk (Barista Blend) | Fairly neutral flavor and creamy consistency. "Barista" blends have added fats/emulsifiers that help a lot. | Lower in fat than coconut milk, so the final product might be a bit less rich. | Flavors where you don't want any competing taste from the base, like strawberry or mint chip. |
| Cashew Milk (Homemade) | When made from soaked raw cashews, it’s remarkably creamy with a very neutral flavor. | Store-bought versions are often too thin. Making it yourself is best but adds a prep step. | Creating a truly neutral, creamy base for delicate flavors like lavender or pistachio. |
Ultimately, by picking the right base for the job, you can create some of the best ice cream maker recipes out there—ones that let everyone enjoy a scoop without sacrificing that luxurious, creamy texture we all crave.
Troubleshooting Common Ice Cream Problems
Even with a great recipe, things can go sideways. You follow the steps perfectly, but end up with a soupy mess that refuses to thicken or a batch riddled with crunchy ice crystals. It’s frustrating, but don’t toss it just yet. These are common hurdles, and almost all of them have a simple fix.
The most frequent complaint I hear is about icy, grainy ice cream. The culprit is almost always the same: large ice crystals. Your entire goal during churning is to make the smallest ice crystals possible, and the only way to do that is to freeze your base fast.
A slow freeze gives water molecules way too much time to get together and form big, crunchy crystals. This is why a properly frozen bowl and a thoroughly chilled base are completely non-negotiable.
Why Your Ice Cream Is Icy
An icy texture can usually be traced back to one of three things. Let's walk through them so you can figure out what happened.
- Your Freezer Bowl Wasn't Cold Enough: This is the number one reason, hands down. Your bowl needs to be frozen solid for at least 12-24 hours at 0°F (-18°C) or colder. If you give it a shake and hear even the faintest sloshing sound, it’s not ready. A half-frozen bowl just can’t pull the heat out of the base quickly enough.
- Your Ice Cream Base Was Too Warm: Never, ever pour a room-temperature or even lukewarm base into your machine. It has to be chilled for at least four hours, though I always recommend chilling it overnight. A cold base gives you a huge head start on the freezing process, which is critical for that creamy texture.
- Your Recipe's Ratios Are Off: Fat and sugar are your best friends in the fight against iciness. They act like natural anti-freeze, physically getting in the way of those big ice crystals. If you’re trying to create a low-fat or low-sugar version, you might have to accept a less creamy result unless you find a recipe specifically built for those constraints.
When Your Ice Cream Won't Thicken
It’s a classic, disheartening scenario: you pour in your chilled base, let the machine run for 30 minutes, and all you have to show for it is a cold, milky liquid. This is almost always a sign that something went wrong before you even hit the "on" switch.
The cause? An insufficiently frozen bowl. The refrigerant liquid sealed inside the bowl's walls just didn't have enough frozen power to do its job. Your bowl needs to spend a full day in the coldest part of your freezer, no exceptions. If you want to dive deeper into the basics, check out our guide on how to make homemade ice cream from scratch.
My Personal Pro-Tip: I never just trust the clock. Before I even think about making ice cream, I pull the freezer bowl out and give it a good, hard shake right next to my ear. If it’s dead silent, I know it's ready. That one-second check has saved me from countless soupy batches over the years.
Perfecting Your Mix-Ins and Storage
Once you've nailed that perfectly creamy base, it's time to think about the finishing touches. Getting your mix-ins and storage right is what separates good homemade ice cream from truly great stuff.
The golden rule for adding things like chocolate chips, brownie bits, or chopped nuts is to wait until the last 1-2 minutes of churning. If you add them too early, the dasher will either pulverize them into dust or they’ll just sink to the bottom. Tossing them in at the very end gets them perfectly distributed without breaking them down.
When it comes to storage, the enemy is air. Preventing freezer burn is all about creating a good barrier.
- Use an Airtight Container: A shallow, flat container is always better than a deep one. It helps the ice cream freeze solid much faster and more evenly.
- Press Plastic Wrap on the Surface: Before you pop the lid on, press a small piece of plastic wrap or parchment paper directly onto the surface of the ice cream. This simple step stops ice crystals from forming on top.
- Store It in the Back: The back of your freezer maintains a much more stable, colder temperature than the door. This little habit prevents the slight melting and refreezing cycles that are the primary cause of freezer burn.
A Few Common Questions About Making Ice Cream
Even with the best recipes, you're bound to run into a few snags. That's just part of the fun! Think of this as your personal troubleshooting guide for those little issues that can make the difference between a pretty good batch and a truly fantastic one. I’ve rounded up the questions I hear most often from fellow home cooks.
Why Is My Homemade Ice Cream Icy Instead of Creamy?
Ah, the classic question. If your ice cream turns out grainy or crunchy, the culprit is almost always ice crystals. When we churn ice cream, the whole point is to keep those crystals as tiny as possible. When they get too big, you get that dreaded icy texture.
I've found it usually boils down to one of three things:
- Your freezer bowl wasn't cold enough. It needs to be frozen solid. We're talking a minimum of 12-24 hours in a freezer set to 0°F (-18°C). A quick test: shake it. If you hear any liquid sloshing around, it's not ready. A partially frozen bowl just can't get the base cold enough, fast enough.
- Your ice cream base was too warm. Never pour a room-temperature (or even just cool) base into your machine. It needs to be thoroughly chilled. I let mine sit in the fridge for at least four hours, but overnight is even better. A colder base freezes faster, which means smaller, creamier ice crystals.
- The recipe was a little off. Sugar and fat are your best friends when it comes to fighting iciness. They both get in the way of large ice crystals forming by lowering the freezing point of the mixture. If a recipe is too low in either, you can end up with a rock-hard, icy result.
Honestly, fixing these three things solves about 90% of texture problems. Just remember: solid bowl, ice-cold base, and a well-tested recipe.
How Long Should I Churn My Ice Cream?
Most home machines will get the job done in 20 to 30 minutes, but you should never just set a timer and walk away. The real secret is to watch the texture, not the clock.
You're looking for the consistency of a very thick soft-serve. You'll see the mixture has grown in volume and it will start pulling away from the sides of the freezer bowl. The moment it hits that stage, it's done.
Don't over-churn! It's a real problem. If you let it run too long, the friction from the dasher can start to warm things up, melting the very ice cream you just worked so hard to freeze. Stop the machine as soon as it looks like perfect soft-serve.
Once churned, the ice cream isn't quite ready to eat. It needs to "ripen" in the freezer for at least four hours. Transfer it to an airtight container (I always pre-chill mine) and let it harden. This final step is what gives you that firm, perfectly scoopable texture.
Can I Use Sugar Substitutes in My Recipes?
You absolutely can, but you'll need to make a few tweaks. Sugar does a lot more than just add sweetness—its most important job is to lower the base's freezing point. This is what keeps your ice cream from turning into a solid block of ice.
Sugar substitutes like stevia or erythritol don't have this same superpower, so the ice cream tends to freeze much harder.
Here’s how I work around that:
- Plan ahead and let the ice cream sit on the counter for 10-15 minutes to soften up before you try scooping.
- Add a tablespoon of a neutral spirit, like vodka, to your base before churning. Alcohol doesn't freeze solid, so it helps keep the final texture a bit softer.
If you plan on making a lot of sugar-free ice cream, look for sweetener blends specifically designed for frozen desserts. They often contain other ingredients that help mimic sugar's effect on texture.
When Is the Right Time to Add Mix-Ins Like Chocolate Chips?
Timing is everything here. Whether you're using chocolate chips, cookie dough, or chopped nuts, the rule is the same: add them in the last 1 to 2 minutes of churning.
You have to wait until the ice cream base has thickened up to that soft-serve stage. If you add your goodies too early, heavy things will sink to the bottom and delicate things, like soft cookie bits, will get pulverized by the paddle.
Tossing them in right at the end gets them perfectly suspended and distributed throughout the ice cream without getting crushed. Just pour them through the little opening in the lid while the machine is still running for that last minute or so.
Ready to start your own ice cream adventure? The Cooler Kitchen 1.2-quart electric ice cream maker makes it easy and fun for the whole family to create delicious homemade treats. Find your new favorite kitchen tool and explore more recipes at https://www.coolerkitchen.com.