
How to Organize Cooking Utensils and Reclaim Your Kitchen
Picture this: you need your favorite spatula, and you know exactly where it is. No more frantic rummaging through a jammed drawer while your onions start to burn. Learning how to organize cooking utensils boils down to a simple, repeatable process: assess what you have, get rid of what you don’t need, and create smart, logical zones for everything else. This isn't just about a quick tidy-up; it's about building a system that actually lasts.
Your Path to a Perfectly Organized Kitchen
An organized kitchen is more than just pretty—it’s the secret to a calmer, more enjoyable cooking experience. The whole point is to make your kitchen work for you, turning a potential stress zone into a space you love to be in. Every meal becomes a little easier, and you get precious time back in your day. This guide will walk you through a practical method to make that happen.

Introducing the Assess Declutter Zone Framework
At its heart, getting organized is about making thoughtful decisions. Forget just cramming things back into drawers. We're going to create a kitchen that feels intuitive and supports the way you actually cook. It all starts with a straightforward, three-part framework designed to stick.
This method is your roadmap from chaos to calm. Each step logically follows the one before it, helping you build a system that’s tailored to your home. Think about it: the average cook can waste up to 30% of their prep time just looking for the right tool. That frustration is real, impacting an estimated 62% of busy family kitchens. A good system gives you that time back.
Here’s a quick overview of our approach.
The Assess Declutter Zone Framework at a Glance
This table breaks down the three core stages of the process. It's a simple but powerful way to approach what can feel like an overwhelming task, turning it into manageable steps.
| Stage | Objective | Key Action |
|---|---|---|
| Assess | To get a clear picture of every single utensil you own. | Pull everything out and gather it all in one spot for a full inventory. |
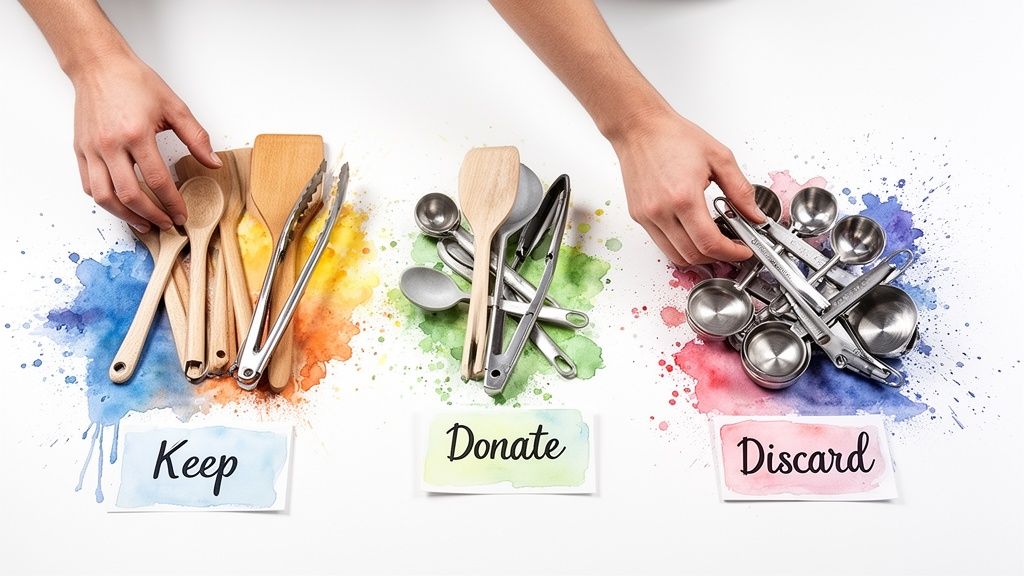
| Declutter | To pare down your collection to the tools you truly use and love. | Sort every item into 'Keep,' 'Donate,' or 'Discard' piles. Be honest! |
| Zone | To assign a logical, function-based home for every keeper. | Group similar tools and store them right where you'll need them most. |
After you've walked through these steps, you’ll have a kitchen that just makes sense.
This process isn't about creating a showroom kitchen overnight. It's about laying a practical foundation that makes your daily routine smoother. This is especially true for smaller kitchens where every inch of space counts. If that's you, check out our guide on space-saving kitchen gadgets for some clever ideas.
The real power of an organized kitchen is the time and mental energy it gives back to you. When you know exactly where your favorite spatula is, you can focus on the joy of cooking, not the frustration of searching.
By following this framework, you’re doing more than just clearing clutter. You’re setting up an intuitive workflow that makes cooking feel less like a chore and more like the creative, fun activity it should be. It’s a small investment of your time that pays off every single day.
The Great Utensil Audit: Your First Step to Sanity
Before you even think about buying a fancy new drawer organizer, you have to get real about what you actually own. This is the most important step, and honestly, it's often the most eye-opening. It's time to pull out every single spatula, whisk, and miscellaneous gadget from every drawer, countertop crock, and forgotten corner.
I call this the "great utensil audit," and you'll probably be shocked at what you find. I've seen clients unearth three identical fish spatulas, a surprising number of melon ballers, and a whole graveyard of forgotten specialty tools. Laying it all out in one giant pile gives you the visual gut-check you need to start making smart decisions.
Set Up Your Sorting Station
First, clear off a big space—your kitchen table or a clean patch of floor will do just fine. Then, set up three zones. You don't need anything fancy; a few cardboard boxes, laundry baskets, or even just designated spots on the floor work perfectly.
- The Keep Pile: This is for your MVPs, the tools you reach for without even thinking. Your favorite spatula, your go-to whisk, the tongs you can't live without—they all go here.
- The Donate Pile: For anything that's perfectly functional but just isn't for you. This is where duplicates, impulse-buy gadgets, and tools from a past cooking hobby (hello, bread-making phase) belong.
- The Discard Pile: Be ruthless here. Anything broken, rusted, melted, or just plain unusable gets tossed. These items aren't just clutter; they can be a safety hazard.
This sorting process is all about reclaiming your kitchen from the clutter. Think of it like a purge. For some great tips on this mindset, which applies to kitchens just as much as closets, check out this guide on how to effectively declutter any space.
Ask the Tough Questions
As you pick up each utensil, you need to be honest with yourself. This isn't about punishing yourself or forcing a minimalist lifestyle. It’s about creating a kitchen that actually works for you, filled only with things you genuinely use and love.
Key Evaluation Questions:
- When did I last use this? If it’s been over a year (and it’s not a once-a-year holiday tool), it’s a strong candidate for the donate pile.
- Do I have more than one? Unless you’re running a catering business that requires four ladles at once, you can probably let the extras go.
- Does this actually make my life easier? That avocado slicer looked cool, but if it's a pain to clean, a simple knife is better. Ditch the gadgets that create more work than they save.
- Is it in good shape? A spatula with a cracked handle or a whisk with bent tines isn't doing you any favors. It's time for it to go.
This is where the real work gets done. It might surprise you to learn that a study found over 40% of kitchen drawers are home to at least one "aspirational" gadget—a tool someone bought for a recipe they never made. Freeing up that space for tools you actually use is a massive win.
An intentional kitchen isn't about having the most tools; it's about having the right tools. Every item you keep should earn its place by being useful, effective, and a joy to cook with.
Once you’re done sorting, take a good look at your 'Keep' pile. This is your curated culinary toolkit. You’ve officially cleared out the noise and now have the perfect foundation to build a system where everything has a logical and accessible home.
Zoning Your Kitchen for Peak Efficiency
Now that you've curated your collection of essential tools, it's time to arrange them in a way that makes your kitchen work with you, not against you. The secret to this is a simple but powerful strategy called "zoning."
Think of it this way: your kitchen is a workshop. You wouldn't keep your hammer on the opposite side of the room from your nails, right? The same logic applies here. By grouping items by function and storing them exactly where you use them most, you can make meal prep feel less like a frantic hunt and more like a fluid, enjoyable dance.
Defining Your Primary Kitchen Zones
Most kitchens, no matter their size, can be broken down into a few key functional areas. The goal is to slash the number of steps you take while cooking. Placing tools within arm's reach of their related tasks creates a system built on pure efficiency.
Here are the most common zones to establish:
- The Prep Zone: This is your main workspace, usually the largest stretch of open counter, often near the sink or trash can. It’s where all the chopping, mixing, and measuring magic happens.
- The Cooking Zone: The area immediately around your stove and oven. This is command central for anything involving heat.
- The Cleaning Zone: Centered on the sink and dishwasher, this area is for washing, drying, and putting away dishes and tools.
- The Consumables Zone: Your pantry and refrigerator, where food is stored. While not directly for utensils, its location definitely influences your workflow.
- The Dispersal Zone: This is where you plate food and store everyday dishes, glasses, and flatware. It’s usually close to the dining area or dishwasher for easy unloading.
Thinking in terms of these zones helps you map out a logical home for every single utensil you decided to keep. This isn't just about being tidy; it's about engineering a smarter kitchen.
Equipping Each Zone for Maximum Flow
Here comes the fun part: assigning your utensils to their new homes. The rule of thumb is simple—store an item where you first reach for it.
For your Prep Zone, gather everything you need to get ingredients ready. A nearby drawer or countertop holder should contain:
- Knives and a peeler
- Measuring cups and spoons
- Mixing bowls
- A can opener
- Grater and zester
Your Cooking Zone is all about the tools you grab in the heat of the moment. A countertop crock or a drawer right next to the stove is perfect for:
- Spatulas and turners
- Tongs and whisks
- Ladles and large spoons
- Oven mitts and trivets
This simple setup means you'll never have to turn your back on a sizzling pan to find the right tool. If you need more ways to optimize tight spaces, our guide on space-saving kitchen storage solutions has some great ideas.
The impact of this approach is huge. A well-zoned kitchen can reduce meal prep time by as much as 25%, saving the average family around 90 minutes a week. With dual-income households making up over 60% of major markets, reclaiming that kind of time is a real game-changer. You can learn more about how efficiency is driving design in kitchen utensil market trends.
Real-World Zoning Examples
Let's look at how this plays out in a couple of different kitchen layouts.
In a small galley kitchen, you have to think vertically. A magnetic strip on the wall is perfect for knives, freeing up precious counter space. A wall rail system with hooks above the stove can hold your most-used cooking tools, defining your Cooking Zone without taking up a single inch of drawer space.
For a large, open-concept kitchen with an island, the island itself often becomes the ultimate Prep Zone. You can stock the drawers and cabinets right there with your knives, bowls, and measuring tools. This centralizes all your prep work and keeps the perimeter counters clear for other things.
Your kitchen's layout doesn't define its efficiency—your system does. Zoning empowers you to create a logical workflow in any space, turning frustrating bottlenecks into smooth, seamless movements.
Ultimately, zoning is all about creating muscle memory. Before long, you’ll be able to reach for any tool without even thinking. You'll move more freely, feel less stressed, and find a real rhythm in your daily cooking routine. It’s the final, and most rewarding, step in organizing your cooking utensils for good.
5. Pick the Right Storage for Your Kitchen
Alright, you’ve sorted through your utensils and mapped out your kitchen zones. Now comes the fun part: picking the hardware that will bring your new, organized system to life. The goal isn't just to find a spot for everything, but to choose solutions that make your daily cooking routine feel effortless.
What works for a big, bustling family kitchen won't be the right fit for a cozy apartment, so let's look at the best options out there. We’ll break down what works where, and why.
This decision tree gives you a great visual for how to think about placement based on your kitchen's natural flow.
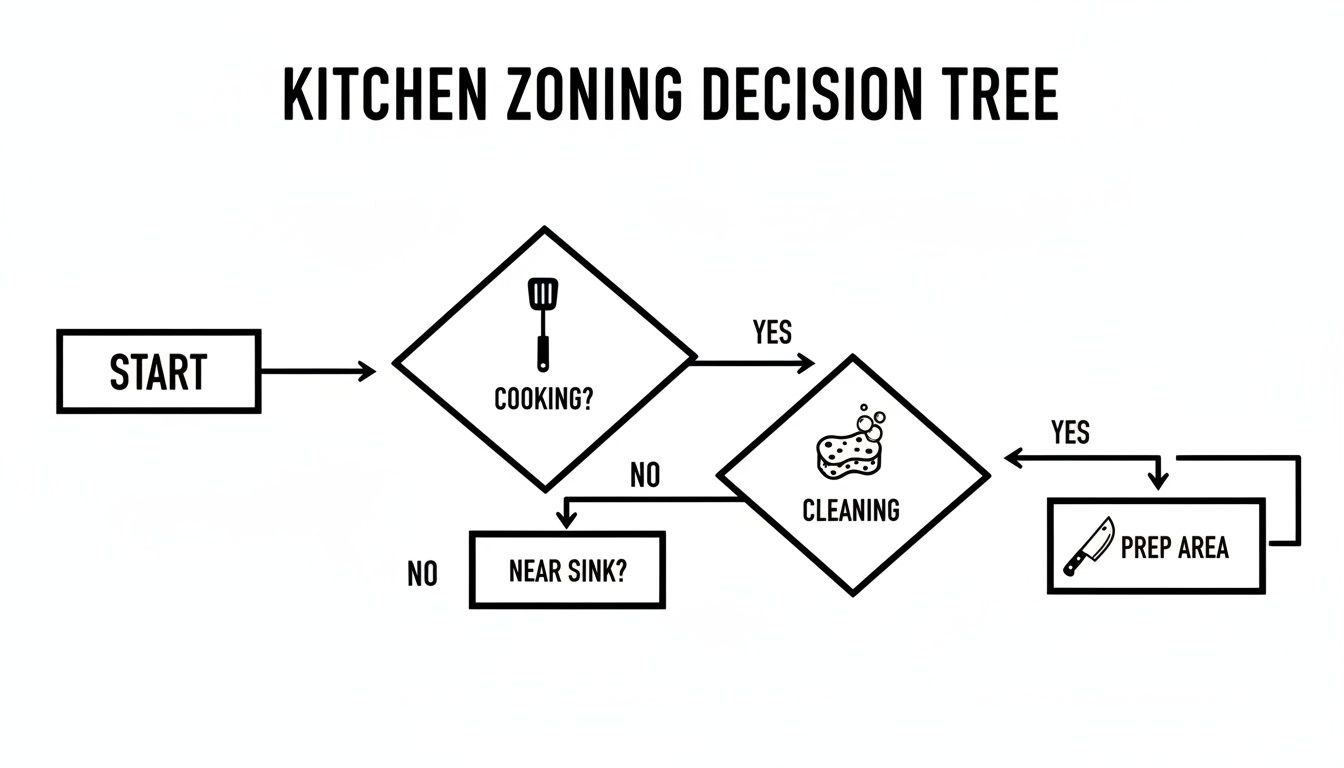
As you can see, the most logical spot for any tool is right where you use it. Think spatulas next to the stove, peelers in your prep area, and so on. It just makes sense.
Get Your Drawers in Order
Drawers are the go-to spot for most utensils, but we all know how quickly they can turn into a tangled nightmare. Getting your drawers sorted is probably the single biggest win in the kitchen organization game.
Here are the workhorses of drawer organization:
- Adjustable Drawer Dividers: These are a game-changer for creating order out of chaos. I prefer bamboo or sturdy plastic ones with tension springs that lock them into place. They’re perfect for creating long, clean channels for spatulas, whisks, and big serving spoons, stopping them from sliding into a jumbled mess at the back of the drawer.
- Modular Tray Inserts: These are a totally different beast. Instead of one big organizer, you get a set of small, individual trays that often interlock. This lets you build a completely custom layout for those small, awkward gadgets—the garlic press, the can opener, the collection of wine stoppers. You can literally create a perfect little home for everything, which is the ultimate way to defeat the dreaded "junk drawer."
And when you're thinking about upgrading your tools, it helps to know what makes for the best flatware sets for everyday use. Choosing durable, well-made items from the start makes organizing them that much easier down the road.
Make the Most of Countertop and Vertical Space
For the tools you reach for over and over, having them out and accessible is key. This is where countertop and wall-mounted storage really prove their worth, especially if you're short on drawer space.
A Countertop Utensil Crock is a classic for a good reason. It keeps your go-to tools—tongs, ladles, wooden spoons—standing at attention right next to the stove. For a serious upgrade, look into a sturdy rotating utensil holder like the one from Cooler Kitchen. The weighted base means it won't tip over when you grab a heavy ladle, and the spin function makes finding the right tool a breeze. Check it out here: https://www.coolerkitchen.com/products/cooler-kitchen-extra-large-and-sturdy-rotating-utensil-holder-caddy-with-sturdy-no-tip-weighted-base-removable-divider-and-gripped-insert-metal-rust-proof-and-dishwasher-safe
Magnetic Knife Strips are probably my favorite space-saving hack. Mounting your knives on the wall gets that clunky block off your counter, instantly freeing up prime real estate. It also keeps sharp blades away from little hands and lets you see exactly which knife you’re grabbing.
Don't forget your walls. In a small kitchen, vertical space is gold. Using it well can literally double your storage without taking up an inch of your precious counter.
Wall-Mounted Rail Systems with S-hooks are another brilliant move. You can hang whisks, sieves, and spatulas, clearing out an entire drawer in one go. Some systems even have little baskets you can attach for holding spices or a bottle of olive oil.
To help you decide what’s best for your space, here’s a quick comparison of the most common storage solutions.
Utensil Storage Options Compared
| Storage Solution | Best For | Space Impact | Key Benefit |
|---|---|---|---|
| Drawer Dividers | Grouping similar items like spatulas, whisks, and flatware. | Low (uses existing drawer space). | Creates custom, neat compartments. |
| Countertop Crocks | Frequently used tools needed by the stove. | Medium (takes up counter space). | Quick, easy access while cooking. |
| Magnetic Strips | Knives and other metal utensils. | Low (uses wall space). | Frees up counter space; keeps knives sharp. |
| Wall Rails/Pegboards | Bulky or awkwardly shaped items. | Low (uses wall space). | Highly flexible and customizable. |
Each option has its place, and the best setups often use a combination of two or three of these to create a truly functional kitchen.
The Ultimate Flexible Fix: Pegboards
If you love a setup you can change on a whim, nothing beats a pegboard. They’re not just for garages anymore; pegboards have become a stylish and seriously practical addition to modern kitchens.
Their real magic is in their complete versatility. You can arrange hooks, shelves, and small baskets in any configuration you dream up. This makes them perfect for storing all those awkwardly shaped tools that just don’t fit in a drawer—think immersion blenders, spider strainers, or that sprawling collection of cookie cutters.
As your kitchen arsenal grows or changes, you just move the hooks around. It's a living system that adapts with you. A well-styled pegboard doesn't just store your tools; it displays them, turning your favorite utensils into a piece of functional art.
Keeping Your Organized Kitchen for the Long Haul
You’ve put in the work—you’ve sorted, purged, and found a home for every single utensil. That feels great, but the real win is making it last. The good news is, staying organized isn't about constant, stressful cleaning. It’s about building a few smart habits that make tidiness feel automatic.
The whole idea is to create systems so simple they become second nature. Forget about those massive weekend clean-up projects. Instead, think of it as performing tiny, everyday resets that stop the clutter from ever creeping back in. This way, keeping your utensils organized shifts from a one-time project to just... the way your kitchen works.
Make Smart Habits Your New Default
Lasting order comes from small, consistent actions, not grand gestures. By weaving a few simple rules into your daily routine, you can head off clutter before it even has a chance to start. Think of these less as chores and more as clever shortcuts to a kitchen that’s always ready for you.
A fantastic place to start is the “one-in, one-out” rule. It’s as simple as it sounds: for every new kitchen tool that comes through the door, an old one has to leave. Just treated yourself to a sleek new silicone spatula? Great. Now it’s time to say goodbye to that old, half-melted one hiding in the back of the drawer. This one habit is your single best defense against the slow, silent takeover of duplicate gadgets.
Another game-changer is the “clean as you go” method. I know, it sounds like something your grandma would say, but it works. Instead of letting every pot, pan, and utensil pile up, take a spare 30 seconds to wash a bowl or put an ingredient back in the pantry while the onions are sautéing. This simple shift prevents that dreaded mountain of dishes after a meal and keeps your cooking zones clear and ready for the next step.
The 5-Minute Monthly Check-In
Even the most perfect system can drift a little over time. That’s where the 5-Minute Monthly Reset comes in. It’s a quick, totally painless way to keep everything on track. Once a month, just set a timer for five minutes and give your utensil drawers and holders a quick once-over.
- Put Strays Away: Notice a whisk in the spatula crock? Move it back to its proper home.
- Quick Wipe-Down: Give your drawer dividers and countertop holders a fast wipe to get rid of crumbs and dust.
- Spot the Clutter Creep: See any areas that are starting to look a little crowded? This is your chance to fix it before it becomes a real mess.
This isn’t about deep cleaning. It's a high-speed tune-up that reinforces your system and stops small issues from becoming big ones. You'll be amazed at what just five minutes of focused attention can do.
Maintaining an organized kitchen is less about perfection and more about consistency. Small, regular actions are far more effective than massive, infrequent overhauls. A tidy space becomes the easy choice, not the hard one.
Get Everyone on the Same Page
For your system to really stick, everyone living in the house has to be on board. The only way that happens is if the system is so obvious and easy to follow that it requires zero thought.
- Label It: Simple, clear labels on drawer organizers or shelves can be a lifesaver, especially for items that could be confusing. It completely removes the guesswork for the rest of the family.
- Give a Tour: When you first set everything up, walk your family through the new layout. Explain why the spatulas are in the drawer right next to the stove. When people understand the logic behind the system, they’re way more likely to stick with it.
- Create Kid-Friendly Zones: If you have kids, give them their own space. A low, easy-to-reach drawer with their kid-safe plates, cups, and utensils empowers them to grab what they need and—more importantly—put it away correctly. It also keeps little hands out of your main work areas.
When the whole household knows where things live, keeping things tidy becomes a shared, almost unconscious, habit. It’s this team effort that ensures your beautifully organized kitchen stays that way, making life a little easier for everyone.
Got Questions? Let's Troubleshoot Your Utensil Organization
Even the best-laid plans can hit a snag. What if you have a kitchen the size of a closet? Or a “junk drawer” that’s more like a black hole for kitchen gadgets? It’s these specific challenges that often trip us up.
Let's dive into some of the most common organizing hurdles. Think of this as the troubleshooting section of your project, with practical answers to get you unstuck and back to creating a kitchen that actually works for you.
How Do I Organize Utensils In a Tiny Kitchen?
When you’re short on space, especially drawer space, you have to change your perspective. Think vertically. Your walls are your most valuable, untapped real estate. The mission is to get everything you can off the counter without hiding it away.
I've found a multi-pronged approach works best. Start with a magnetic knife strip. It’s amazing how much prep space you reclaim just by ditching that clunky knife block. Plus, your knives are right there, easy to see and grab.
Next, a wall-mounted rail with S-hooks is a game-changer for those larger, awkward tools you use all the time:
- Ladles and serving spoons
- Spatulas and fish turners
- Whisks and tongs
That one simple rail can honestly empty an entire drawer. For everything else, a solid countertop crock is non-negotiable. Find one with a heavy, stable base that won’t tip over when you yank out a spoon. Some even have dividers, which is a nice bonus. This combination of wall and countertop storage keeps your go-to tools handy without eating up that precious workspace.
Tackling the Dreaded Junk Drawer of Gadgets
We all have one. That drawer. The chaotic mess of single-purpose kitchen gadgets. Taming it really comes down to two things: being ruthless about decluttering and then getting hyper-specific with dividers.
First, dump the entire drawer out. Go through it piece by piece, using the audit method we talked about earlier. Be honest with yourself. When was the last time you really used that avocado slicer? A good knife does the job just fine. If you haven't touched a gadget in a year, it doesn't deserve to live in your kitchen.
A gadget's purpose is to make a task easier, not to create clutter. If a tool causes more organizational stress than it solves, it hasn't earned its spot.
Once you’ve whittled it down to the keepers, invest in some adjustable or interlocking modular drawer dividers. These are so much better than those pre-molded trays. They let you create tiny, custom-fit homes for every single item.
- A small slot just for the wine opener.
- A dedicated section for your measuring spoons.
- A tiny compartment for those pesky bag clips.
Giving every gadget its own designated spot is the only way to stop them from becoming a tangled mess. It’s a beautiful thing when you can open a drawer and see everything at a glance.
Creating a Safe and Kid-Friendly System
Getting kids involved in the kitchen is wonderful, but it definitely requires a new organizational strategy—one that’s safe for them and doesn't get completely undone every day. The trick is to create a dedicated, low-access "kid zone."
Pick a low drawer or a sturdy, non-tipping countertop container that is just for their stuff. Fill it with tools they can safely handle: silicone spatulas, nylon whisks, plastic measuring cups, and their own colorful plates and cutlery. It gives them a real sense of ownership and makes them feel like they have their own special gear.
To help them learn where everything goes, use visual cues. Color-coding or simple picture labels work wonders. It turns cleanup into a matching game they can actually win.
Of course, safety is paramount. Anything sharp, heavy, or hazardous needs to be stored completely out of their reach.
- Knives: A high, wall-mounted magnetic strip is perfect.
- Heavy Items: Store heavy pots and cast iron pans on low, deep shelves where they can't be pulled down.
- Sharp Tools: Any drawer with peelers, graters, or microplanes should have a childproof latch.
By creating this clear separation between "your tools" and "their tools," you can nurture their curiosity in the kitchen without sacrificing your sanity or your beautifully organized system.
At Cooler Kitchen, we know that an organized kitchen is a happy kitchen. Our thoughtfully designed tools, from sturdy rotating utensil holders to space-saving cutting board sets, are made to bring a little more ease and joy to your daily routine.
Discover the tools that will complete your newly organized kitchen at Cooler Kitchen.