
A Guide on How to Store Fruits for Maximum Freshness
Deciding where to store your fruit can feel like a bit of a kitchen mystery, but it doesn't have to be. The golden rule is refreshingly simple: if a fruit needs to ripen, leave it on the counter. Once it's ripe—or if it's a delicate item like a berry—it belongs in the fridge.
Getting this one decision right is the single biggest step you can take to extend the life of your groceries, making sure everything tastes just as it should.
The Great Debate Counter vs Fridge
Figuring out whether to use the counter or the fridge is your first move toward cutting down on food waste and enjoying your fruit at its absolute best. It all boils down to one simple concept: ripening.
Some fruits, like avocados, peaches, and bananas, are picked before they're fully ripe and continue the process right in your kitchen. If you stick them in the fridge too soon, you hit the brakes on that ripening process. The result? A rock-hard peach or a flavorless, mealy avocado. Nobody wants that.
Think of your countertop as a ripening station. It provides the ideal environment for these "climacteric" fruits to develop their natural sugars and soften to perfection. An unripe, green-tinged banana left on the counter will slowly transform into the sweet, yellow fruit you're looking forward to. Put it in the fridge prematurely, and the peel might turn black, but the inside will never get any sweeter.
When the Fridge Is Your Best Friend
On the flip side, the refrigerator acts like a pause button. For fruits that are already perfectly ripe, or for delicate items that don't ripen after being picked (like berries and grapes), the cold is your secret weapon. These fruits don't get any better once they leave the vine; they just start to spoil.
Refrigeration slows down the natural decay process, keeping things like mold growth and moisture loss at bay. A pint of fresh raspberries left on the counter can get fuzzy and sad in just a day, but it’ll stay fresh and delicious for several days in the cool, stable environment of your fridge.
Key Takeaway: It’s not just about preventing rot; it’s about preserving flavor and texture. The counter is for developing flavor, while the fridge is for preserving it.
This little decision tree makes it super clear when to choose the counter and when to head for the fridge.
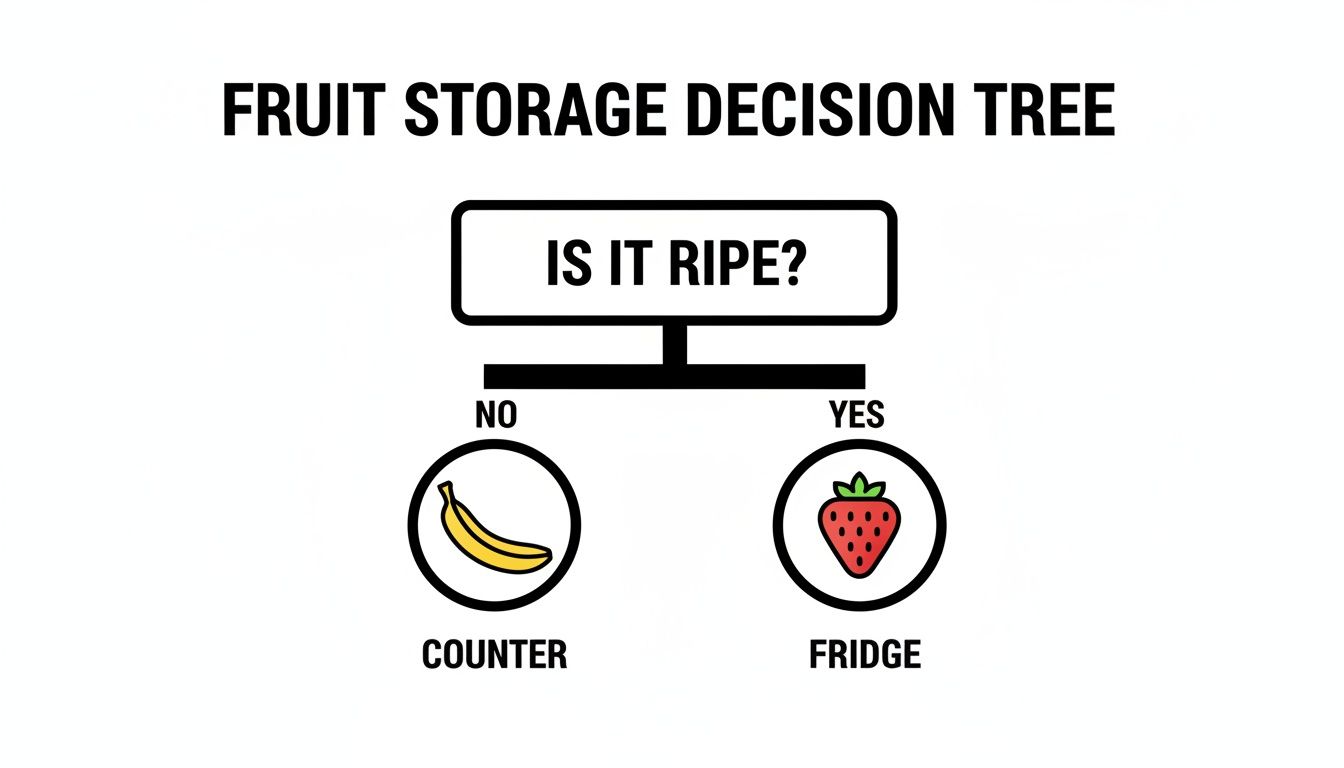
The image really drives home the point: check how ripe your fruit is first. That simple check will guide your storage choice and make a huge difference in both taste and how long it lasts.
To help you get it right every time, here's a quick cheat sheet.
Quick Guide Where to Store Your Fruits
| Fruit Type | Store on Countertop (To Ripen) | Move to Fridge (Once Ripe) | Store in Fridge Immediately |
|---|---|---|---|
| Apples | ✓ | ||
| Apricots | ✓ | ✓ | |
| Avocados | ✓ | ✓ | |
| Bananas | ✓ | ✓ (peel will brown) | |
| Berries | ✓ (do not wash until use) | ||
| Cherries | ✓ | ||
| Citrus | ✓ (for a few days) | ✓ (for longer life) | |
| Grapes | ✓ | ||
| Kiwi | ✓ | ✓ | |
| Melons | ✓ (whole) | ✓ (cut) | |
| Peaches | ✓ | ✓ | |
| Pears | ✓ | ✓ | |
| Pineapple | ✓ (whole) | ✓ (cut) | |
| Plums | ✓ | ✓ | |
| Tomatoes | ✓ | ✓ (use quickly) |
This table takes the guesswork out of it. Just find your fruit and you'll know exactly where it should live in your kitchen.
The Science Behind the Chill
The impact of proper storage is huge. On a global scale, a staggering 20-60% of fruits are lost post-harvest, often because they weren't stored correctly. Commercial cold storage works by slowing down respiration rates, ethylene production, and water loss—the very things that cause spoilage. Peaches, for example, might only last 14 days in basic cold storage, but that lifespan can double to 28 days with the right packaging and temperature controls.
You can apply these same ideas at home. Use ventilated containers or crisper drawers, and try to dial in the temperature. Citrus fruits, for instance, are happiest around 8-10°C, whereas delicate berries prefer a much colder 0°C with high humidity. For those who rely on the fridge, a few good fridge organization ideas can make a world of difference in preserving your produce.
This initial decision—counter or fridge—also brings up another key player you'll need to manage: ethylene gas. Many fruits you ripen on the counter, like apples and bananas, release this natural gas, which acts as a ripening agent and can cause other nearby produce to spoil much faster. Storing them in the right place from the start is your first line of defense.
And just as you separate your fruits, don't forget that fresh herbs have their own set of rules. You can learn all about them in our guide on the best way to store fresh herbs. Knowing where everything goes is the foundation of a kitchen that wastes less and tastes better.
Mastering the Art of Fruit Ripening

Controlling when your fruit hits that perfect peak of ripeness isn't some secret kitchen magic. It’s a simple skill that puts you in charge, helping you slash food waste and enjoy incredible flavor. Once you understand a few basics, you can either hit the accelerator or gently pump the brakes on the whole process to fit your schedule.
This is how you make sure that avocado is ready for tonight’s tacos or get those bananas to last until the weekend. It really just comes down to managing temperature, air, and the fruit’s own natural ripening hormone, ethylene gas.
How to Speed Up Ripening
We've all been there—a bunch of stubbornly firm peaches or an avocado that feels more like a rock. Instead of just waiting and hoping, you can create the perfect little environment to encourage them to soften and sweeten up on your timeline.
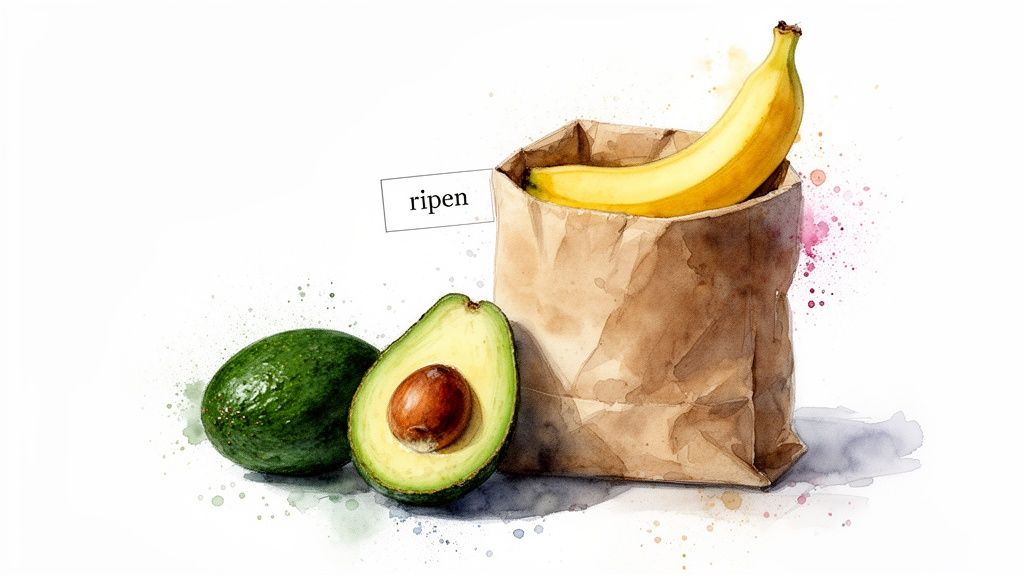
The secret? Trapping the ethylene gas that many fruits release as they ripen.
A simple paper bag is your best friend here. Just pop your unripe fruit inside, and you've created a mini ripening chamber. The bag traps the ethylene, concentrating it right around the fruit and kicking the process into high gear.
If you really need to move things along, add an apple or a banana to the bag. These are ethylene-producing powerhouses, and their presence will get those other fruits ripe in record time.
Pro Tip: Whatever you do, don't use a plastic bag. Unlike paper, plastic traps moisture right along with the gas, creating a breeding ground for mold. You'll end up with ruined fruit before it even has a chance to ripen.
This trick works wonders for:
- Avocados: Go from hard to perfectly creamy in a day or two.
- Peaches and Plums: Helps them get soft, juicy, and ready to eat.
- Pears: Lose that grainy texture and become melt-in-your-mouth sweet.
- Tomatoes: Deepen their color and develop a much richer flavor right on your counter.
Just be sure to check on them daily. Once they give a little to gentle pressure and smell fragrant, they're ready to enjoy or move to the fridge.
How to Slow Down Ripening
Just as you can speed things up, you can also put them on pause. The best way to delay ripening is to separate your fruits and give them plenty of breathing room. This prevents a buildup of ethylene gas and stops one super-ripe fruit from starting a chain reaction in the entire bowl.
For most fruits that have already hit their sweet spot, the refrigerator is the ultimate pause button. The cold air dramatically slows down both ethylene production and the enzymes that cause decay. It's why a ripe pear can last for days in the fridge but would turn to mush on the counter in no time.
Even citrus fruits like oranges and lemons, which are fine in a bowl for a few days, will last much longer—up to three or four weeks—in the fridge.
The Role of Your Crisper Drawer
That crisper drawer in your fridge is more than just a bin; it’s a high-tech tool for produce. These drawers are specifically designed to maintain higher humidity than the rest of the fridge, which is key to keeping fruits and veggies from drying out and shriveling up.
Many crisper drawers even have an adjustable vent. Here’s a simple way to remember how to use it:
- Closed Vent: This setting traps humidity, making it perfect for leafy greens and vegetables prone to wilting.
- Open Vent: This allows ethylene gas to escape and air to circulate. It's the better choice for fruits that rot easily from too much moisture, like apples, grapes, and pears.
By getting the hang of these simple tools—a paper bag, your fridge, and its crisper—you can truly master fruit ripening. You'll not only get the best taste and texture but also save money by keeping good food from going to waste.
Understanding Ethylene Gas: Your Fruit's Friend or Foe
Have you ever noticed how a bunch of bananas can make everything else in the fruit bowl go bad overnight? The invisible culprit is a natural plant hormone called ethylene gas. It’s completely odorless and harmless, but it’s the single most important factor in how your fruits ripen—and spoil.
Learning to manage ethylene is a total game-changer for keeping produce fresh. Some fruits are what I call "producers," constantly emitting this gas, while others are "sensitive," reacting to even the smallest amount.
When you store a producer next to a sensitive item, you're sending a powerful signal to the sensitive fruit: "ripen now!" This is why a single apple can cause a bag of potatoes to sprout, or why your berries seem to go from perfect to past-their-prime when a ripe banana is nearby.
The Big Producers of Ethylene
A handful of common fruits are notorious for pumping out ethylene as they ripen. You'll want to give these guys their own space, unless you're intentionally using them to speed up the ripening of something else.
Here are the most common high-ethylene producers you probably have in your kitchen right now:
- Apples: One of the heaviest hitters. They're fantastic for ripening a hard avocado, but they're a real liability next to your salad greens.
- Bananas: Their ethylene production goes into overdrive as they get more brown spots. A yellow-green banana is mild, but a speckled one is a ripening powerhouse.
- Avocados: They release ethylene as they soften, which is why a few avocados in a bowl tend to ripen all at once.
- Peaches, Plums, and Pears: Most stone fruits are major producers, especially once they become fragrant and give slightly to the touch.
- Tomatoes: That's right—a fruit! And a potent one. Keep them away from your cucumbers and leafy greens unless you want them to yellow fast.
Just knowing this list is half the battle. Isolating these fruits is your first and best defense against premature spoilage.
The Highly Sensitive Produce
On the flip side, you have the fruits and veggies that are extremely sensitive to ethylene. They don't produce much themselves, but they’ll wilt, spot, or decay in a hurry when exposed to it.
A huge part of smart fruit storage is simply protecting the sensitive ones. Keeping them away from ethylene producers can easily add days, sometimes even a week, to their shelf life.
Be extra careful with these ethylene-sensitive items:
- Berries: Fragile strawberries, raspberries, and blueberries will mold and soften in a heartbeat.
- Grapes: Ethylene exposure causes them to loosen from the stem and shrivel up.
- Leafy Greens: Your lettuce, spinach, and kale will wilt and turn yellow far more quickly.
- Broccoli and Cauliflower: They can get yellow spots and lose that fresh-from-the-market crispness.
- Carrots: Ethylene can actually make them develop a bitter flavor over time.
Now that we know who the producers and the sensitive ones are, let's put it all together in a simple guide.
Ethylene Producers vs Ethylene-Sensitive Produce
Knowing which fruits to keep apart is key to preventing spoilage. Think of this table as your cheat sheet for creating a more harmonious (and less wasteful) fruit bowl and fridge.
| High Ethylene-Producing Fruits | Ethylene-Sensitive Fruits & Veggies | Storage Tip |
|---|---|---|
| Apples | Berries, Grapes, Leafy Greens | Keep apples in their own crisper drawer or a bag in the fridge, well away from other produce. |
| Bananas | Avocados (if you want to slow them), Carrots | Let bananas live on the counter by themselves. Never store them in a closed bag or crowded bowl with other fruits. |
| Peaches & Plums | Broccoli, Cauliflower, Cucumbers | Once ripe, move stone fruits to the fridge but give them a separate drawer from your sensitive veggies. |
| Avocados | Asparagus, Sweet Potatoes, Peppers | Store ripe avocados in the fridge. Keep unripe ones on the counter, away from bananas, unless you want them to ripen. |
By mastering the art of ethylene management, you're doing more than just organizing your kitchen. You’re actively fighting food waste, saving money, and making sure every piece of fruit you eat is at its absolute peak.
The Right Way to Wash and Prep Your Fruit
It’s so tempting to wash all your beautiful fruit the moment you get home, but that's actually one of the fastest ways to shorten its life. The number one enemy of fresh fruit, especially delicate berries, is moisture. Washing them too early creates the perfect damp environment for mold and bacteria to throw a party, turning your vibrant produce into a fuzzy disappointment overnight.
The best habit you can get into is surprisingly simple: wash your fruit right before you’re ready to eat or use it. This one little change preserves the natural protective bloom on things like grapes and blueberries and keeps moisture away until the very last second. Adopting this "just-in-time" approach ensures every bite is as fresh as it can possibly be.
Gentle Cleaning for Delicate Fruits
For soft-skinned fruits like raspberries, blueberries, and strawberries, a gentle touch is everything. Blasting them under a powerful tap will only bruise them and damage their fragile structure. A much better way to handle them is a quick, gentle soak.
A popular and effective trick is the diluted vinegar bath. Just mix one part white vinegar with about four parts cool water in a large bowl. Swish the berries around for a minute, then drain them and give them a good rinse with fresh water to get rid of any vinegar taste. This not only cleans them but can also help kill off any lingering mold spores.
Drying is just as important as washing.
- Pat them dry: Gently pat the berries with a clean cloth or a few paper towels.
- Use a salad spinner: For a hands-off method, line a small salad spinner with paper towels and give the berries a few gentle spins to wick away the water.
By minimizing their time in water and ensuring they are completely dry before storing (if you absolutely must wash them ahead of time), you dramatically improve their chances of staying fresh and delicious.
Scrubbing Heartier Produce
Fruits with thicker, tougher skins—think apples, melons, and citrus—can handle a more robust cleaning. These often have wax or a bit of orchard dirt on their surfaces that needs a little more effort to remove.
A soft-bristled vegetable brush is your best friend here. Hold the fruit under cool, running water and give it a gentle but thorough scrub. You don’t need any special soaps or produce washes; clean water and a good scrub are all it takes to remove most surface grime. This is especially important for fruits where you’ll be eating the skin, like apples and pears.
Improper prep and storage are a massive global problem. Post-harvest losses for fruits can reach an astounding 40-50% in some parts of the world, often due to issues that could be fixed with better techniques. Simple things like maintaining low temperatures to slow ethylene production and keeping humidity levels between 90-95% can make a huge difference. You can learn more about the global impact of produce storage from these FAO findings on post-harvest management.
By rethinking how and when you wash your fruit, you're doing more than just making a small tweak to your kitchen routine. You're adopting a core principle of proper fruit storage that directly impacts freshness, flavor, and how long your produce lasts, helping you get the most out of every purchase.
Freezing and Preserving for Long-Term Storage
So, what happens when your garden goes wild and blesses you with an avalanche of berries, or you just can't resist a fantastic sale on peaches? When you have more fruit than you can eat in a week, you need a long-term plan. Freezing is, by far, the easiest and most effective way to lock in that fresh-picked flavor for months. It’s your secret weapon for enjoying vibrant summer smoothies in the dead of winter.
But there’s a right way and a wrong way to do it. Simply tossing a bag of fruit into the freezer often leads to disappointment. We're talking about freezer burn and a giant, icy brick of fruit. The goal is to preserve the flavor, color, and texture, so your frozen fruit is just as delicious as it was the day you bought it.
The Trick to Perfect Frozen Berries
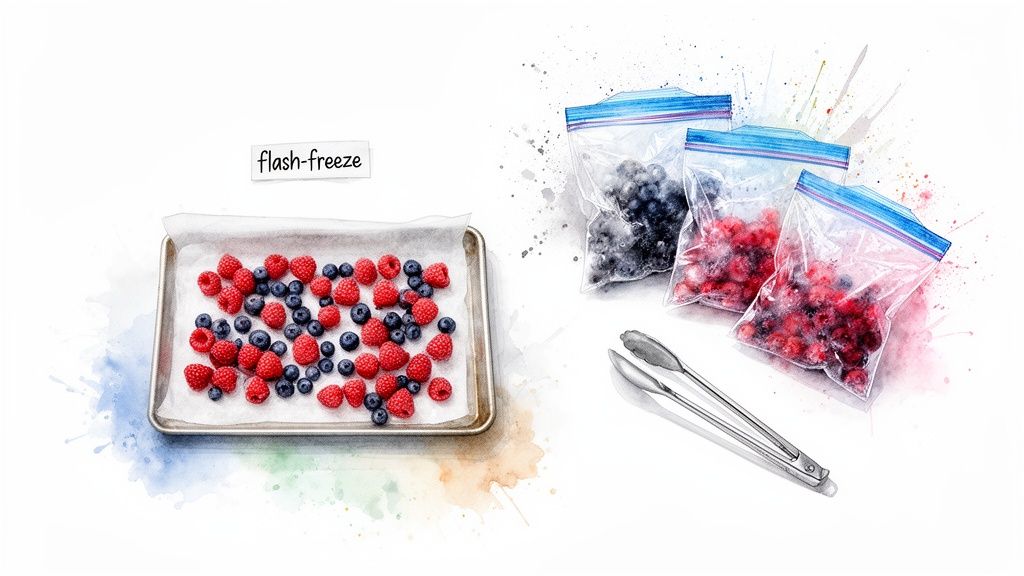
Ever tried to grab a handful of frozen berries only to find they've fused into a solid, impenetrable block? There's a simple technique to prevent this, and it’s called flash-freezing. It ensures every single berry freezes on its own, so you can easily pour out exactly the amount you need.
Here’s my go-to method:
- Wash and Dry, Really Dry: Give your berries a gentle rinse, but the critical part is patting them completely dry. Any lingering water is what creates those pesky ice crystals.
- Give Them Space: Spread the berries out on a baking sheet lined with parchment paper. Try to make sure they aren't touching.
- The Quick Freeze: Pop that baking sheet into the freezer for an hour or two. You want them frozen solid.
- Bag Them Up: Once they're firm, you can transfer the berries into a labeled, airtight freezer bag or container. They’ll stay separate and ready to use.
This works like a charm for strawberries, blueberries, raspberries, and blackberries. They'll be perfect for dropping into oatmeal, smoothies, or muffin batter.
Prepping Larger Fruits for the Freezer
For bigger fruits like peaches, apples, and mangoes, a little extra prep work goes a long way in keeping them looking and tasting great.
I always start by peeling, coring, and slicing the fruit into even pieces. Some fruits, especially apples and peaches, tend to turn an unappetizing brown. To stop this, you can toss them in a simple solution of water mixed with a little lemon juice or ascorbic acid before they hit the freezer. It makes a world of difference in preserving their color.
Just like with the berries, flash-freeze the slices on a baking sheet first before moving them into your storage containers. When you’re planning on long-term storage, using good quality produce bags can also make a real difference in preventing freezer burn and keeping everything fresh.
Key Takeaway: Think of freezing as hitting the pause button on freshness. Taking a few extra minutes to prep and flash-freeze your fruit prevents ice crystals and freezer burn, guaranteeing it will taste just as good in six months as it did on day one.
Beyond the Freezer: Simple Preservation Ideas
While freezing is my top choice for simplicity, don't forget about other ways to preserve your bounty. Making a quick stovetop jam is one of the most satisfying ways to use up a lot of fruit at once. You don’t need any special canning gear for a small batch you can keep in the fridge—just simmer your fruit with some sugar and a squeeze of lemon juice until it thickens up.
Getting a handle on proper storage, from the counter to the freezer, has a bigger impact than you might think. Globally, up to 50% of all fruits and vegetables are lost or wasted. Cold storage is a powerful tool against this, dramatically slowing down decay. For example, peaches might only last 14 days in standard cold storage, but the right packaging can extend that to 28 days.
And these long-term strategies aren't just for fruit. Many root vegetables and herbs can be preserved, too. If you find yourself with extra ginger, for instance, we have a whole guide on how to store cut ginger root to keep it fresh for as long as possible.
Troubleshooting Common Fruit Storage Problems
We've all been there. You bring home beautiful, perfect-looking fruit from the market, only to find it's a shadow of its former glory a day later. When things go wrong in the fruit bowl or fridge, it's easy to get frustrated.
Let's walk through some of the most common fruit storage headaches. Most of the time, the culprit is something simple like too much moisture or not enough airflow.
Why Are My Berries Always Moldy?
It’s one of the most disheartening kitchen moments: reaching for a carton of fresh berries to find them covered in a fuzzy, white blanket. This almost always comes down to one thing: moisture. Berries have incredibly delicate skin, and any trapped water is an open invitation for mold to set up shop.
There's a simple, two-part fix. First, hold off on washing your berries until right before you eat them. Second, give them some room to breathe. The vented plastic clamshell they come in is a decent start, but for even better results, transfer them to an airtight container lined with a paper towel. This will soak up any condensation and keep them fresh.
Solving Mealy Apples and Pears
Have you ever bitten into an apple, expecting that signature crisp snap, but instead got a mouthful of soft, grainy mush? That mealy texture is a classic sign of improper storage, specifically keeping them at the wrong temperature. When apples sit in a warm spot on the counter for too long, their internal structure breaks down fast.
Apples and pears are happiest in a cold, slightly humid environment.
- Keep them cold: Your fridge’s crisper drawer is their ideal home.
- Add a little humidity: Drape a damp paper towel over them inside the bag to help maintain the perfect moisture level.
Storing them this way keeps that satisfying crunch for weeks, not just days.
What to Do with Shriveled Grapes and Citrus
When your grapes or citrus fruits start looking wrinkled and sad, they're losing a battle with dehydration. The dry, circulating air inside your refrigerator is great for preventing mold but can suck the moisture right out of thin-skinned fruits.
Key Insight: The trick is to strike a balance between airflow and humidity. Storing grapes in a vented bag in the crisper drawer is the sweet spot. It lets ethylene gas escape while holding in just enough moisture to keep them plump.
For lemons, limes, and oranges, the crisper drawer is also a game-changer. They'll last for three or four weeks in there, a huge leap from just a few days on the counter.
Don't Throw It Out: Give It a Second Life
Even with the best storage habits, some fruit will inevitably get a little past its prime. But "slightly overripe" is a far cry from "garbage." This is where you can get creative and cut down on food waste.
- Mushy Bananas: These are a baker's dream! They're practically begging to be mashed into a loaf of banana bread.
- Soft Berries: Perfect for blending into a smoothie or simmering into a quick compote to top your morning yogurt or pancakes.
- Wrinkled Apples: Don’t toss them. Chop them up and cook them down into a batch of delicious, homemade applesauce.
Finding a new purpose for imperfect fruit saves you money and ensures nothing goes to waste. For the peels and scraps you can't use, composting is an amazing, eco-friendly solution. You can learn the ropes with our guide on how to compost at home.
Got More Questions About Storing Fruit?
Even the most seasoned home cook runs into tricky situations with produce. Let's tackle some of the most common questions that pop up.
How Do I Get Rid of Fruit Flies?
Ugh, fruit flies. They seem to appear out of nowhere, drawn by the sweet smell of ripening fruit. The best way to prevent them is to stash ripe fruit in the fridge and toss anything that's past its prime.
If they've already moved in, you can make a simple but effective trap. Pour a little apple cider vinegar into a small jar, add a single drop of dish soap, and cover the top with plastic wrap. Just poke a few small holes in the plastic, and the flies will find their way in but won't be able to get back out.
Can I Put Fruit Back in the Fridge After It's Been Sitting Out?
You sure can, but there's a small catch. If you left a handful of grapes or a peach on the counter for a couple of hours, it's totally fine to pop it back in the fridge.
Just know that this back-and-forth temperature change can make the texture a little less crisp and might knock a day or two off its total shelf life. A good rule of thumb is to only take out what you think you'll eat.
Does Soaking Cut Fruit in Water Actually Work?
For certain fruits, it's a fantastic trick! Sliced apples and pears, for instance, will stay fresh and white if you submerge them in cold water with a little lemon juice. It's my go-to move when I'm prepping a fruit salad ahead of time.
This method doesn't work for everything, though. Softer fruits like berries or cut melon will just get waterlogged and mushy.
One Last Pro Tip: Never store fruits and vegetables in the same crisper drawer. Many fruits, like apples and bananas, release a surprising amount of ethylene gas, which acts like a fast-forward button for ripening and can make your veggies spoil much quicker. Separating them is a tiny change that makes a huge difference.
At Cooler Kitchen, we're obsessed with creating smart, efficient tools that help you waste less and enjoy more. Check out our collection of thoughtful kitchenware designed to keep your food fresh and bring a little more joy to your cooking. Find your next kitchen essential at https://www.coolerkitchen.com.