
How to Clean a Wood Cutting Board for a Safer Kitchen
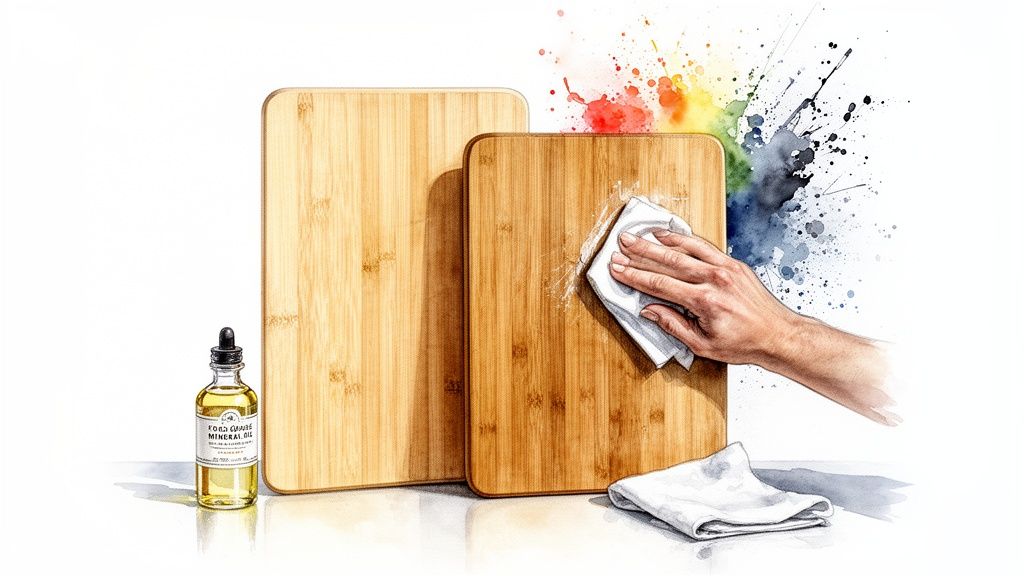
Your wooden cutting board is a workhorse in the kitchen, but it needs a little TLC to stay in top shape. The golden rule is simple: hand wash with hot, soapy water right after you're done chopping.
Whatever you do, never put it in the dishwasher. The intense heat and prolonged water exposure will cause the wood to warp, split, and crack in no time. Soaking it in the sink is just as bad. For a deeper clean that sanitizes without harsh chemicals, you can’t go wrong with natural pantry staples like lemon, salt, or vinegar.
Why Proper Wood Cutting Board Care Matters
A well-maintained wooden cutting board isn't just a pretty piece of kitchen decor; it’s a critical tool for safe and hygienic cooking. Knowing how to properly clean it goes way beyond a quick rinse under the tap. It's about establishing a routine that protects your health and extends the life of your board for years to come. Whether you have a classic maple, a rich walnut, or a durable bamboo board, wood has fantastic properties for food prep, but only if you care for it the right way.
The Surprising Science of Wood vs. Plastic
For a long time, the common wisdom was that plastic cutting boards were the cleaner, safer choice. It turns out, that's not quite the full story. Research has shown that wood's porous surface is actually a secret weapon for hygiene. When you wash a wooden board, bacteria get pulled down into the wood fibers. As the board dries, they become trapped and die off.
Plastic boards, on the other hand, develop deep grooves from knife cuts. These tiny canyons are the perfect hiding spot for moisture and bacteria, making them notoriously difficult to sanitize completely.
I've created this guide to give you total confidence in your cleaning routine. We'll walk through everything you need to know:
- The essential daily cleaning steps to prevent cross-contamination.
- Monthly deep-cleaning and sanitizing rituals for ultimate peace of mind.
- Tricks to lift stubborn stains from things like berries and banish lingering odors from garlic or onions.
- The crucial oiling process that keeps the wood hydrated and prevents it from cracking.
A clean cutting board is non-negotiable for food safety. The methods here are simple, effective, and designed to protect your board's natural integrity using ingredients you probably already have in your kitchen.
Keeping harsh chemicals away from a surface where you prepare food is always a good idea. To learn more, you can explore various all natural cleaning methods that are tough on grime but gentle on wood. By making these practices a habit, you’ll keep your board beautiful and truly clean for all your culinary adventures.
The Essential Daily Cleaning Routine
Taking care of a wood cutting board is all about building a simple habit. Forget complicated routines; this is something that should take you less than two minutes after you're done chopping. This quick cleanup is your best defense against bacteria and cross-contamination, stopping problems before they even start.
I like to think of a good wood board the same way I think of my favorite cast-iron pan. You'd never dream of putting cast iron in the dishwasher or leaving it to soak in a sink full of water, right? The same logic applies here. Wood is a natural, porous material, and water is its biggest enemy.
The Right Way to Wash Your Board
The best time to clean your board is right after you use it. Don't let it sit out on the counter covered in food scraps. That’s just an invitation for bacteria to grow and for juices to soak deep into the wood grain.
Take it straight to the sink and use hot water. The heat is great for cutting through any fats or oils left behind from meats or vegetables. Grab a mild dish soap—anything too harsh will strip the wood's natural oils and undo all your hard work seasoning it. A few drops are plenty.
With a soft sponge or a dish brush, gently scrub the entire surface. I always tell people to clean both sides, all the edges, and even the handle. It's a step people often forget, but cleaning both sides ensures the board absorbs and releases moisture evenly, which is key to preventing warping. For a deeper dive into cleaning techniques, our guide on how to hand wash dishes has some great pointers.
Rinsing and Why Immediate Drying Is a Must
After a good scrub, give the board a thorough rinse under hot water. You want to make sure you get all the soap off, as any residue left behind can dry out the wood.
Now, here’s the most important part of the whole process: you have to dry it immediately. I can't stress this enough. Water causes the wood fibers to swell up, which leads to warping, bending, and eventually, ugly cracks that can ruin your board for good.
Let me be perfectly clear: Never, ever put a wood cutting board in the dishwasher. Don't leave it to soak in the sink, either. The combination of intense heat and a long bath in water will destroy it, often causing it to split right down the seams. It's the fastest way to turn a beautiful kitchen tool into firewood.
Grab a clean dish towel and wipe down every single surface. Get the front, the back, and all the edges.
The Best Way to Air Dry Your Board
Once you've towel-dried the board, there's one final step. To let it dry completely, you need air to circulate around all sides at once. The best way to do this is to stand it up on its edge. You can lean it against your backsplash or pop it in a dish rack.
Whatever you do, don't lay it flat on the counter. Laying it flat traps a pocket of moisture underneath, which is not only unhygienic but also causes one side to dry slower than the other—a classic recipe for a warped board.
Once it feels completely dry, it's ready to be put away. That's it. This simple two-minute ritual will keep your board in fantastic shape for years to come.
Deep Cleaning and Sanitizing Your Board
That quick daily wash is great for everyday use, but some jobs call for a deeper clean. After you’ve prepped raw chicken, sliced fish, or handled anything else that could leave behind nasty bacteria, you need to go beyond a simple surface scrub. It’s time to sanitize.
Don't worry, this doesn't mean reaching for the bleach. In fact, you absolutely shouldn't. Chlorine bleach is far too harsh for wood; it will dry it out, cause splintering, and can even warp your board over time. The best tools for the job are probably already in your pantry.
This simple routine is your foundation for a clean board, every single day.
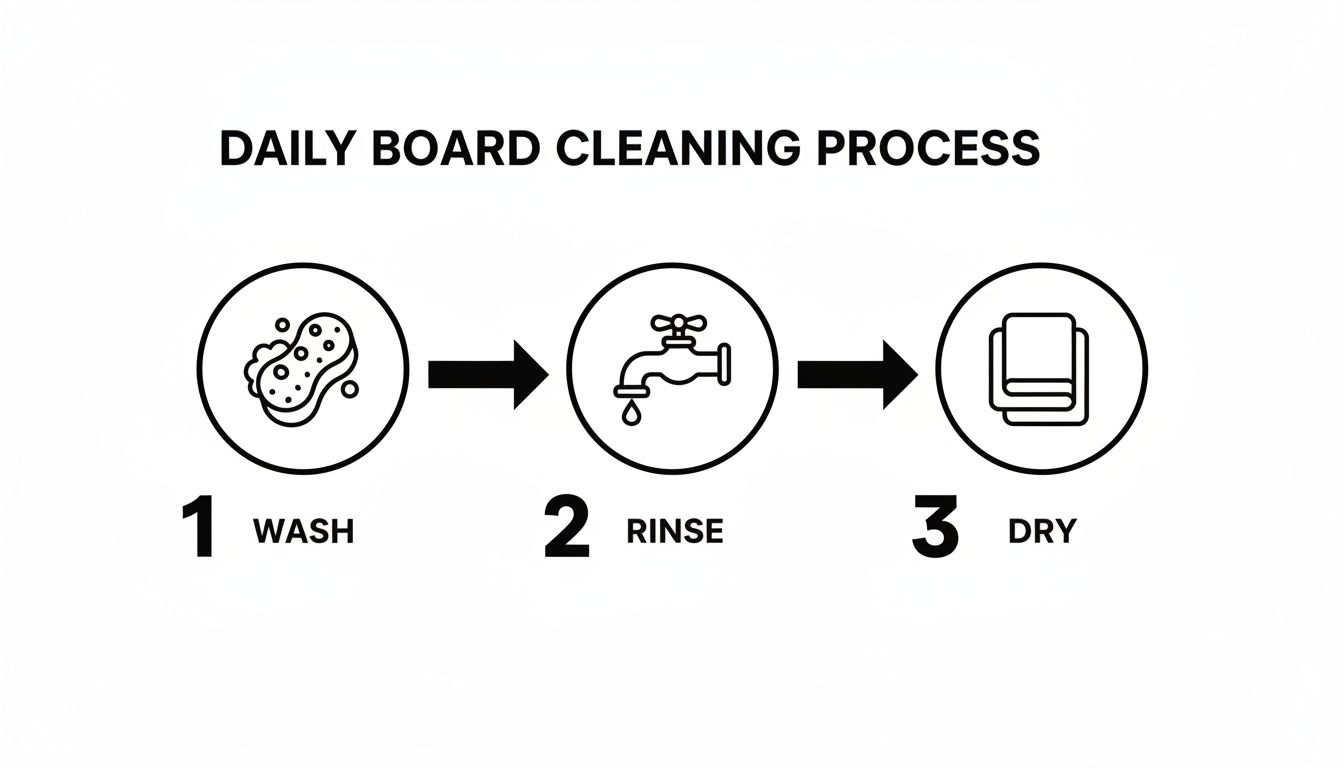
As the graphic shows, it’s a simple wash, rinse, and dry process. That final step—drying it completely—is non-negotiable for keeping your wood healthy.
Natural Sanitizing Methods for Wood Cutting Boards
When it's time for a serious deep clean, especially after dealing with raw meat, you have several fantastic, all-natural options. These methods effectively kill germs without damaging the wood's surface.
| Method | What You Need | How It Works | Best For |
|---|---|---|---|
| Salt & Lemon Scrub | Coarse salt (kosher or sea) and one lemon | The salt acts as a physical abrasive, while the citric acid in the lemon juice works as a natural cleanser and deodorizer. | Removing stubborn food particles, neutralizing strong odors like garlic and onion, and brightening the wood. |
| White Vinegar Spray | Undiluted white vinegar in a spray bottle | The acetic acid in vinegar is a powerful disinfectant that kills common foodborne bacteria like E. coli and Salmonella. | Routine sanitizing after washing, especially after contact with raw meat, poultry, or fish. |
| Baking Soda Paste | Baking soda and a small amount of water | Creates a gentle, slightly alkaline paste that acts as a mild abrasive to lift and absorb stubborn stains from the wood fibers. | Tackling deep-set, colorful stains from berries, beets, wine, or turmeric without scratching the board. |
Each of these pantry staples offers a safe way to keep your board hygienic. They prove you don't need harsh chemicals to get a truly clean and food-safe surface.
The Power of Salt and Lemon for Deodorizing
One of my favorite ways to give a board a "spa treatment" is with coarse salt and half a lemon. It's a fantastic combination that scrubs away particles stuck in knife grooves while completely neutralizing stubborn odors like garlic or onion.
Here’s the rundown:
- Sprinkle generously. Cover the entire dry board with a good layer of coarse salt—kosher or sea salt works perfectly. Don't be shy.
- Scrub with the lemon. Take half a lemon and, using the cut side, scrub the salt into the board in small circles. Squeeze the lemon as you go to release its acidic juice.
- Let it sit. After a thorough scrub, let the salty, lemony mixture sit for about 5-10 minutes. This gives the citric acid time to really do its work.
- Scrape and rinse. Grab a bench scraper or spatula and scrape off the gray, grimy paste. You’ll be surprised at what it lifts! Rinse the board with hot water and dry it immediately and thoroughly.
This process not only deep cleans but also leaves your board looking brighter and smelling incredibly fresh.
Using White Vinegar for Safe Sanitization
When you need to be absolutely sure your board is sanitized, plain old white vinegar is your best friend. Its acetic acid is incredibly effective at killing germs like E. coli and Salmonella but is gentle enough that it won't damage the wood.
After your normal wash and dry, just spritz the board with undiluted white vinegar and let it sit for at least five minutes. This gives the acid time to neutralize any lingering bacteria. Then, wipe it down with a clean, damp cloth, give it a final rinse, and dry it completely.
The vinegar smell might seem strong at first, but it completely disappears once the board is dry. I promise it won't linger or transfer to your food.
It’s pretty incredible how effective these simple methods are. Wood actually gives you a head start in the fight against germs, thanks to its natural antimicrobial properties. One study found a sugar maple board reduced E. coli levels by 99.95% within two hours without any washing at all—a huge difference compared to plastic. While a good scrub with hot, soapy water removes about 98% of surface bacteria, adding that vinegar step can get you up to 99.99%.
Tackling Tough Stains with Baking Soda
For those stubborn stains from beets, berries, or a splash of red wine, a simple baking soda paste works wonders. It's a gentle abrasive that lifts discoloration without scratching the wood.
Just mix a few tablespoons of baking soda with a little water until you have a thick paste. Spread it over the stain and let it sit for 15-20 minutes. Then, gently scrub the area with a soft sponge, rinse everything off, and dry the board well. For more tips on kitchen hygiene, you can explore our guide on how to properly disinfect dishes and surfaces.
Tackling Tough Stains and Lingering Smells
Even if you’re a pro at daily cleaning, some foods just love to leave their mark. A beautiful beet salad can leave a splash of pink, and the ghost of last night's garlic can hang around longer than you'd like. When that happens, a simple wash isn't going to cut it. Your board needs a more targeted approach to bring back its fresh look and neutral scent.
Think of these deep-cleaning tricks as a spa day for your cutting board. They exfoliate, rejuvenate, and tackle the specific problems that soap and water just can't handle. The best part? The most powerful solutions are probably already sitting in your kitchen pantry.
Battle Stains with a Baking Soda Paste
You just finished dicing strawberries for a pie, and now your maple board has a bright red splotch that soap won’t touch. This is a job for baking soda. Its gentle grit is perfect for lifting discoloration out of the wood fibers without causing any scratches.
Making a stain-fighting paste couldn't be easier.
- Mix it up: In a small bowl, add a few tablespoons of baking soda and just enough water to create a thick, spreadable paste—think toothpaste consistency.
- Apply and wait: Slather the paste over the stained area, making sure it’s totally covered. Let it sit for at least 15-20 minutes. For a really stubborn stain, don't be afraid to leave it on even longer.
- Scrub gently: Grab a soft sponge or brush and work the paste into the stain using small, circular motions. You'll feel the paste doing the heavy lifting, pulling the stain right out of the wood.
- Rinse and dry: Wash the board under hot water until all the baking soda is gone. Pat it dry with a towel, then stand it on its edge to let it air dry the rest of the way.
This trick is a lifesaver for colorful stains from berries, turmeric, red wine, and other vibrant ingredients. It's a safe and incredibly effective first step when you’re figuring out how to get your wood cutting board looking new again.
Erase Odors with a Lemon and Salt Scrub
Some smells just don't want to leave. Onions, garlic, and fish, in particular, can embed themselves deep in the wood. You can wash your board five times and still catch a faint whiff the next day. The classic remedy for this is a powerful duo: coarse salt and a fresh lemon.
Here’s why it works so well: the coarse salt acts as an abrasive, scouring out tiny food particles trapped in knife grooves. Meanwhile, the citric acid in the lemon juice works on a chemical level to break down and neutralize the compounds causing the smell. It's a one-two punch that leaves your board smelling fresh and looking brighter.
My go-to trick: I always do this after mincing a lot of garlic. It completely resets the board, leaving it smelling incredibly clean and ready for whatever I'm chopping next—even fruit.
To deodorize your board, start by sprinkling a generous layer of coarse salt (kosher or sea salt is perfect) over the dry surface. Slice a lemon in half and use the cut side to scrub the salt into the wood. Squeeze the lemon as you go to release its juice, creating a slurry that deep cleans as you scrub. Let that mixture sit for about 10 minutes, then scrape it off and give the board a final rinse and a thorough dry.
Prevention is the Best Medicine
Honestly, the easiest way to handle stains and odors is to stop them before they start. A well-oiled cutting board is your best defense, creating a barrier that keeps juices and smells from sinking deep into the wood grain.
Here's a little pro tip: if you know you’re about to chop something notorious for staining, like beets or pomegranates, apply a very light film of food-grade mineral oil right before you start. That tiny bit of prep makes cleanup a breeze and is a key part of keeping your cutting board in great shape for years.
Long-Term Care and Board Maintenance
Daily cleaning and the occasional deep scrub are vital, but the real secret to a cutting board that lasts a lifetime is consistent maintenance. This is what separates a board that cracks and warps in a year from one that becomes a treasured heirloom in your kitchen. It all comes down to keeping the wood conditioned, hydrated, and resilient.
Think of it like caring for your own skin. Without moisture, it gets dry, brittle, and easily damaged. For your board, that "moisture" comes from regular oiling. This simple ritual replenishes the wood's natural oils and creates a protective barrier against water and food juices, preserving its health and beauty for years to come.
The Crucial Role of Oiling Your Board
Oiling is, without a doubt, the single most important thing you can do for your cutting board. A well-oiled board is far more resistant to stains, smells, and, most critically, water. When the wood fibers are saturated with oil, they can’t absorb water—the primary culprit behind warping and splitting.
This protective layer also makes the board easier to clean, since food particles and bacteria struggle to penetrate the surface. A consistent oiling schedule prevents the wood from drying out and developing tiny cracks, which are impossible to clean and can become breeding grounds for germs.
You'll know it's time to re-oil when water stops beading up on the surface or when the wood starts to look dull and faded. If you have a brand-new board, get in the habit of oiling it weekly for the first month. After that, a monthly treatment is usually all it takes to keep it in prime condition.
Choosing the Right Oil is Not Optional
When it comes to oiling, not just any oil will do. The choice you make is critical for both the longevity of your board and your own food safety.
You must use a food-grade mineral oil. This is the industry standard for a reason: it's non-toxic, has no smell or taste, and it will never go rancid. It seeps deep into the wood grain to moisturize and protect from the inside out.
Warning: Never, ever use cooking oils like olive, vegetable, canola, or coconut oil. These organic oils oxidize over time, turning rancid. This will leave your board with a sticky, smelly film that’s a pain to remove and can transfer foul flavors to your food.
Here are your best options for conditioning:
- Food-Grade Mineral Oil: This is your go-to. It’s inexpensive, easy to find, and does the job perfectly. Just make sure the label specifically says "food-grade."
- Specialized Board Creams: These products usually blend mineral oil with natural waxes like beeswax or carnauba wax. The oil penetrates deep, while the wax creates an extra water-resistant seal on the surface.
How to Properly Oil Your Cutting Board
Oiling your board is a simple and almost therapeutic process. The key is to be generous and give the oil plenty of time to soak in.
- Start Clean and Dry: First, make sure your board is completely clean and, more importantly, bone-dry. Oiling a damp board will trap moisture inside, which is exactly what you want to avoid.
- Apply Generously: Pour a liberal amount of food-grade mineral oil directly onto the board. Don't be shy—the wood is thirsty and will drink it right up.
- Spread Evenly: Using a clean, soft cloth or a paper towel, rub the oil into the wood in a circular motion. Get every surface: the top, the bottom, and all the edges.
- Let It Penetrate: This is the most important part. Stand the board on its edge and let it sit for at least 4-6 hours, or even better, overnight. This gives the oil time to work its way deep into the wood fibers.
- Wipe Away Excess: After the board has had its fill, use a clean cloth to buff off any excess oil left on the surface. It should feel smooth and hydrated, not greasy.
These core principles apply to many types of wooden kitchenware. For instance, you can find more detailed instructions if you want to learn how to season a bamboo cutting board, as the process shares many of these fundamental steps.
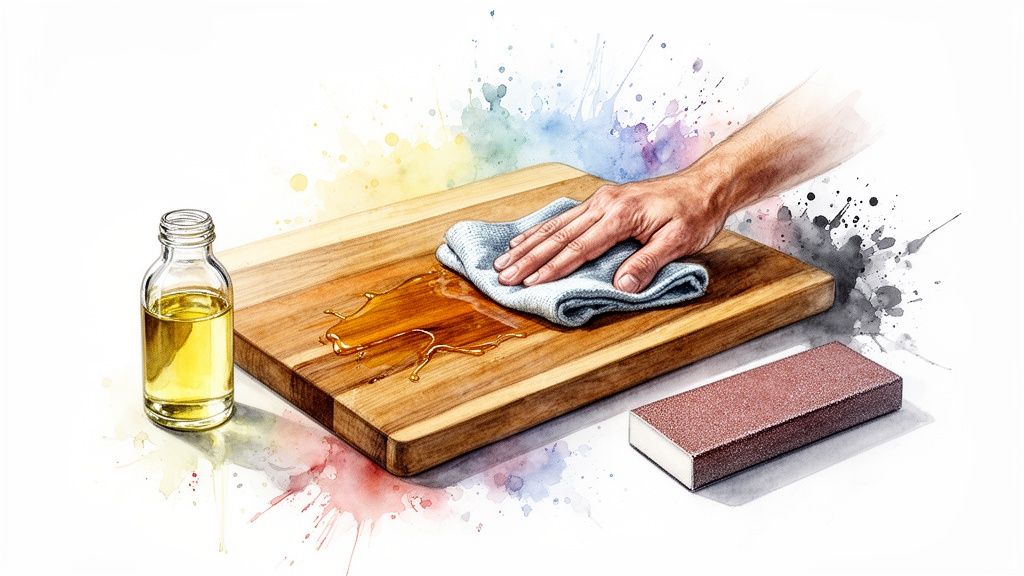
Restoring a Worn Surface with Sanding
Over time, even a well-loved board will show its history with knife marks and fine scratches. When these grooves get deep, they can make the board harder to clean and can trap bacteria. The good news is you can give your board a fresh start with some light sanding.
Sanding erases years of use, creating a silky-smooth, like-new surface that’s much easier to clean and maintain. This isn't a weekly task—think of it as a reset button you press once a year or whenever the surface feels particularly rough.
To restore your board, start with a medium-grit sandpaper (around 120-grit) to smooth out the deeper scores, always moving with the grain of the wood. Follow that up with a fine-grit sandpaper (220-grit or higher) to get that perfectly smooth finish.
After sanding, wipe away every trace of dust with a damp cloth. The wood will now be raw and very thirsty, so it's critical to finish the job with a thorough oiling. Apply at least two generous coats of mineral oil, letting each one soak in for several hours before wiping off the excess. Your board will look and feel brand new.
Common Cutting Board Care Questions
Even when you have a solid cleaning routine down, questions always seem to pop up. Taking care of a wood cutting board can feel like a big responsibility, especially with so much conflicting advice floating around. Let's clear up some of the most common uncertainties so you can feel totally confident looking after your board.
Getting these little details right is what takes a good care routine and makes it great, keeping your board hygienic and beautiful for years to come.
Can I Put My Wood Cutting Board in the Dishwasher?
This is probably the number one question I hear, and the answer is a hard no. Absolutely not. Sending a wood or bamboo cutting board through a dishwasher cycle is the quickest way to destroy it.
The intense, prolonged heat combined with a full-soak cycle forces the wood fibers to swell up and then shrink down too quickly. This violent change causes warping, bending, and cracking—often beyond repair. If your board is made of several pieces of wood glued together, the heat can even dissolve the adhesive, causing it to literally fall apart. Always, always stick to washing by hand.
What Is the Best Oil for My Cutting Board?
The only oil you should ever reach for is food-grade mineral oil. It’s the undisputed champion for conditioning wood kitchenware for a few simple reasons: it's completely non-toxic, tasteless, odorless, and it will never go rancid. It soaks deep into the wood to moisturize and protect it from the inside out.
Board creams or "board butters" that mix mineral oil with beeswax are also a fantastic option. The oil does the deep conditioning, and the wax adds a protective barrier on the surface that helps repel water.
Never use cooking oils like olive, vegetable, coconut, or canola oil. These are organic fats that will oxidize and go rancid over time. This leaves you with a sticky, foul-smelling residue on your board that's a nightmare to remove and can make your food taste off.
How Often Should I Sanitize My Board?
Sanitizing isn't something you need to do every day, unless you’re working with high-risk foods. You must sanitize your cutting board every single time it touches raw meat, poultry, or seafood. This is non-negotiable for preventing dangerous cross-contamination.
For everything else—fruits, veggies, bread, cheese—a good scrub with hot, soapy water right after you're done is perfectly fine. That said, getting into the habit of doing a full deep clean and sanitization with vinegar or a salt scrub every few weeks is a great idea, especially if your board sees a lot of action.
Are Deep Knife Marks on My Board Unsafe?
Yes, deep grooves and heavy knife scores can definitely become a safety concern. These little crevices are tough to get truly clean and can easily trap moisture and food particles, turning into a breeding ground for bacteria. When thinking about the pros and cons of different materials, it helps to see how they handle daily use. For example, a detailed comparison of a Glass Vs Wood Cutting Board can shed light on how each surface deals with wear and tear.
If your board is looking pretty scarred, it’s time for some maintenance. You can bring the surface back to life by sanding it down with fine-grit sandpaper until it's smooth again. Just be sure to sand with the grain of the wood. Afterward, wash off all the dust, let it dry completely, and give it a generous coat of oil to protect the freshly exposed wood.
However, if your board ever develops actual cracks or splits, it’s time to retire it. A crack is impossible to clean properly and creates a serious food safety risk that no amount of scrubbing can solve.
At Cooler Kitchen, we design our bamboo cutting boards to be durable and easy to care for, so you can focus on the joy of cooking. Explore our collection of thoughtfully designed kitchen essentials that make everyday prep simpler and safer. Check out our products at https://www.coolerkitchen.com.