
How to Hand Wash Dishes for a Spotless Kitchen Every Time
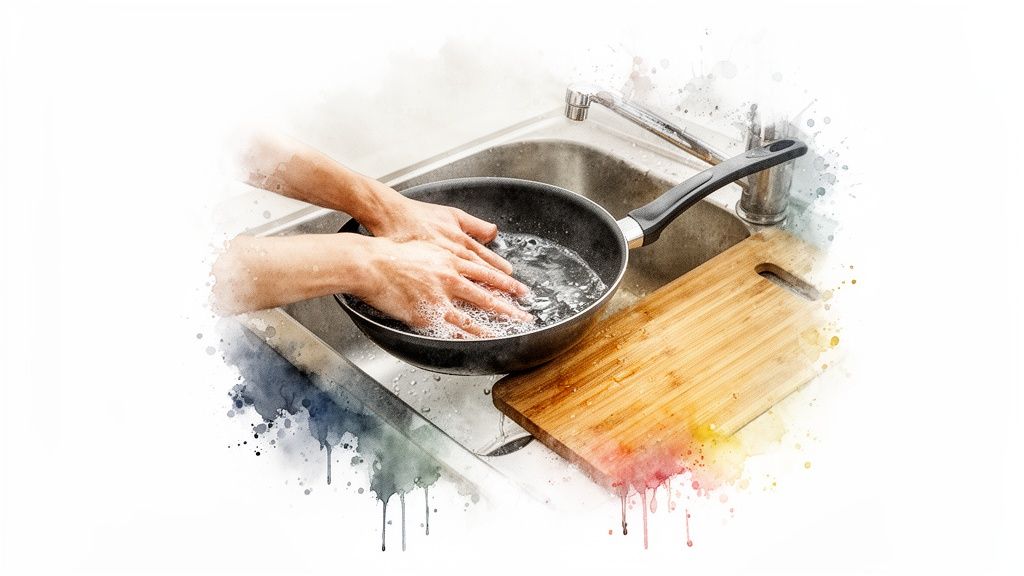
The right way to wash dishes by hand is pretty simple: scrape off leftover food, wash everything in hot, soapy water (starting with the cleanest items first), rinse with clean water, and let it all air dry on a rack. Getting this basic routine down is the secret to a sparkling kitchen.
Why Mastering Hand Washing Still Matters
In a world full of high-tech kitchen gadgets, the thought of washing dishes by hand can feel a bit old-fashioned. But this simple skill is more than just a chore—it’s a fundamental part of taking care of your kitchen tools and can even be a surprisingly calming moment in a hectic day.
Think about it: so many of our favorite kitchen items just can't handle the intense heat and harsh detergents of a dishwasher. Your delicate wine glasses, that razor-sharp chef's knife, and most specialty cookware need a more personal touch.
Hand washing puts you in the driver's seat. You get to protect the hard-earned seasoning on your cast iron skillet, keep the non-stick coating on your pans from peeling, and stop wooden utensils and bamboo cutting boards from splitting or warping.
A Skill for Every Kitchen
Even though the dishwasher market was valued at an impressive USD 7.55 billion in 2023, washing by hand is still the go-to method in countless homes around the globe, especially where kitchen space is at a premium. The skill got a major boost during the COVID-19 pandemic, when U.S. production of sanitizing products shot up by 23% as everyone became more focused on hygiene.
While a high-efficiency dishwasher might win on water usage in some cases, a smart and mindful approach to hand washing can seriously cut down on waste.
At the end of the day, this guide is about more than just getting your dishes clean. It’s about transforming a mundane task into an efficient, effective routine. Once you nail these fundamentals, you’ll not only have a spotless kitchen but also help your favorite cookware last for years to come.
To take your cleaning game to the next level, it’s really helpful to understand the difference between sanitizers and disinfectants. Knowing what each does helps you pick the right products to keep your kitchen truly clean and safe.
Setting Up Your Dishwashing Station
The secret to actually enjoying—or at least, not dreading—doing the dishes has nothing to do with the actual washing. It all starts with how you set up your sink area. A little prep work before your hands even get wet can turn this daily chore from a chaotic mess into a smooth, streamlined process.
Think of it like a chef's mise en place. Before you even think about starting, get the area clear. A sink piled high with dirty dishes and a counter cluttered with mail and coffee mugs is just visual noise that makes the job feel bigger than it is. Take 30 seconds to clear the decks, and you'll find the whole task feels much less overwhelming.
Gather Your Essential Tools
Once you have some breathing room, it’s time to grab your gear. Using the right tools doesn't just get your dishes cleaner; it actually protects them from scratches and damage over time.
- A Scrubber for Every Surface: That one sad, soggy sponge isn't going to cut it. You really need a few different tools. I always keep a soft cloth for wine glasses, a non-abrasive sponge for my everyday plates, and a tough, stiff-bristled brush for getting burnt-on gunk off my cast iron pan.
- A Quality Dish Rack: Letting your dishes air dry is hands-down the most hygienic way to do it. A good dish rack is your best friend here—it allows air to circulate, which prevents those annoying water spots and, more importantly, keeps your countertops from turning into a puddle.
- The Right Dish Soap: Believe me, not all soaps are created equal. Choosing an effective detersive that can cut through grease without stripping your hands raw is a game-changer. Look for a concentrated formula; you'll use less and it'll last longer.
Here’s a pro tip that’s made a huge difference for me: use a spinning utensil caddy to hold your brushes and sponges. It keeps them upright, letting them dry out completely between uses (which prevents that musty smell), and everything is always right where you need it. If you're looking for more ways to get your counter under control, our guide on how to organize kitchen utensils has some great ideas.
Prepare Your Sink for Success
With your tools at the ready, the final step is prepping the sink itself. If you’re lucky enough to have a double-basin sink, you’ve got a built-in system: one side for washing, one for rinsing. Easy.
But if you’re working with a single basin like many of us, don't sweat it. Just grab a separate wash tub or even a large bowl and use that for your rinse water.
Before you turn on the tap, give the sink a quick wipe to get rid of any crumbs or old coffee grounds. Starting with a clean basin means your dishwater stays cleaner longer. A clean, organized setup truly makes the entire workflow faster and, dare I say, a little more pleasant.
The Smart Way to Tackle That Pile of Dishes
Ever feel like you’re just pushing grease around the sink? The secret to truly efficient dishwashing isn’t about scrubbing harder—it’s about working smarter. The order in which you wash your dishes makes all the difference. Get it right, and you'll keep your soapy water clean and effective from the first glass to the last greasy pan.
The guiding principle is simple: go from the least dirty to the most caked-on. This prevents the grease from a frying pan from ending up on your drinking glasses. You end up with cleaner dishes, and you won't have to dump and refill a murky sink halfway through.
Here's a look at the ideal setup. Having a clear workflow makes the whole process smoother.
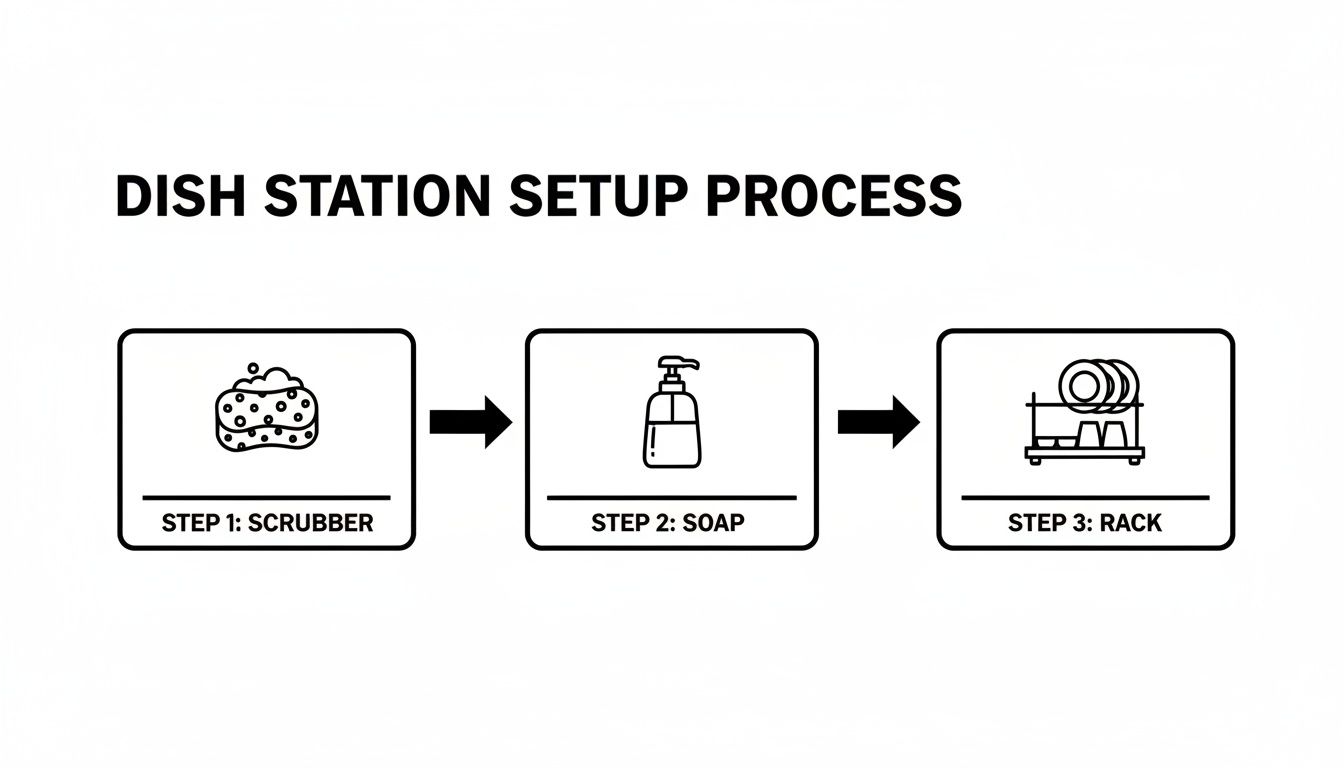
With a good scrubber, quality soap, and a drying rack at the ready, you’re all set for an organized and effective washing session.
A Proven Washing Sequence That Actually Works
Ready to dive in? This is the order I've found works best for keeping the water clean and getting everything sparkling without wasting time or water.
First, Glasses and Cups
Always start with glassware. These items are typically the cleanest and have the least amount of grease. Washing them in fresh, hot, soapy water is the key to getting that streak-free finish. Nobody wants a glass that vaguely smells like last night’s garlic bread.
Next Up: Silverware and Utensils
After the glasses are done, move on to forks, knives, and spoons. They might have a bit more food stuck to them, but they’re still not as greasy as plates or pans. Here's a pro-tip: let them soak in a cup of hot, soapy water while you’re washing the glasses. It gives them a head start and loosens up any dried-on bits.
Then, Plates and Bowls
Now you're ready for the main course—the plates, bowls, and serving dishes. Your dishwater should still be in great shape at this point, giving you plenty of sudsy power to cut through food residue instead of just smearing it around.
Finally, Pots and Pans
Save the messiest for last. This means all your cooking vessels—skillets, saucepans, stockpots, and baking sheets. These are usually coated in oils, fats, and baked-on food. Washing them at the very end ensures their grime doesn't contaminate everything else you just cleaned.
This isn't just a quirky habit; it's a a genuinely effective strategy. Following this order means you'll avoid the dreaded mid-wash sink drain. You’ll get the job done faster while saving a surprising amount of water.
Getting the Water and Soap Just Right
The perfect balance of hot water and dish soap is crucial. You need the water to be hot enough to cut through grease effectively, but not so scorching that it’s uncomfortable. A good rule of thumb is to get it as warm as you can comfortably stand while wearing gloves.
When it comes to soap, a little goes a long way with today's concentrated formulas. Start with just a tablespoon of soap as you fill the sink; that should be enough to create a nice basin of suds. If you notice the suds have vanished before you’re finished, that’s your signal to either add another small squirt of soap or, if the water is really grimy, swap it out for a fresh batch.
The Final Rinse for a Flawless Finish
Your rinsing technique is just as important as your washing one. A proper rinse gets rid of all the soap residue, which can leave a filmy coating on your dishes and even affect the taste of your food.
- The Two-Basin Method: This is the gold standard, especially if you want to conserve water. One sink (or basin) is for hot, soapy washing, and the second is filled with clean water for rinsing. It’s incredibly efficient.
- The Running Tap Method: If you only have one sink, you can rinse each item under a gentle stream of warm water. The key here is to avoid turning the tap on full blast. A small, steady stream is all you need to get the job done without being wasteful.
Making a few smart choices can have a huge impact. For example, scraping dishes well before washing can cut your soap use by 25%, and using a dedicated brush for utensils can slash bacteria by 99.9% compared to a cloth. While a typical family might use 40 gallons of water a day on hand-washing, the two-basin method can cut that down to just 20 gallons. You can learn more about these dishwashing product insights and see how small changes add up. It’s a practical way to make a daily chore a bit more sustainable.
Cleaning Tricky Kitchenware Without Ruining It

Not all dishes are created equal. You can go to town on a ceramic plate, but some of your most beloved kitchen tools need a gentler touch. Using the wrong approach can permanently damage your favorite skillet or warp a beautiful cutting board, so learning the right way to care for different materials is a skill every home cook should have.
This isn't about being overly fussy; it's about protecting your investment and making sure your gear performs at its best for years. A little extra care now pays off big time later.
Preserving Your Cast-Iron Skillet
With cast iron, it's all about the seasoning. That hard-earned, non-stick layer is everything, and your main job is to protect it. Once you're done cooking, let the pan cool down a bit—you don't want it screaming hot, but you don't want it cold either.
Scrub it out with hot water and a stiff-bristled brush or a good pan scraper. If you’ve got stubborn bits stuck on (hello, post-bacon cleanup), a paste made from coarse salt and a splash of water works wonders as a gentle abrasive. The most important rule? Avoid soap whenever possible. It's the fastest way to strip away all that beautiful seasoning you’ve worked so hard to build.
Once it's clean, dry it immediately and thoroughly with a towel. I always pop mine back on a warm burner for a minute just to be sure every last drop of moisture is gone. The final step is to wipe a very thin layer of cooking oil inside the pan, which keeps it protected and ready for next time.
Caring for Non-Stick and Stainless Steel Pans
I love my non-stick pans for eggs and fish, but that coating is delicate. The absolute worst thing you can do is attack it with an abrasive scrubber or metal utensil. You'll scratch the surface, and that coating can start flaking into your food. Not good.
Always stick with a soft sponge or cloth and some warm, soapy water. If you've got food that's really baked on, just fill the pan with soapy water and walk away. A good soak is usually all it takes for the gunk to lift right off.
Stainless steel is a different beast—it's tough, but it can get those weird rainbow-like stains or other discoloration. For that, a simple paste of baking soda and water or a little bit of white vinegar usually does the trick to bring back its original shine.
Cleaning Wooden and Silicone Tools
Anything made of wood, like your favorite bamboo cutting board or wooden spoon, has one major enemy: water. Never, ever let them soak in the sink. Soaking is a surefire way to make them swell, warp, and eventually crack.
Wash wooden items quickly with mild soap and warm water, then dry them immediately and thoroughly with a towel. To keep a bamboo cutting board in top shape, rub it down with a food-grade mineral oil every so often. This keeps it from drying out and creates a nice protective barrier.
Silicone tools are incredibly durable, but they have a knack for picking up stains and smells from things like tomato sauce or curry. If you find your spatula smells like last night’s dinner, you can soak it in a hot water and baking soda solution. For a really deep clean, I'll even pop them in the oven at a low temp (around 250°F or 120°C) for about an hour. It helps bake out any trapped oils and stubborn odors.
Material-Specific Cleaning Guide
It can be a lot to remember, so here’s a quick-reference chart to keep the rules straight for your go-to kitchen gear.
| Material | Best Cleaning Tool | What to Avoid | Pro Tip |
|---|---|---|---|
| Cast Iron | Stiff brush, pan scraper, coarse salt | Soap, steel wool, soaking | Always re-season with a thin layer of oil after drying completely. |
| Non-Stick | Soft sponge or cloth | Abrasive scrubbers, metal utensils | Let it soak to loosen stuck-on food; never use cooking spray. |
| Stainless Steel | Non-scratch scouring pad, sponge | Harsh abrasives (can scratch) | Use baking soda paste or vinegar to remove heat stains. |
| Wood & Bamboo | Soft sponge | Soaking in water, dishwasher | Dry immediately and oil boards regularly with food-grade mineral oil. |
| Silicone | Sponge | Sharp knives (can cut it) | Bake at a low temperature to remove stubborn stains and odors. |
Following these simple guidelines will not only make your cookware last longer but also ensure it works better every time you use it.
Eco-Friendly Dishwashing Hacks That Save Time and Water
Washing dishes by hand doesn't have to mean watching gallons of precious water swirl down the drain. With a few simple tweaks to your routine, you can make a real dent in your water usage and turn dishwashing into a more sustainable kitchen practice. These aren't complicated overhauls, just smarter habits that save time and natural resources.
One of the best tricks in the book is letting your dishes pre-soak. Instead of immediately attacking that casserole dish with baked-on cheese, just fill it with a bit of hot, soapy water and walk away. Giving it 15-30 minutes does most of the hard work for you, breaking down stubborn food so you can wipe it away with minimal effort and much less water.
Master the Two-Basin System
The two-basin method is the gold standard for water conservation at the sink. If you've got a double sink, you're already perfectly set up. Just fill one basin with hot, soapy water for washing and the other with clean water for rinsing. Simple.
Don't have a double sink? No problem. You can easily create the same setup with a single basin by using a separate wash tub or even a large bowl for your rinse water. This simple system stops you from leaving the tap running, which can waste a shocking amount of water during a single dishwashing session.
Adopting a better hand-washing method isn't just about feeling good—it has a measurable impact. Efficient techniques can remove 99% of oils using just 12 liters of water. That’s a huge drop from the 50+ liters often wasted by leaving the tap on.
Think Beyond the Sink
An eco-friendly approach starts before you even turn on the faucet. First things first: scrape all food scraps into a compost bin. Tools like a countertop compost bin make this process easy and odor-free, keeping food waste out of your drain where it can cause clogs and add strain to water treatment facilities.
If you're looking to get started with this powerhouse habit, our complete guide on how to compost at home has everything you need to know.
When it comes to soap, look for biodegradable formulas that are tough on grease but gentle on the planet. Many modern eco-soaps are highly concentrated, meaning a little goes a long way. This reduces both plastic packaging and water waste over time.
For an extra sanitizing boost without harsh chemicals, try adding a splash of white vinegar to your rinse water. It works as a natural rinsing agent, helping dishes dry spot-free while adding an extra layer of clean. Studies show that a three-step method—pre-soak, wash, and sanitize—can kill 99.99% of germs, and vinegar is a fantastic, eco-friendly way to handle that final step. You can read more about the benefits of modern dish detergents on maximizemarketresearch.com.
Common Dishwashing Questions Answered
Even with a solid game plan, some questions always seem to pop up at the sink. Whether you're battling a stubborn, burnt-on mess or just want to be sure your dishes are truly clean, having a few pro tips in your back pocket makes all the difference. Let's tackle some of the most common dilemmas.
How Can I Remove Stubborn Food Without Scratching My Pans?
The best tool for this job is patience. Seriously. Before you grab the most aggressive scrubber you can find, just let a good soak do the hard work for you.
Fill the pan with hot, soapy water and let it sit for at least 30 minutes. For those really disastrous, baked-on messes, leaving it overnight is your best bet. This simple step loosens up the food, so you can often just wipe it away with a regular sponge.
If you need a little more firepower, try this trick: add a tablespoon of baking soda to the water, gently heat it on the stove for a few minutes, then turn off the heat and let it soak. Just promise me you'll never use steel wool on your non-stick pans or other delicate cookware—it will cause permanent, irreversible scratches.
Does the Order I Wash Dishes In Really Matter?
It absolutely does. Following a smart sequence is the secret to keeping your dishwater cleaner for longer and stops you from smearing grease all over everything. The whole idea is to protect your cleanest items from your dirtiest ones.
Here’s the order I always follow:
- Glasses and cups first. They get the freshest, sudsiest water, which is key for a sparkling, spot-free finish.
- Next, I move to silverware, followed by plates and bowls.
- Save the greasiest pots, pans, and baking sheets for last. This strategy means you aren't stuck draining and refilling the sink halfway through, which saves a ton of time and water.
What Is the Most Hygienic Way to Dry Dishes?
Hands down, air drying is the most sanitary method. When you place your freshly washed dishes on a clean, well-ventilated dish rack, you're minimizing their contact with other surfaces where bacteria could be hanging out. The air circulates freely and dries them perfectly without you having to do a thing.
Of course, sometimes you need to towel dry. If you do, the most important thing is to use a completely clean, dry, and lint-free towel. A damp or dirty dish towel is a perfect breeding ground for bacteria, and you’ll just end up spreading germs from one clean dish to the next. My advice? Have a dedicated stack of towels just for drying dishes and grab a fresh one every single day.
Sanitizing Without a Dishwasher: You don't need a machine to sanitize. For heat-safe dishes, carefully place them in a basin and pour boiling water over them. Let them sit for a few minutes. Another option is to create a sanitizing solution with one tablespoon of unscented bleach per gallon of cool water. Submerge the dishes for at least one minute, then let them air dry completely on a rack.
While mastering hand washing is a fantastic skill, sometimes the machine itself needs a deep clean. For tips on that, you can learn more about cleaning the inside of a dishwasher in our other guide.
At Cooler Kitchen, we design thoughtful, durable tools to make every kitchen task—from washing up to composting—simpler and more enjoyable. Explore our collection of smart kitchen essentials at https://www.coolerkitchen.com.