
How to Disinfect Dishes and Keep Your Kitchen Safe
Disinfecting your dishes is a completely different ballgame from just washing them. It's about using serious methods—like high-heat dishwasher cycles, specific bleach solutions, or even boiling water—to actively kill off the nasty bacteria and viruses that can stick around.
This isn't an everyday chore for most, but it's an absolutely essential step after you've handled raw meat or when someone in the house is sick. It's how you make sure your kitchenware is truly hygienic and safe for the next meal.
Why a Quick Wash Is Not Enough for True Kitchen Hygiene
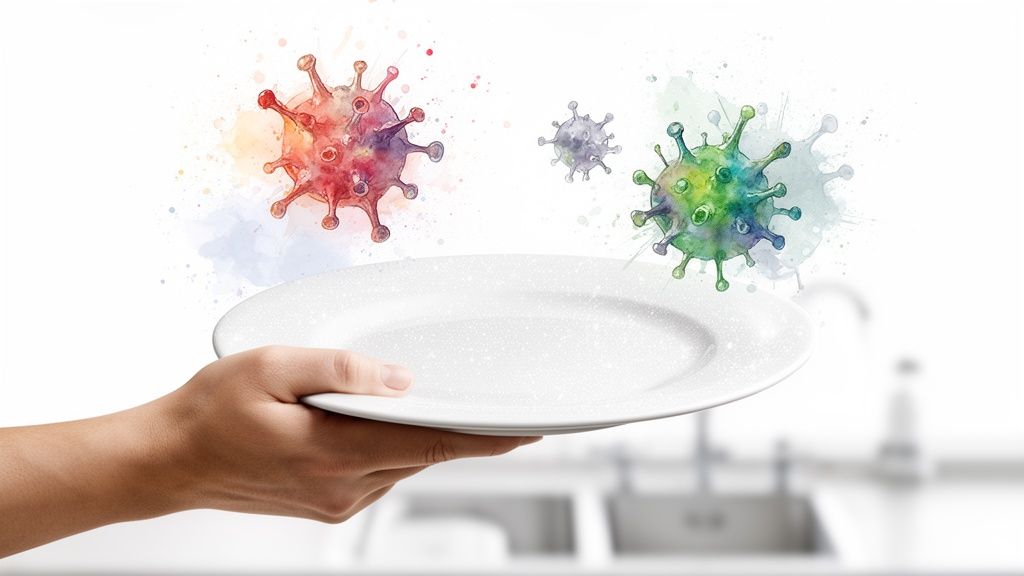
Sure, that plate you just scrubbed might look spotless, but looks can be deceiving. There's a world of difference between "clean" and "disinfected." Cleaning gets rid of the visible stuff—food bits, grease, and grime. Disinfection is what takes out the invisible threats like Salmonella or E. coli that can linger long after the suds are gone.
Just think about the last time you prepped raw chicken on a cutting board. Even with a good wash, microscopic bacteria can hang around, creating a perfect setup for cross-contamination. This is exactly why knowing how to properly disinfect dishes is a core kitchen safety skill, especially when cold and flu season hits.
The Rise of At Home Disinfection
More and more, households are looking for better ways to keep things hygienic, and the appliance market shows it. In 2023, the global dishwasher market hit a staggering USD 9.23 billion and is expected to keep climbing. This isn't just about convenience; it reflects a real shift toward more powerful sanitation at home. A good dishwasher’s high-temperature cycles can kill 99.99% of bacteria, something hand-washing just can't compete with. If you're curious about the numbers, you can explore the full research from Grand View Research.
This focus on better hygiene makes products built for high-heat and durability, like Cooler Kitchen’s dishwasher-safe bamboo cutting boards, more important than ever. They’re designed to hold up to the very disinfection methods that keep your family safe.
Key Takeaway: True kitchen hygiene isn't just about what you can see. Disinfection is the crucial, often-missed step that neutralizes harmful microorganisms, making your kitchen a genuinely safe place to prepare food.
Getting this distinction is the first step. Whether you have a modern dishwasher or need some solid manual techniques, the goal is the same: to build a cooking environment where you don't have to worry about foodborne illnesses or other common germs. This guide will walk you through practical, no-nonsense ways to do exactly that.
To help you decide which approach is right for your situation, here's a quick breakdown of the main methods we'll cover.
Choosing Your Disinfection Method
| Method | Best For | Effectiveness | Cooler Kitchen Product Tip |
|---|---|---|---|
| Dishwasher | Everyday disinfection; post-illness sanitizing. | High (kills 99.99% of germs on sanitize cycle). | Perfect for our Dishwasher-Safe Bamboo Cutting Boards. |
| Bleach Solution | Non-porous items; situations without a dishwasher. | Very High (kills a broad spectrum of pathogens). | Ideal for sanitizing our silicone utensils and mats. |
| Boiling Water | Small, heat-safe items like baby bottles or utensils. | High (kills most bacteria and viruses). | A great way to deep-clean our stainless steel items. |
| UV-C Light | Supplementing other methods; tech-forward kitchens. | Moderate to High (surface-level disinfection). | Use after washing to sanitize any non-porous surface. |
Each of these has its place in a truly clean kitchen. Let's dive into the specifics of how to use them effectively and safely.
Using Your Dishwasher for Effortless Disinfection
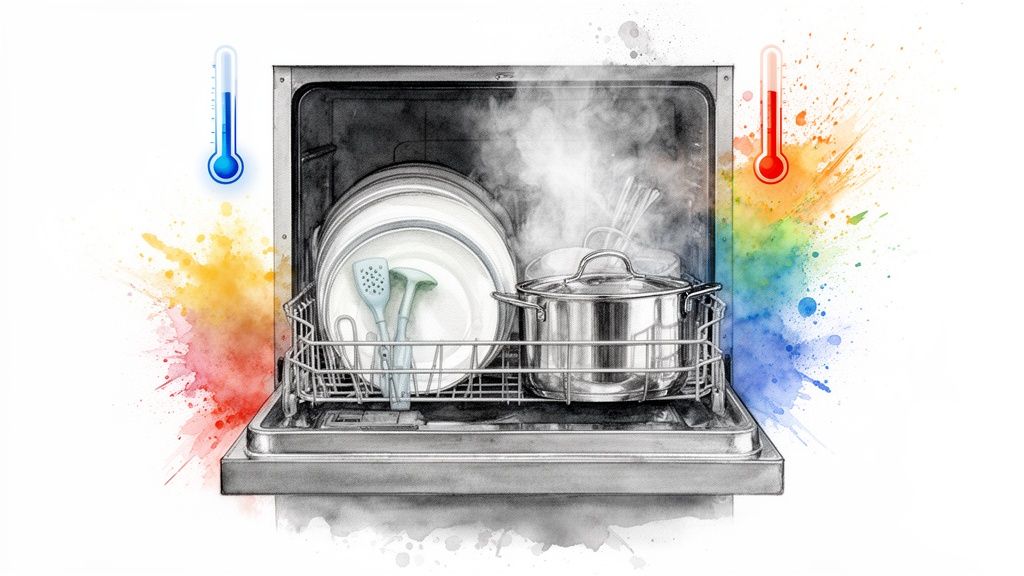
When you need to be absolutely sure your dishes are germ-free, your dishwasher is your best friend. Many modern machines have a dedicated "Sanitize" or "Sani-Rinse" cycle, and it's there for a good reason. This isn't just a marketing gimmick; it’s designed to meet specific health and safety standards.
The secret is in the final rinse, which cranks the water temperature up to at least 150°F (65.5°C). That sustained, intense heat is what annihilates over 99.9% of common household bacteria like E. coli and Salmonella. Knowing what temperature kills viruses is also crucial, as this high heat is what it takes to neutralize many of those tougher pathogens, too.
How to Get the Best Results
To get the full benefit of that sanitizing power, how you load the dishwasher matters more than you might think. Don't just cram everything in. You need to give the hot water and steam room to work their magic on every single surface.
A few pointers from experience:
- Face items toward the spray: Make sure the dirty surfaces of bowls, cups, and spoons are facing the spray arms.
- Avoid nesting: Don't stack bowls or plates so tightly that they shield each other from the water jets.
- Check your clearance: Make sure tall items, like our stainless steel pots, don't block the spinning spray arms from rotating freely.
Paying a little attention to loading ensures that sanitizing rinse makes direct contact everywhere, leaving no place for germs to hide. Of course, a clean machine works best. For tips on keeping your appliance in prime condition, see our guide on cleaning the inside of a dishwasher.
A dishwasher's Sanitize cycle is a scientifically backed method for achieving a level of hygiene that’s nearly impossible to replicate by hand. It provides peace of mind, especially when someone in the house is sick or after handling high-risk foods.
What If My Dishwasher Lacks a Sanitize Button?
No "Sanitize" button? No problem. You can often get pretty close to the same effect by using your machine’s other high-heat settings.
First, select the hottest water setting available. This is usually called "Heavy Duty" or "Pots & Pans."
Then, use a heated dry cycle. The hot air in the drying phase adds another blast of heat to help kill off any germs that might have survived the wash.
This one-two punch of a super-hot wash and a hot dry cycle can push the internal temperature high enough to drastically reduce pathogens. While hand-washing is still common, achieving true disinfection in the sink is tough. Even with the best soaps, studies show that improper rinsing can leave residue on 25% of hand-washed dishes.
At the end of the day, your dishwasher does more than just save you from scrubbing. When used correctly, it becomes an effortless, powerful disinfection station for a healthier home.
Mastering Manual Disinfection Without a Dishwasher
No dishwasher? No problem. You don't need a machine to get your dishes truly, hygienically clean. A little hands-on effort can bring professional-level sanitization right to your sink. This is especially important for those times when a standard scrub just won't cut it—think after prepping raw chicken or when someone in the house is down with a bug.
Let’s get into the two most reliable methods for disinfecting dishes by hand. These techniques will leave your kitchenware not just looking clean, but being genuinely sanitized.
The Bleach Solution Method
Sometimes you need to bring out the big guns. A properly mixed bleach solution is a powerhouse for disinfecting dishes, and it’s what many professional kitchens rely on for a reason. It’s incredibly effective at knocking out a huge range of nasty germs, from bacteria to tough-to-kill viruses.
The trick is all in the concentration—you need it strong enough to kill germs but perfectly safe for food contact surfaces. The gold standard ratio is one tablespoon of regular, unscented household bleach per one gallon of cool water. Why cool water? Hot water can actually make the active ingredient in bleach (sodium hypochlorite) less effective, so stick with cool or lukewarm water.
Crucial Safety Note: Never mess around with bleach without good ventilation. Crack open a window or flip on an exhaust fan. It's also smart to protect your skin and eyes, especially when handling potent solutions. Knowing how to use Personal Protective Equipment for Chemicals is key to staying safe.
Before you sanitize, make sure you've washed the dishes with soap and water to get rid of any food particles. Once they're clean, you're ready to disinfect.
- Mix Your Solution: In a clean basin or one side of a double sink, combine your gallon of cool water and one tablespoon of bleach.
- Submerge Everything: Place your clean, rinsed dishes into the solution. Make sure they're completely covered.
- Time it Right: Let the dishes soak for at least one full minute. This is the "contact time" needed for the bleach to work its magic. Don't cut this short.
- Just Air Dry: Pull the dishes out and place them on a clean drying rack. Let them air dry completely. There's no need to rinse—the tiny amount of bleach residue safely breaks down and evaporates as it dries.
The Boiling Water Method
If you'd rather skip the chemicals, boiling water is a fantastic, age-old method for sanitizing anything that can handle the heat. This is my go-to for things like metal utensils, silicone spatulas, glass baby bottles, and canning jars. Just be careful—this isn't the right approach for delicate plastics that could warp or anything with wooden handles.
The process is simple, but you have to be cautious to avoid burns. You'll need a pot large enough to completely submerge your items without water sloshing over the top.
First, get the water in your pot to a full, rolling boil. I'm talking about those big, vigorous bubbles that can't be stirred down.
Using tongs, carefully lower the clean items into the pot. Make sure they're fully underwater and not packed in too tightly. Let them boil for at least five minutes; this is what it takes to ensure all pathogens are eliminated.
When the time's up, use those tongs again to safely remove the items. Place them on a clean dish towel or a drying rack to cool off and air dry. This method uses pure heat to achieve total sanitization, and it's incredibly effective.
And if you're brushing up on the fundamentals, our complete guide on how to hand-wash dishes is a great place to start.
A Practical Guide to Disinfecting Different Kitchen Materials
Ever ruined a favorite cutting board or warped a plastic container trying to get it squeaky clean? It happens. The key to safely disinfecting dishes is knowing that not all materials are created equal. What works for a tough stainless steel pot could completely wreck a bamboo utensil.
High heat is a fantastic sanitizer, but it’s the enemy of certain plastics. Likewise, soaking a wooden spoon can cause it to swell and crack, creating new hiding spots for germs. Let's walk through the right way to disinfect the most common materials you’ll find in your kitchen.
Stainless Steel, Glass, and Ceramic
Good news—these are the easy ones. Because they're non-porous and built to last, you have plenty of options.
- Dishwasher Sanitize Cycle: Go for it. Stainless steel, glass, and ceramic items are almost always safe on the hottest dishwasher settings.
- Bleach Solution: A properly diluted bleach soak works wonders and won't harm these sturdy materials.
- Boiling Water: If you prefer a chemical-free route, submerging these items in boiling water is a highly effective way to sanitize them.
For example, our Cooler Kitchen stainless steel pasta pots are designed to handle extreme temperatures, so feel free to use any high-heat method you like.
Plastics and Silicone
This is where you need to pay a little more attention. The world of plastics is vast, and heat tolerance varies dramatically from one product to the next. The first rule is to always look for that dishwasher-safe symbol.
If a plastic item can't take the heat, a cool bleach solution is your best friend. Silicone, on the other hand, is usually a champ when it comes to heat resistance. Most silicone tools can be boiled or sent through a dishwasher’s sanitize cycle without a problem. For a deeper dive into which tools can handle the heat, check out our guide on dishwasher-safe cooking utensils.
A Note on Scratches: Be ruthless with heavily scratched plastic cutting boards and containers. No amount of scrubbing or sanitizing can reliably clean out those deep grooves where bacteria love to multiply. It’s simply not worth the health risk—just toss them.
This chart can help you decide which manual disinfection method is best for your particular item.
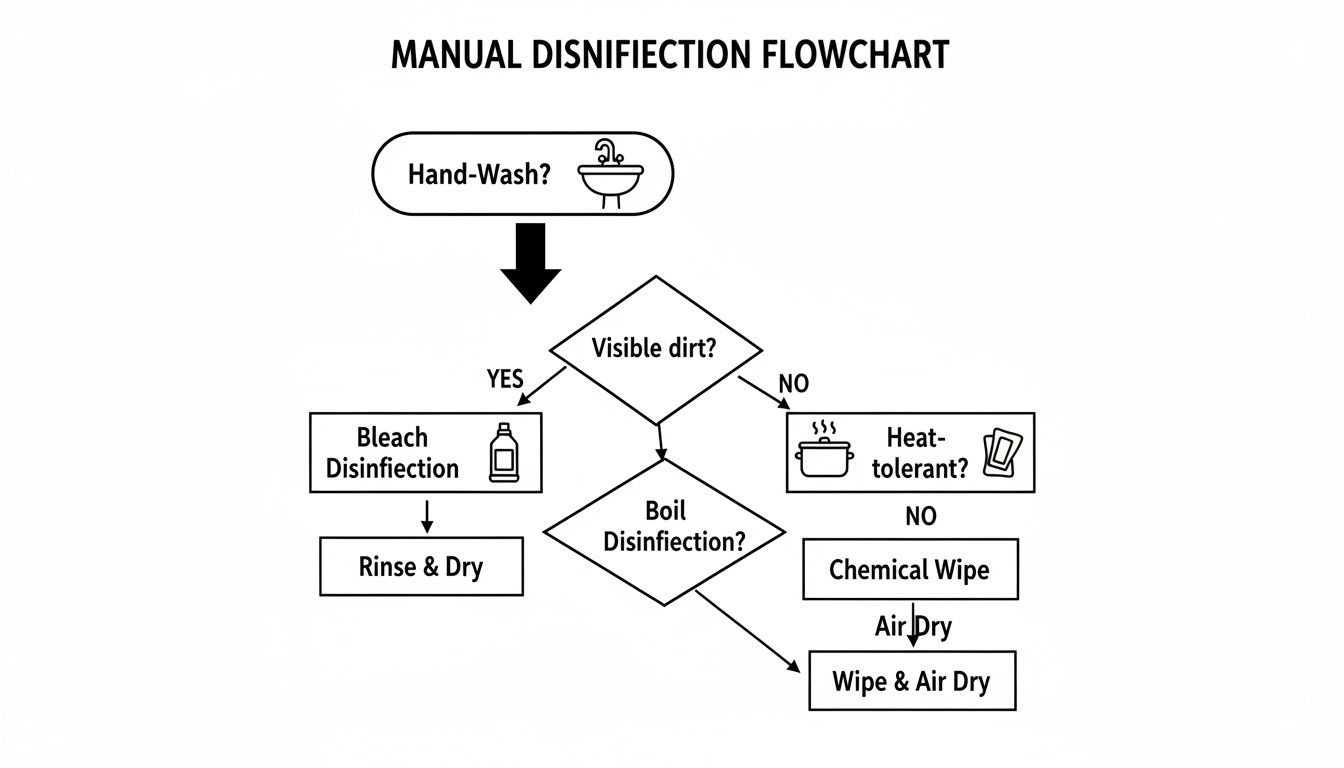
As you can see, the choice often comes down to balancing an item's heat tolerance with the most effective sanitizing agent.
Wood and Bamboo
Handle these natural materials with care. Wood and bamboo are porous, which means they absorb water. You should never soak them in water or a bleach solution—this is a surefire way to cause warping, splitting, and cracking. The intense, dry heat of a dishwasher will also cause permanent damage.
So, what’s the best approach? A gentle vinegar spray is the safest way to disinfect items like your Cooler Kitchen bamboo cutting boards. Just mix equal parts white vinegar and water in a spray bottle. After washing and drying the board, give it a light mist, let it sit for about 10 minutes, and then wipe it down with a clean cloth. This method is strong enough to kill surface bacteria without harming the material itself.
Disinfection Guide by Kitchenware Material
To make things even clearer, here’s a quick-reference table. It breaks down the best methods for each material so you can disinfect with confidence.
| Material Type | Safe in Dishwasher (Sanitize Cycle) | Bleach Solution Safe | Boiling Water Safe | Best Practice Tip |
|---|---|---|---|---|
| Stainless Steel | ✅ Yes | ✅ Yes | ✅ Yes | Extremely durable; handles all disinfection methods well. |
| Glass | ✅ Yes | ✅ Yes | ✅ Yes | Avoid sudden temperature changes (e.g., cold glass in boiling water) to prevent cracking. |
| Ceramic/Porcelain | ✅ Yes | ✅ Yes | ✅ Yes | Check for "dishwasher-safe" label, as some glazes or paints may be delicate. |
| Heat-Resistant Plastic | ✅ Yes (check symbol) | ✅ Yes | ✅ Yes (check symbol) | Always look for the dishwasher-safe symbol or a temperature rating from the manufacturer. |
| Standard Plastic | ❌ No | ✅ Yes | ❌ No | Use a cool bleach solution. High heat will cause warping or melting. |
| Silicone | ✅ Yes | ✅ Yes | ✅ Yes | Very durable and heat-resistant, making it easy to sanitize. |
| Wood & Bamboo | ❌ No | ❌ No | ❌ No | Never soak. Clean with a vinegar spray and dry thoroughly. |
Ultimately, protecting your kitchenware investment means matching the right cleaning technique to the right material. A little bit of know-how goes a long way in keeping your tools in great shape for years to come.
Knowing When to Disinfect and When to Replace Your Cookware
Knowing how to disinfect your dishes is one thing, but knowing when it's actually necessary is a whole different ballgame. Let's be clear: for your everyday breakfast bowls and coffee mugs, a good scrub with hot, soapy water is all you need. Disinfection isn't for every meal; it's a specific tool you pull out for high-risk situations where germs could cause real trouble.
So, when should you break out the heavy-duty sanitizing routine?
The most common trigger is after prepping raw meat, poultry, or fish. These foods are notorious carriers of nasty bacteria like Salmonella and Campylobacter, and cross-contamination is a very real risk. Anything that touched that raw chicken—knives, cutting boards, plates—needs to be disinfected.
Another critical time is when someone in the house is sick with something contagious. If a family member has the flu or a stomach bug, sanitizing their dishes, glasses, and utensils is a smart move to keep the illness from running through the whole household.
You'll also want to do a full kitchen disinfection after any major contamination event, like a flood, a serious plumbing backup, or even a pest infestation.
Signs It’s Time to Toss It
Sometimes, no amount of scrubbing or bleaching can make a kitchen tool truly safe to use again. Wear and tear can create permanent hiding spots for bacteria, turning a trusty utensil into a health hazard. Knowing when to retire an item is just as important as knowing how to clean it.
Plastic cutting boards are the classic example. As soon as they're covered in deep knife grooves, they become impossible to properly clean. Those little crevices trap food bits and moisture, creating the perfect breeding ground for germs that even a strong disinfecting solution can't fully penetrate.
Expert Tip: Run your fingernail across your plastic cutting board. If you can feel deep grooves that a scrub brush can't get into, it's time for a new one. Don't wait for it to look like a topographic map.
This same principle applies to a lot of other kitchen gear. Be on the lookout for:
- Cracked Wooden Spoons: Wood is naturally porous. A crack or split is basically a permanent invitation for bacteria to move in.
- Warped Plastic Containers: If a container doesn't seal tightly anymore, it's not just frustrating—it fails at its main job of protecting food from airborne contaminants.
- Melted or Frayed Silicone Spatulas: Damaged silicone can start to break down and shed particles into your food. Plus, the compromised surface becomes much harder to clean effectively.
Making the Right Call for a Safer Kitchen
It all comes down to making smart, practical decisions. Disinfecting is your go-to for managing temporary, situational risks. Replacing is your long-term strategy for getting rid of permanent hazards.
Think of it this way: after you've prepared raw chicken for dinner, you’ll disinfect the cutting board and knife you used. But if that same cutting board is old and riddled with deep, stained cuts, the truly safe move is to just throw it out and start fresh.
This approach keeps you from going overboard with daily disinfection while ensuring you take firm action when it really matters. By understanding both when to sanitize and when to replace, you create a kitchen that is consistently and reliably safe for everyone.
Your Top Questions About Disinfecting Dishes
Even after you've got the methods down, a few questions always pop up. It's totally normal. Let's run through some of the most common ones I hear, so you can feel completely confident about keeping your kitchen safe.
Can I Just Use Vinegar or Lemon Juice to Disinfect?
I love using vinegar and lemon juice for cleaning—they're amazing at cutting grease and making glassware sparkle. But when it comes to killing serious germs, they just don't make the cut. They are cleaners, not disinfectants.
While their natural acidity might knock back some surface bacteria, they aren't powerful enough to wipe out dangerous pathogens like Salmonella or E. coli. For situations where health is on the line, like after handling raw chicken or when someone's sick, you need to bring out the big guns: high heat or a proper bleach solution.
How Often Do I Really Need to Disinfect My Dishes?
This is a big one. The good news is, you don't need to disinfect everything, every day. For your average Tuesday night dinner, a good scrub with hot, soapy water or a regular dishwasher cycle is perfectly fine.
Think of disinfection as a targeted tool for specific, high-risk situations. You pull it out when you absolutely need to eliminate harmful germs.
- After prepping raw meat, poultry, or fish. Anything that touched the raw stuff—cutting boards, knives, plates—needs to be disinfected.
- When someone in the house is sick. If you're dealing with the flu or a stomach bug, disinfecting their dishes and utensils is a smart move to stop the germs from making the rounds.
- For your pet's bowls. A periodic disinfection of your pet's food and water dishes helps keep nasty bacteria in check.
- After a contamination event. If your kitchen was exposed to something like floodwater or pests, a full-scale disinfection is a must.
And a pro tip? Don't forget your sponge and sink. Sanitizing those regularly does wonders for overall kitchen hygiene.
Is It Really Safe to Use Bleach on My Kid's Dishes?
Yes, absolutely—as long as you do it right. This isn't some home-remedy hack; it's the gold standard used in professional kitchens, daycares, and hospitals to keep things sterile and safe for children.
The secret to using bleach safely is all in the process: the right dilution and a thorough rinse. That’s it. You only need one tablespoon of plain, unscented household bleach per gallon of cool water.
After a soak of at least one minute, give the items a good rinse under clean, running water. Then, let them air dry completely. By the time they're dry, there's no bleach residue left. The chemical compound breaks down into simple, harmless salt and water, leaving you with a perfectly sanitized surface that’s safe for even the littlest members of your family.
Ready to make your kitchen safer and more organized? The thoughtfully designed essentials from Cooler Kitchen—from our dishwasher-safe bamboo cutting boards to our heat-resistant silicone tools—are built to withstand effective disinfection while making your daily cooking routine a joy. Explore our full collection and find your new favorite kitchen tools at https://www.coolerkitchen.com.